Version 1.
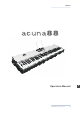
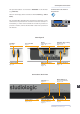
ENGLISH Operation Manual acuna88 by Studiologic® 3 E
Safety Instructions Important Safety Instructions Please read the entire manual. It contains all the information you need to use this unit. Please follow the instructions in the manual. The warranty will be void if unauthorized work is carried out on the unit. Only accessories that are specified by the manufacturer should be used with this unit. Use the unit only as specified in this manual. DANGER! Risk of electric shock. Do not open the chassis. There are no user serviceable parts inside.
Table of contents Safety Instructions 4 Your new acuna88 6 How functions are shown in this manual Control panel / Connections Before using the acuna88 7 7 8 Operation Preset recall Pitch wheel Modulation wheel Switch zones on / off MIDI controller 9 9 9 9 9 9 Zone programming Status MIDI Port Channel Prog.Chg Bank MSB / LSB Keybd.Range Octave Volume Vel.Range Aft.Touch Picthbend Modulation Breath.Ct Jack 1 Jack 2 10 10 10 10 10 10 10 10 10 11 11 11 11 11 12 12 Controller programming Zone Def.
Your new acuna88 Thank you very much for choosing the acuna88. You have obtained a state-of-the-art masterkeyboard made by the renowned manufacturer Studiologic. The acuna88 offers a perfect keyboard touch and extensive MIDI functions. It is the perfect control centre in your studio and on stage. We recommend that you read the entire manual carefully to take full advantage of all the functions of your new acuna88.
Control panel / Connections All operation buttons are marked in bold italic in this manual (e.g. Control 1). How functions are shown in this manual Values in the display of the acuna88 are marked bold (e.g. Select Zone). The acuna88 offers Push Encoders. To perform a task they can be either turned or pushed. If the encoder needs to be turned, it is indicated by a circular arrow around the encoder. If you have to press the encoder, it will be marked with a dot in the pictures of this manual.
Before using the acuna88 8 Power connection Use the AC power adaptor supplied with the device to connect the acuna88 to a power socket. Switch the unit on by using the power button near to the power inlet of the acuna88. MIDI In, MIDI Out 1 / 2 Connect the MIDI Out of another MIDI device with the MIDI In of the acuna88. Incoming data arriving at the MIDI In are merged with the MIDI signals of the acuna88.
Operation To recall a preset, turn Data Entry. There are 50 presets available which you can overwrite with your own settings. To scroll through a wide range of preset numbers just turn Data Entry more quickly. In this way it is possible to change from P01 to P50 with a quick half turn of the encoder. To perform a preset change in steps of 1 turn Data Entry slowly. Right after selection the preset is active and its name and number are shown in the first row of the display.
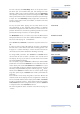
Zone programming This chapter describes the programming of the zones in detail. We will take zone 1 as an example. The programming of all other zones is identical. Data Entry - Edit Control 1 Control 2 Control 3 Control 4 Data Entry Edit Control 1 10 Control 2 Control 3 + + - Control 4 Press Data Entry. The display shows Select Zone. Select zone 1 by pressing Control 1 (to select a different zone press respectively Control 2 to 4).
Zone programming You can choose in what keystroke (or velocity) range the zone shall send its MIDI data. In the first row of the display you define the lowest velocity value at which the zone starts to operate. In the second row you can change the highest velocity value of the zone. For both parameters values from 0 to 127 are available. For example: you select 43 in the first row and 89 for the second value. Now the zone will only play notes if the keys are played with medium pressure.
Zone programming Jack 1 Here you may choose if an attached sustain pedal on Jack 1 is active (On) or inactive (Off) for the zone. In the second row you can assign a MIDI Control Change parameter to the pedal. All MIDI CC messages from 0 to 127 are available. An overview of the standardised MIDI CC parameters is given on page 54. For each zone you can assign a different MIDI CC parameter to the pedal Jack 1. Please note: Jack 1 is dedicated to pedals which act as on/off switches, such as sustain pedals.
Controller programming This chapter describes the programming of the controllers in detail. We will take controller 1 as an example. The programming of all other controllers is identical. Press Data Entry. The display shows Select Zone. Now turn Data Entry. The display switches to show Control Assign. Select controller 1 by pressing Control 1 (to select a different controller press respectively Control 2 to 4).
Miscellaneous settings In the last menu you can adjust miscellaneous settings for MIDI input and the keyboard velocity curve. Transposing the keyboard or factory preset recall can also be performed here. Data Entry Edit Control 1 Control 2 Control 3 Edit Control 2 Control 3 - Control 4 Data Entry Control 1 + + - Control 4 Press Data Entry. Now turn Data Entry until the display switches to Misc. Menu. Select M1 by pressing Control 1.
Store presets If you would like to restore the factory presets, turn Data Entry on the Reset Factory Presets page. Now the display shows Y. Press Data Entry. You will be asked Are you sure?? Turn Data Entry again to select Y in the display. Finally confirm the factory preset restore by pressing Data Entry.
Declarations Every product from Studiologic by Fatar has been carefully manufactured, calibrated and tested, and carries a two year warranty. Please register your NUMA piano to get full support. Damage caused by incorrect transport, mounting or handling is not covered by this warranty. Compensation amounting to more than the price of the device is excluded. This is based on general terms and condition of the local distributor / FATAR srl, Italy. Warranty FATAR srl Zona Ind.
DEUTSCH Bedienungsanleitung acuna88 by Studiologic® 19 D
Sicherheitshinweise Wichtige Sicherheitshinweise Lesen Sie die Bedienungsanleitung vollständig. Sie finden dort alle Informationen, die Sie zum Einsatz des Gerätes benötigen. Bei Fremdeingriffen in das Gerät erlischt die Garantie. Betreiben Sie das Gerät nur in Übereinstimmung mit der Bedienungsanleitung. Verwenden Sie nur vom Hersteller spezifiziertes Zubehör. ACHTUNG! Gefahr durch Stromschlag! Das Gerät nicht öffnen. Im Inneren befinden sich keine vom Benutzer verwendbaren Teile.
Inhaltsverzeichnis Sicherheitshinweise 20 Ihr neues acuna88 22 Hinweise zur Anleitung Bedienfeld / Anschlüsse Inbetriebnahme 23 23 24 Bedienung Preset aufrufen Pitch Rad Modulations Rad Zonen Ein- / Ausschalten MIDI Controller 25 25 25 25 25 25 Zonen Programmierung Status MIDI Port Channel Prog.Chg Bank MSB / LSB Keybd.Range Octave Volume Vel.Range Aft.Touch Picthbend Modulation Breath.Ct Jack 1 Jack 2 26 26 26 26 26 26 26 26 26 27 27 27 27 27 28 28 Controller Programmierung Zone Def.
Ihr neues acuna88 Herzlichen Glückwunsch zu Ihrem neuen acuna88! Damit haben Sie sich für ein erstklassiges Masterkeyboard des renommierten Herstellers Studiologic entschieden. Das acuna88 bietet neben der herausragenden Hammermechanik eine umfangreiche Ausstattung, die es zur idealen MIDI-Zentrale in Ihrem Musik-Studio und auf der Bühne macht. Lesen Sie diese Anleitung aufmerksam durch, damit Sie alle Funktionen des acuna88 voll ausschöpfen können.
Bedienfeld / Anschlüsse Alle Bedienelemente werden in dieser Bedienungsanleitung fett kursiv hervorgehoben (z.B. Control 1). Hinweise zur Anleitung Anzeigen und Werte des Displays werden fett geschrieben (z.B. Select Zone). Das acuna88 verfügt über sogenannte Push Encoder. Diese können sowohl gedreht, als auch gedrückt werden. Soll der Encoder gedreht werden, wird dies mit einem kreisförmigen Pfeil um den Encoder im Bild angezeigt.
Inbetriebnahme 24 Netzanschluß Schließen Sie Ihr acuna88 über das mitgelieferte Netzteil an das Stromnetz an. Das Gerät schalten Sie über den daneben befindlichen Schalter ein und aus. MIDI In, MIDI Out 1 / 2 An den MIDI In schließen Sie den Ausgang eines weiteren MIDI Gerätes an. Das eingehende MIDI Signal wird mit den MIDI Daten des acuna88 zusammen gemischt. Der Port an dem das MIDI In Signal ausgegeben wird, ist frei wählbar (MIDI Out 1, MIDI Out 2 oder USB, siehe Seite 30 F MIDI In).
Bedienung Um zu einem anderen Preset zu wechseln, drehen Sie Data Entry. Es stehen 50 Presets zur Verfügung, die alle überschrieben werden können. Bei einer schnellen Drehung von Data Entry wird der Wertebereich in größeren Schritten durchlaufen. Sie können so mit nur einer halben Umdrehung von P01 zu P50 wechseln. Bei langsamen Drehen von Data Entry erfolgt der Preset-Wechsel in Einer-Schritten.
Zonen Programmierung In diesem Kapitel widmen wir uns der detaillierten Programmierung der Zonen. Dies geschieht am Beispiel von Zone 1. Die Programmierung der anderen Zonen ist identisch. Data Entry - Edit Control 1 Control 2 Control 3 Control 4 Data Entry Edit Control 1 26 Control 2 Control 3 + + - Control 4 Drücken Sie Data Entry. Im Display wird Select Zone angezeigt. Wählen Sie Zone 1, indem Sie Control 1 drücken (zur Auswahl einer anderen Zone drücken Sie entsprechend Control 2 bis 4).
Zonen Programmierung Hier stellen Sie ein, bei welchem Tasten-Anschlag die Zone MIDI Befehle sendet. In der ersten Zeile stellen Sie den niedrigsten Velocity-Wert ein, bei dem die Zone anspricht. In der zweiten Zeile definieren Sie den maximalen Velocity-Wert für die Zone. Es sind jeweils Eingaben von 0 bis 127 möglich. Beispiel: In der ersten Zeile haben Sie 43 eingestellt, in der zweiten Zeile 89. Jetzt gibt die Zone nur Töne aus, wenn Sie die Tasten mit mittlerer Kraft anschlagen.
Zonen Programmierung Jack 1 Legen Sie hier fest, ob ein am Jack 1 angeschlossenes Sustain Pedal für die Zone aktiviert oder deaktiviert sein soll (On / Off). In der zweiten Zeile wählen Sie den MIDI Control Change Parameter den das Pedal steuern soll. Es sind alle MIDI CC Befehle von 0 bis 127 möglich. Eine Übersicht der standardisierten MIDI CC Befehle finden Sie auf Seite 54. Für jede Zone kann ein eigener MIDI CC Befehl für das Sustain Pedal gewählt werden.
Controller Programmierung Nun programmieren wir die Controller. Dies geschieht am Beispiel von Control 1. Die Programmierung der anderen Controller ist identisch. Drücken Sie Data Entry. Im Display wird Select Zone angezeigt. Drehen Sie Data Entry. Das Display zeigt nun Control Assign an. Wählen Sie Control 1, indem Sie Control 1 drücken (zur Auswahl eines anderen Controllers drücken Sie entsprechend Control 2 bis 4). Ab jetzt navigieren Sie zwischen den einzelnen Einstellungen mit der Taste + und Taste -.
Weitere Einstellungen In einem letzten Menü können Sie weitere Einstellungen vornehmen, die den MIDI Eingang und Breath Controller betreffen. Auch eine generelle Transponierung und das Wiederherstellen der Werks-Presets ist hier möglich. Data Entry Edit Control 1 Control 2 Control 3 Edit Control 2 Control 3 - Control 4 Data Entry Control 1 + + - Control 4 Drücken Sie Data Entry. Drehen Sie Data Entry bis das Display Misc. Menu anzeigt. Wählen Sie M1, indem Sie Control 1 drücken.
Speichern Um die Werkspresets wieder herzustellen, drehen Sie Data Entry. Im Display erscheint jetzt Y. Drücken Sie Data Entry. Es wird Are you sure?? (Sind Sie sicher?) nachgefragt. Drehen Sie wieder Data Entry, sodass Y im Display angezeigt wird und bestätigen Sie abschließend durch Drücken von Data Entry. Reset Factory Presets ACHTUNG: Bei diesem Vorgang werden alle Einstellungen der Presets P01 bis P50 unwiderruflich gelöscht und überschrieben! Auf der letzten Seite im Misc.
Rechtliches Jedes Gerät von Studiologic® by Fatar wird einzeln geprüft und einer vollständigen Funktionskontrolle unterzogen. Die Verwendung ausschließlich hochwertigster Bauteile erlaubt die Gewährung von zwei Jahren Garantie. Als Garantienachweis dient der Kaufbeleg / Quittung. Schäden, die durch unsachgemäßen Einbau oder unsachgemäße Behandlung entstanden sind, unterliegen nicht der Garantie und sind daher bei Beseitigung kostenpflichtig.
ITALIANO Manuale di Istruzione acuna88 by Studiologic® 35 I
Informazioni di sicurezza Important Safety Instructions Si prega di leggere l‘intero manuale. Esso contiene tutte le informazioni di cui hai bisogno per usare questa unità. Si prega di seguire le istruzioni riportate nel manuale. La garanzia sarà annullata se lavori non autorizzati vengono svolti sull‘unità. Solo accessori specificati dal fabbricante devono essere utilizzati con questa unità. Utilizzare l‘unità solo come specificato in questo manuale. PERICOLO! Rischio di scosse elettriche.
Indice Importanti informazioni di sicurezza 36 Il tuo nuovo acuna88 38 Indicazione delle funzioni nel manuale Pannello di controllo / Connessioni Prima di usare il acuna88 39 39 40 Operatività Richiamo dei Preset Pitch wheel Modulation wheel Switch zones on / off MIDI controller 41 41 41 41 41 41 Programmazione delle zone Status MIDI Port Channel Prog.Chg Bank MSB / LSB Keybd.Range Octave Volume Vel.Range Aft.Touch Picthbend Modulation Breath.
Il tuo nuovo acuna88 La ringraziamo molto per aver scelto acuna88. Lei ha ottenuto una masterkeyboard allo stato dell’arte realizzata dal famoso costruttore Studiologic. Acuna88 offre un tocco di tastiera perfetto ed estese funzioni di MIDI. È il centro di controllo perfetto nel tuo studio e sul palco. Si consiglia di leggere l‘intero manuale attentamente per sfruttare al meglio tutte le funzioni del tuo nuovo acuna88.
Pannello di Controllo / Connessioni Tutti i pulsanti di funzionamento sono evidenziati in grassetto corsivo in questo manuale (ad esempio Control 1). Indicazione delle funzioni nel manuale I valori sul display del controller acuna88 sono contrassegnati in grassetto (es. Select Zone). acuna88 offre encoder con switch a pressione. Per eseguire un‘azione possono ruotare o essere premuti. Se l‘encoder deve essere ruotato, è indicato da una freccia circolare intorno all‘encoder.
Prima di usare il acuna88 40 Alimentazione Utilizzare l‘adattatore di alimentazione fornito con il dispositivo per collegare acuna88 alla presa di corrente. Accendere l‘unità utilizzando il pulsante di accensione vicino alla presa di alimentazione dell’ acuna88. MIDI In, MIDI Out 1 e 2 Collegare il MIDI Out di un altro dispositivo MIDI con MIDI In dell’ acuna88. Dati in entrata, arrivando a MIDI In sono Uniti con i segnali MIDI della acuna88.
Operatività Per richiamare un preset, ruotare su Data Entry. Ci sono 50 preset predefiniti che è possibile sovrascrivere con impostazioni personalizzate. Per scorrere la vasta gamma di preset preimpostati ruotare velocemente Data Entry. In questo modo è possibile modificare da P01 a P50 con una mezzo rotazione dell’encoder. Per eseguire una preimpostazione di uno step alla volta, girare lentamente l’encoder.
Programmazione delle zone Questo capitolo descrive la programmazione delle zone in dettaglio. Prendiamo la zona 1 come esempio. La programmazione di tutte le altre zone è identica. Data Entry - Edit Control 1 Control 2 Control 3 Control 4 Data Entry Edit Control 1 42 Control 2 Control 3 + + - Control 4 Premere Data Entry. Il display mostra Select Zone. Selezionare la zona 1 premendo Control 1 (per selezionare un‘area diversa premere rispettivamente Control 2 a 4).
Programmazione delle zone È possibile scegliere in quale range dinamico la zona trasmette i dati MIDI. Nella prima riga del display è definire il valore più basso di velocità alla quale la zona inizia ad operare. Nella seconda riga, è possibile modificare il valore di velocità più alto della zona. Per entrambi i parametri sono possibili valori da 0 a 127. Esempio: Selezionando 43 nella prima linea e 89 per il secondo valore. Ora la zona suonerà solo note, se i tastii sono suonati con media pressione.
Programmazione delle zone Jack 1 Qui puoi scegliere che se un pedale sustain collegato sul Jack 1 è attivo (On) o inattivo (Off) per la zona. Nella seconda riga si assegna al pedale un parametro di MIDI control change. Tutti i messaggi MIDI CC da 0 a 127 sono disponibili. Una panoramica dei valori MIDI stantard è data a pagina 54. Per ciascuna zona è possibile assegnare un parametro MIDI diverso al pedale.
Programmazione dei controlli Questo capitolo descrive la programmazione del controller in dettaglio. Prenderemo il controller 1 come esempio. La programmazione di tutti gli altri controller è identica. Premere Data Entry. Il display mostra la Select Zone. Ora ruotate Data Entry. Il display cambia in Control Assign. Selezionare controller 1 premendo Control 1 (per selezionare un controller diverso premere rispettivamente da Control 2 a 4).
Modifiche Globali In un ultimo menu è possibile regolare le impostazioni varie per il MIDI input, la curva di velocità della tastiera, il transpose, il presets factory reset. Data Entry Edit Control 1 Control 2 Control 3 Edit Control 2 Control 3 - Control 4 Data Entry Control 1 + + - Control 4 Premere Data Entry. Ora ruotare Data Entry fino a mostrare sul display Misc. Menu. Selezionare M1 premendo Control 1.
Store presets Se si desidera ripristinare i preset di fabbrica, girare il Data Entry. Ora il display mostra Y. Premi Data Entry. Vi verrà chiesto sei sicuro? (Are you sure??) Ruotare Data Entry per selezionare Y sul display. Infine confermare il ripristino dei preset di fabbrica premendo Data Entry. Ripristino factory presets L’ultima parte del Misc.Menu mostra la versione del firmware del vostro acuna88. Se necessario, è possibile aggiornare il firmware tramite USB.
Dichiarazioni Tuti i prodotti Studiologic® by Fatar sono costruiti attentamente, calibrati, testati, e sono soggetti a garanzia di due anni. Registra il tuo NUMA Piano per avere pieno supporto. Danni causati da trasporto non conforme, montaggio o da errata manutenzione non sono coperti da questa garanzia. Rimborsi di importo superire al valore delo strumento sono esclusi. Questo è basato su termini e condizioni del distributore / FATAR srl, Italy. Garanzia FATAR srl Zona Ind.
Appendix Appendix acuna88 by Studiologic® 51
Specifications / dimensions Specifications Studiologic acuna88 Keyboard Number of Keys 88 Type Weighted Hammer Action (TP100) Velocity Curves 4 Aftertouch monophonic Display LCD, 2 x 16 character, backlit Controls 5 x push encoder, 2 x button MIDI 1 x In, 2 x Out USB USB to Host, iOS 4.2 compatible (Apple iPad, iPod, iPhone,) Jack 1 6,3mm mono jack Jack 2 6,3mm stereo jack Breath Controller 3,5mm mini stereo phone jack Power Supply DC In 9V / 0,5A Dimensions Width 1280 mm (50.
MIDI implementation chart Studiologic acuna88 Basic information MIDI channels 1 - 16 Note numbers 0 - 127 Program Change 0 - 127 Bank select yes Note-On velocity yes Note-Off velocity no Aftertouch yes Pitch Bend yes MIDI CC MIDI CC # 0 - 127 acuna88 by Studiologic® 53
MIDI continious controller map MIDI CC No. Control Function MIDI CC No. Control Function MIDI CC No.
General MIDI sound set Prog. Chg. Instrument Name Prog. Chg. Instrument Name Prog. Chg.
www.studiologic-music.com Ub 07.