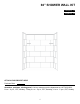
60” SHOWER WALL KIT Français p. 12 Español p. 23 ATTACH YOUR RECEIPT HERE Purchase Date Questions, problems, missing parts? Call our customer service department at 1-877-632-6322, 8 a.m. - 8 p.m., EST, Monday - Friday, 9 a.m. - 5 p.m., EST, Saturday, 11 a.m. - 5 p.m., EST, Sunday.
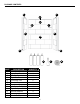
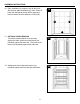
PACKAGE CONTENTS F F G B H I C D A E E K PART A B C D E F G H I K L M DESCRIPTION Lower Back Panel Upper Back Panel Left Side Panel Right Side Panel Front Edge Trim Side Molding Back Molding Left Shampoo Shelf Right Shampoo Shelf Silicone Adhesive Mounting Adhesive Installation Tape QUANTITY 1 1 1 1 2 2 1 1 1 4 1 1 2 LI M
SAFETY INFORMATION Please read and understand this entire manual before attempting to assemble or install the product. WARNING • Always wear safety glasses or eye protection when using power tools. Use a dust mask or respirator for applications that generate dust. • DO NOT proceed if any doubt arises about the correct or safe method of performing anything found in this manual. The installation of this product can require the use of power tools. Do not use power tools without adequate training.
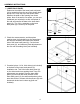
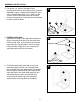
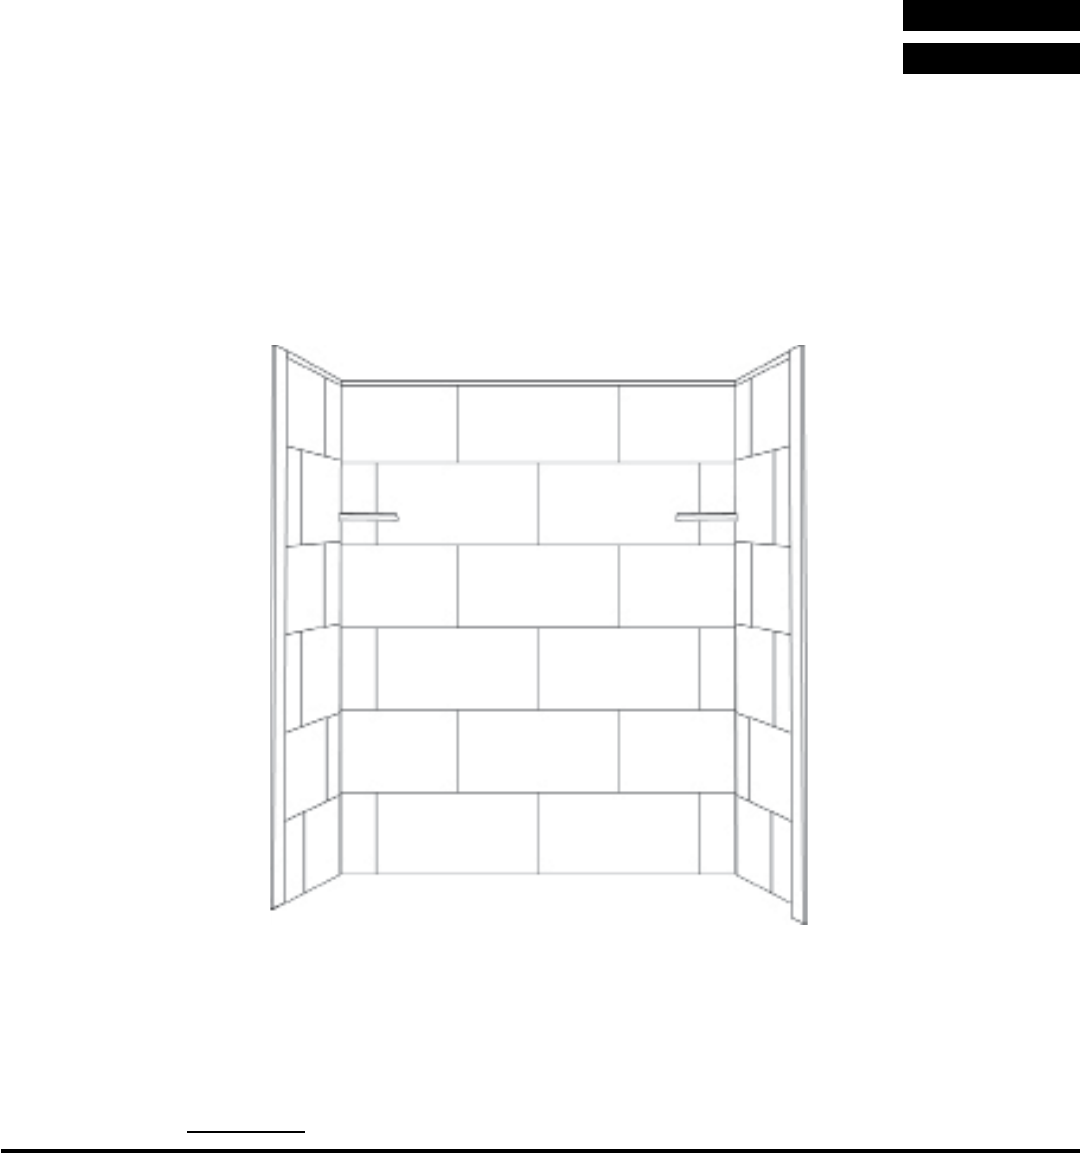
ASSEMBLY INSTRUCTIONS 1. Lower Back Panel Determine the width of the lower back wall panel (A) by measuring from the top of the shower base and up 36 in. from the top of the shower base. Measure the width of the opening from these points. Note: If the wall is not square, you can use cardboard (not included) to create a template of the wall and transfer the data to the lower back panel (A). The 1/4 in. extension on the lower back panel (A) is at the top of the panel. 1 Measure Finish Side 2.
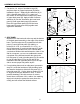
ASSEMBLY INSTRUCTIONS 4. Cut twelve 4-in. strips of installation tape (M) and place them on lower back panel (A) where indicated in figure 4. Apply silicone adhesive (K) in 3/4 in. diameter dots every 6-7 in. apart over the surface of the reinforcement strips on the back of lower back panel (A). Place the lower back panel in place and press firmly. 4 M M K A KI 5. Upper Back Panel Determine the width of the upper back wall panel (B) by measuring from the top of the lower back panel (A) and 36 in.
ASSEMBLY INSTRUCTIONS 7. Cut twelve 4-in. strips of installation tape (M) and place them on upper back panel (B) where indicated in figure 7. Apply silicone adhesive (K) in 3/4 in. diameter dots every 6-7 in. apart over the surface of the reinforcement strips on the back of upper back panel (B). Apply a bead of silicone adhesive (K) into the area where the lower back panel (A) and upper back panel (B) connect.
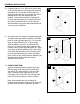
ASSEMBLY INSTRUCTIONS 10. If needed, place 1/16 in. thick shims at the base of the left side panel (C) and right side panel (D) installation site. Trial fit the left side panel (C) and right side panel (D) on the shims and use a sanding block if any fine adjustments are needed. Clean the back of the left side panel (C) and right side panel (D), the wall board and any other area that will be in contact with the silicone adhesive (K) with denatured alcohol and a clean rag (not included). 10 11.
ASSEMBLY INSTRUCTIONS 13. BACK BULLNOSE MOLDING Measure the width at the top of the back wall panel assembly and cut the back bullnose molding (G) to match the measurement. Trial fit the back bullnose molding (G) on upper face of the back wall panel (B) assembly and adjust as needed. Apply silicone adhesive (K) to the face of the top of the back wall panel assembly and place the back bullnose molding (G) on upper face of the back wall panel (B) firmly.
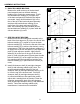
ASSEMBLY INSTRUCTIONS 16. Once installation is complete, seal all the joints with silicone adhesive/sealant (K). Note: Clean all joints with denatured alcohol before applying a uniform bead of silicone adhesive to the joints. 16 K K K 17. Optional Wood Bracing To hold the installed panels more securely against the walls, place two wood braces (not included) against the back wall. Place two wood braces (not included) against each side wall. 17 18.
ASSEMBLY INSTRUCTIONS 19. Insert small blocks (not included) between the rear panel braces and the back panel braces. These will apply pressure to the back panel to hold it in place. Remove the braces after 24 hours. 19 CARE AND MAINTENANCE Wipe the surface with a damp cloth or sponge. For basic stains, clean with mild detergent or general purpose cleaner. For cleaning corners and seams, spray with mildew cleaner.
WARRANTY The manufacturer provides a LIMITED TEN (10) YEAR WARRANTY for its solid surface tub and shower surrounds to be free of manufacturing defects in materials and workmanship. If this product is found to be defective in materials or workmanship, after inspection by an authorized representative, we will repair, or at our option, exchange the product for a similar model. This warranty is valid for a period of ten (10) years, so long as it remains in use in its original place of installation.