Automatic Ice Maker Model: BIM70 User's Manual Be sure unit is standing upright 24 hours prior to plug-in. Felix Storch, Inc. 770 Garrison Avenue Bronx, New York 10474 www.summitappliance.
Table of Contents Page ICE MAKER SAFETY ................................................................................................... 2 IMPORTANT SAFEGUARDS .................................................................................. 3 - 5 TECHNICAL INFORMATION...................................................................................... 5 INTRODUCTION ........................................................................................................... 6 COMPONENT LOCATIONS .......
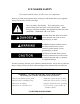
ICE MAKER SAFETY Your safety and the safety of others are very important. We have provided many important safety messages in this manual and on your appliance. Always read and obey all safety messages. This is the Safety Alert Symbol. This symbol alerts you to potential hazards that can injure or kill you and others. Safety messages will follow the Safety Alert Symbol and either the words “DANGER”, “WARNING” OR “CAUTION”.
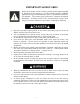
IMPORTANT SAFEGUARDS Before the ice maker is used, it must be properly positioned and installed as described in this manual, so read the manual carefully. SUMMIT Appliance strongly recommends that you have a professional install your new machine. The warranty may be affected or voided by an improper installation.
The ice maker should not be located next to ovens, grills or other sources of high heat. The ice maker must be installed with all electrical, water and drain connections in accordance with state and local codes. A standard electrical supply (115 VAC only, 60 Hz, 15 A), properly grounded in accordance with the National Electrical Code and local codes and ordinances is required. Do not kink or pinch the power supply cord or drain lines between the ice maker and the cabinet.
plug firmly and pull straight out from the outlet. Repair or replace immediately all power cords that have become frayed or otherwise damaged. Do not use a cord that shows cracks or abrasion damage along its length or at either end. When moving the ice maker, be careful not to damage the power cord. Extension Cord Because of potential safety hazards under certain conditions, it is strongly recommended that you do not use an extension cord with this ice maker.
INTRODUCTION This SUMMIT Ice Maker finds wide application in households, bars, restaurants, hotels, supermarkets, etc. This unit produces crystal-clear, gourmet cube ice, and offers convenience for homeowners and hotel guests. An insulated ice storage bin is built into each ice maker. This User’s Manual is intended as a resource for persons installing, using and servicing model BIM70. It contains valuable information on safety and maintenance.
COMPONENT LOCATIONS Top cover Door Ice cube full sensor Right side Front cover Water sump Ice storage bin Ventilation louvers Ice scoop Leveling caster Control box (behind front cover) Power switch 7
ICE MAKER INSTALLATION Unpacking Excessive Weight Hazard Use two or more people to move and install ice maker. Failure to do so can result in back or other injury. Remove packaging materials IMPORTANT: Do not remove any permanent instruction labels or the rating label on your ice maker. Remove tape and glue from your ice maker before using. To remove any remaining tape or glue, rub the area briskly with your thumb.
• To ensure proper ventilation for your ice maker, the front of the unit must be completely unobstructed. Allow at least 101 mm (4”) clearance at rear, and 15 mm (0.6”) at top and sides for proper air circulation. The installation should allow the ice maker to be pulled forward for servicing if necessary. • When installing the ice maker under a counter, follow the recommended spacing dimensions shown. Place electrical and water supplies and drain fixtures in the recommended locations as shown.
Electrical Requirements Electrical Shock Hazard Plug into a grounded 3-prong outlet. Never remove the grounding prong from the plug. Never use an adapter. Never use an extension cord. Failure to follow these instructions can result in fire, electrical shock or death. IMPORTANT: Do not kink or pinch the power supply cord between the ice maker and wall or cabinet. Before you move your ice maker into its final location, it is important to make sure you have the proper electrical connection.
Leveling the Ice Maker It is important for the ice maker to be leveled in order to work properly. It can be raised or lowered by rotating the plastic sheaths around each of the four rolling casters on the bottom of the machine. If you find that the surface is not level, rotate the casters until the ice maker becomes level. You may need to make several adjustments to level it. We recommend using a carpenter’s level to check the machine.
Connecting the water line: 1. Turn off main water supply. Turn on nearest faucet long enough to clear the line of water. 2. Find a ½ in. to ¾ in. vertical cold water pipe near the installation location. The distance should be less than 9 feet. The water supply hose provided with the ice maker is about 9 feet. 3. A shut-off valve must be installed to the main water supply. If the water pipe has a plain piece of copper tubing, attach a ¼” O.D. compression union to the tubing and remove the nut. 4.
NOTE: The drain hose should never be allowed to hang or loop higher than the bottom of the ice storage bin. 3. All horizontal runs of drain lines must have a fall of ¼” per foot. An air gap will likely be required between the ice maker drain hose and the drain/waste receptacle. A stand pipe with a trap below it would be acceptable for the drain/waste receptacle. A floor drain is also acceptable. 4.
OPERATION Final Check List before Operation 1. Have all packing materials and tape been removed from the interior and exterior of the ice maker? 2. Did you clean the ice storage bin? 3. Have the installation instructions been followed, including connecting the machine to water, drain and electricity? 4. Has the machine been leveled? 5. Is the ice maker in a site where the ambient temperature is between 13ºC (55ºF) and 27ºC (80ºF) and the water temperature within 5ºC (41ºF) and 25ºC (77ºF) all year round? 6.
Operating Method 1. Switch on the Power switch on the right side panel. The light will be on. The ice maker will start working automatically and feeding water. 2. After the first feeding of the water, the machine will automatically go to the ice making stage, and the sound of water spraying will be heard. 3. Ice will be harvested to the ice storage bin. When the storage bin is filled to the point that the ice-full sensor is covered, the ice maker will automatically stop working.
Harvest: During the harvest cycle the compressor is still operating, but the water pump has stopped. Two other components have been energized: the hot gas valve and the water inlet valve. These two valves open and warm up the freezing surface, allowing the cubes to fall into the bin. The freeze cycle will restart when all the cubes have been harvested. How the machine uses water: The ice maker begins with a fixed charge of water that is contained in the water sump.
● Water running from the water sump to the evaporator plate may make a splashing sound. ● Water running from the evaporator to the water sump may make a splashing sound. ● As each cycle ends, you may hear a gurgling sound due to the refrigerant flowing in your ice maker. ● You may hear air being forced over the condenser by the condenser fan. ● During the harvest cycle, you may hear the sound of ice cubes falling into the ice storage bin.
CLEANING AND MAINTENANCE If the ice maker is left unused for a long time, before the next use it must be thoroughly cleaned. Follow carefully any instructions provided for cleaning or use of sanitizing solution. Do not leave any solution inside the ice maker after cleaning. Periodic cleaning and proper maintenance will ensure efficiency, top performance, and long life. The maintenance intervals listed are based on normal conditions.
Exterior Cleaning The door and cabinet may be cleaned with a mild detergent and warm water solution such as 1 oz of dishwashing liquid mixed with 2 gallons of warm water. Do not use solvent-based or abrasive cleaners. Use a soft sponge and rinse with clean water. Wipe with a soft clean towel to prevent water spotting. Stainless steel can discolor when exposed to chlorine gas and should be cleaned. Clean stainless steel with a mild detergent and warm water solution and a damp cloth.
Interior Cleaning The ice storage bin should be sanitized occasionally. Clean the bin before the ice maker is used for the first time and reused after stopping for an extended period of time. It is usually convenient to sanitize the bin after the ice making system has been cleaned and the storage bin is empty. 1. Disconnect power to the unit. 2.
2. Take out the row of flake covers by snapping one end up and pulling forward. 3. Remove the slideway from the water sump. 4. Find the sprinkler arm and raise it. Disconnect it from the water tube which is connected at the back of the sprinkler arm. 5. A de-scaling solution can be prepared in a plastic basin with Nu-Calgon Nickel-Safe Ice Machine Cleaner. Mix 4 ounces of the ice machine cleaner per gallon of warm water. Remove the sprinkler arm from the interior.
6. Wipe down the interior of the water sump with the de-scaling solution and warm water. Rinse thoroughly with clear water. 7. Reassemble the sprinkler arm, slideway and row of flake covers. 8. Perform steps 1, 3, 6, 7 and 8 of the Ice Making System Cleaning procedure below. Ice Making System Cleaning Water inlet valve Water line Nut of the water-draining hole To drain Minerals that are removed from water during the freezing cycle will eventually form a hard scaly deposit in the water system.
5. Allow 30 minutes for proper cleaning. After cleaning, shut off the power switch, and unscrew the nut of the water-draining hole on the rear of the unit. Drain off the waste water to some container, and then screw the nut on tightly when the waste water is fully drained off. The ice machine cleaner contains acids. DO NOT use or mix with any other solvent-based cleaning products. Use rubber gloves to protect hands.
Control Box (behind front cover) Clean Ice-full Ice-making Mode Ice-harvest Descriptions of LEDs and buttons: 1. Red LED: Ice Full indicator light. When this LED is lit, the ice storage bin is full of ice or there is something between the two arms of the ice-full sensor in the ice storage bin. The unit will stop working. When ice cubes are taken out of the ice storage bin, clearing the sensor, the red LED will keep flashing for 3 minutes. Then the unit will restart and return to the Ice Making mode.
5. Mode button: Mainly for service. When this button is pressed, unit can change from Ice Making mode to Ice Harvest mode, or from Ice Harvest mode to Ice Making mode. You can judge the mode from the status of the green and yellow LEDs. 6. Ice Size Adjustment Guide: a. Press and hold the Clean button and the Mode button together for at least 3 seconds. The unit will enter the Ice Size Adjustment mode. The Ice Making LED (green) will be blinking continuously during the ice size adjustment. b.
MAJOR FUNCTIONS 1. Completely automatic operating procedure. 2. When the ice storage bin is full of ice cubes, the machine stops working automatically and starts again after the cubes are removed. 3. The different colors of the LED display indicate various work modes. 4. Indication of failure of major control box fuse. 5. The fan motor responds to the ambient temperature. If it is cold, the motor will stop working to keep the cooling system in good working condition. 6.
TROUBLESHOOTING Before Calling for Service If the unit appears to be malfunctioning, read through the Operation section of this manual first. If the problem persists, check the Troubleshooting Guide below and on the following page. The problem could be something very simple which can be solved without a service call.
28
LIMITED WARRANTY PARTS AND LABOR WARRANTY INFORMATION SUMMIT appliances are manufactured to provide outstanding value, and your satisfaction is our goal on every product. All SUMMIT major appliances carry a one year limited warranty on both parts and labor. All refrigerators and freezers carry an additional four years on the compressor. Certain exclusions may apply.
of any parts that SUMMIT determines have been subjected after the date of manufacture to alteration, neglect, abuse, misuse, accident, damage during transit or installation, fire, flood, or act of God. IMPROPER ELECTRICAL CONNECTIONS: SUMMIT is not responsible for the repair or replacement of failed or damaged components resulting from electrical power failure, the use of extension cords, low voltage, or voltage drops to the unit.
Tested and certified to NSF standard 12 by NSF International Probado y certificado por NSF International de acuerdo con la norma NSF 12 .