4-BURNER ELECTRIC COOKTOPS Models CR4B23T5B & CR4B23T6W User’s Guide and Installation Instructions Please read this manual carefully before use and keep it in a safe place for future reference. FELIX STORCH, INC. An ISO 9001:2008 registered company 770 Garrison Avenue Bronx, New York 10474 www.summitappliance.
TABLE OF CONTENTS Important Safeguards ...................................................................................... 2 – 7 Safety Precautions .................................................................................. 2 – 3 Electrical Safety ............................................................................................ 3 Child Safety .................................................................................................. 4 Safety during Use ...........................
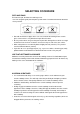
IMPORTANT SAFEGUARDS READ ALL INSTRUCTIONS BEFORE USE WARNING: For your safety, the information in this manual must be followed to minimize the risk of fire, electric shock, or to prevent property damage, personal injury, or death. SAFETY PRECAUTIONS Proper Installation: Be sure your appliance is properly installed and grounded by a qualified technician in accordance with the National Electrical Code ANSI/NFPA No.
WARNING: Never use your appliance for warming or heating a room. CAUTION: DO NOT touch Cooking Zones or areas near these surfaces.Cooking Zones may be hot from residual heat even though they are dark in color. Areas near the Cooking Zones may become hot enough to cause burns. During and after use, do not touch or let clothing or other flammable materials touch these areas until they have had sufficient time to cool. CAUTION: Never wear loose fitting or hanging garments while using this appliance.
CHILD SAFETY WARNING: This appliance is not intended for use by young children or infirm persons unless they have been adequately supervised by a responsible person to ensure that they can use the appliance safely. Young children should be supervised to ensure that they do not play with the appliance. Accessible parts may become hot during use. Young children should be kept away. SAFETY DURING USE This appliance may only be used for normal cooking and frying in the home.
Do not place any object on or near the control keypad area in order to prevent accidental activation of the cooktop controls. Utensil Handles Should Be Turned Inward and Not Extend Over Adjacent Surface Units. To reduce the risk of burns, ignition of flammable materials, and spillage due to unintentional contact with the utensil, the handle of a utensil should be positioned so that it is turned inward, and does not extend over adjacent surface units. Never leave prepared food on the Cooking Zones.
SAFETY WHEN CLEANING Always switch off the appliance before cleaning. For safety reasons, do not clean the appliance with a steam jet or high-pressure cleaner. Clean the cooktop in accordance with the maintenance and cleaning instructions in this manual. Steam cleaners are not to be used for cleaning of the cooktop. Do not use harsh abrasive cleaners or rough metal scrapers to clean the cooktop glass since they can scratch the surface, which may result in shattering of the glass.
Do not use cookware with rough or uneven bottoms. This cookware can mark and scratch the cooktop surface. See elsewhere in this manual for proper cleaning and maintenance of the cooktop. Do not use the glass cooktop surface as a cutting board. Never cook directly on the glass. Always use cookware. CAUTION Burn Hazard: The Cooking Zones may appear cool when turned ON and after they have been turned OFF. Take note of the Residual Heat Indicator above each cooking zone key.
SELECTING COOKWARE POTS AND PANS The better the pot, the better the cooking results. • You can recognize good pots and pans by their bases. The base should be as thick and flat as possible. Pots with aluminum or copper bases can cause metallic discoloring on the ceramic glass surface which is very difficult or impossible to remove. Be very careful when using cast iron pots or pots with damaged bases which are rough and/or have burrs on them. Scratches can occur if they are slid across the surface.
FOR BEST RESULTS Always follow the recommendations for proper cookware type and size. In addition: Do not use dirty pans with grease buildup. Always use pans that are easy to clean after cooking, and make sure that the bottoms of the pans are clean and dry. When cooking with large amounts of liquid, use large pots so that nothing can boil over. Do not let pans boil dry. This may cause permanent damage in the form of breakage, fusion, or marring that can affect the ceramic cooktop.
PARTS AND FEATURES Throughout this manual, features and appearance may vary from your model. COOKTOP LAYOUT Single cooking zone 5.5‖ (140mm) 1200W Dual cooking zone 8.1‖/5.2‖ (206/132mm) 2200W/1000W Single cooking zone 6.9‖ (175mm) 1800W Single cooking zone 5.
TOUCH CONTROL FEATURES LOCATIONS OF SURFACE ELEMENTS AND CONTROLS Refer to the diagram below to locate the control button for each of the surface burner elements on the cooktop. Dual right rear element Single left rear element Hot Hot Residual heat indicators Hot Child Lock On/Off Hot Single right front element Single left front element Timer POWER ON/OFF: Touch the POWER ON/OFF button to turn the entire cooktop ON and OFF.
OPERATING INSTRUCTIONS BEFORE USING THE COOKTOP Before using the cooktop for the first time, clean it thoroughly with an approved ceramic cooktop cleaner according to the Care and Cleaning instructions in this guide. This will help protect the ceramic surface and make future cleanups easier. CAUTION Never use scrub pads or abrasive or etching cleansers. They can cause permanent damage to the cooktop surface.
To turn OFF the Cooking Zone ① After the cooking is complete, touch the pad to 0 to turn off the Cooking Zone. The corresponding Cooking Zone display will turn off. (Remember that the burner is still hot while the Residual Heat Indicator is lit.) If the POWER ON/OFF pad is selected, all Cooking Zones will shut off.
USING THE DUAL COOKING ZONE The Dual Cooking Zone, located in the right rear position, offers two different size elements to accommodate different pan sizes. Use one or two sections of the burner according to the size of the pan. To Activate the Dual Cooking Zone: ① Touch the pad. The innermost element will activate. ② Touch the pad again to activate the entire element (Dual). Select the desired power level.
has the linked timer. 9. All cooking zones can be linked to the timer one by one. You can press another cooking zone once, then press the Timer button and then + or – for the desired timer. 10.If more than one cooking zone has been linked to the TIMER, the display will show the time remaining for the zone with the least amount of remaining time. 11.When the countdown time is complete, the corresponding cooking zone will switch off automatically.
BURNED-ON RESIDUE To clean the glass-ceramic Step 1 First remove any burnt-on deposits or spilled food from your glass-ceramic cooking surface with a suitable metal razor scraper (similar to scraping paint off windowpanes in your home – it will not damage the cooking surface). Hold the scraper at approximately a 30° angle to the cooktop. NOTE: Do not use a dull or nicked blade. For your safety, wear an oven mitt potholder while using the metal scraper.
BEFORE YOU BEGIN Read these instructions completely and carefully. NOTES TO INSTALLER: Read all installation instructions before installing the cooktop. Remove all packing material before connecting the electrical supply to the cooktop. Observe all governing codes and ordinances. Only certain cooktop models may be installed over certain built-in electric oven models. Be sure to leave these instructions with the consumer.
PREPARING THE INSTALLATION LOCATION IMPORTANT INSTALLATION INFORMATION These electric cooktops run off a single phase, three-wire or four-wire cable, 220-240 volt, 60 hertz, AC-only electrical supply with ground. Minimum distance between cooktop and overhead cabinetry is 30″ (762 mm). Make sure the cabinets and wall coverings around the cooktop can withstand the temperatures (up to 93°C [200°F]) generated by the cooktop. DO NOT apply any sealant along the perimeter. The cooktop must breathe freely.
DIMENSIONS AND CLEARANCES COOKTOP INSTALLATION INSTRUCTIONS * Letters on this figure refer to chart on previous page except for J and K Cooktop Width 19
Recommended space between cooktop and oven ELECTRICAL CONNECTIONS IMPORTANT SAFETY INSTRUCTIONS Be sure your cooktop is installed and grounded properly by a qualified installer or service technician. This cooktop must be electrically grounded in accordance with local codes or, in their absence, with the National Electrical Code ANSI/NFPA No. 70, latest edition in the United States.
21
WARNING! Electrical grounding is required on this appliance. This appliance is manufactured with a supply wire and a frame-connected grounding wire. NOTE TO ELECTRICIAN: The armored cable leads supplied with the appliance are UL-listed for connection to larger gauge household wiring. The insulation of the leads is rated at temperatures much higher than the temperature rating of household wiring.
COOKTOP INSTALLATION Visually inspect the cooktop for damage. Make sure all cooktop screws are tight (see locations below). ②Carefully lower the cooktop into the countertop cutout, making sure not to trap any wires. NOTE: Do not use caulking compound. The cooktop must be removable, should service be required. ③ Install the retainer brackets to the bottom of the cooktop; then snug the bolts against the bottom of the countertop as shown.
NOTE: The retainer brackets MUST be installed to meet local codes or, in their absence, with the National Electrical Code ANSI/NFPA No. 70, latest edition. FINAL CHECK Perform a final operational check of the cooktop, making sure the cooktop powers on properly and that each Cooking Zone operates correctly. Refer to the section Operating Instructions in this guide for details. MODEL AND SERIAL NUMBER LOCATION The model and serial numbers are located on a plate on the bottom of the cooktop.
TROUBLESHOOTING BEFORE CALLING FOR SERVICE Before you call for service, review this list. It may save you time and expense. This list includes common occurrences that are not the result of a defect in workmanship or materials.
NOTES 26
LIMITED WARRANTY Within the 48 contiguous United States, for one year from the date of purchase, when this appliance is operated and maintained according to instructions attached to or furnished with the product, warrantor will pay for factory-specified parts and repair labor to correct defects in materials or workmanship. Service must be provided by a designated service company. Outside the 48 states, all parts are warranted for one year from manufacturing defects.