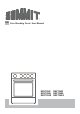
EN Free Standing Oven / User Manual REXT20W REXT24W REXT20BL REXT24BL REXT20SS REXT24SS
Thank you for choosing this product. This User Manual contains important safety information and instructions on the operation and maintenance of your appliance. Please take the time to read this User Manual before using your appliance and keep this book for future reference.
CONTENTS 1. IMPORTANT SAFETY INSTRUCTIONS .................................................................................... 4 1.1 Important Instructions for Unpacking and Installation ........................................................... 5 1.2 Grounding Instructions............................................................................................................... 6 1.3 Important Instructions for Using Your Radiant Cooktop........................................................ 9 1.
1. IMPORTANT SAFETY INSTRUCTIONS • Read all instructions before using this appliance. • This manual contains important safety symbols and instructions. Please pay attention to these symbols and follow all instructions given. • Do not attempt to install or operate your appliance until you have read the safety precautions in this manual. Safety items throughout this manual are labeled with a WARNING or CAUTION statement based on the risk type.
WARNING: Tip Over Hazard •A child or adult can tip the range and be killed. •Verify the anti-tip device has been installed to floor or wall. • Ensure the anti-tip device is reattached to floor or wall when the range is moved. • Do not operate the range without the anti-tip device in place and engaged. • Failure to follow these instructions can result in death or serious burns to children and adults.
unpacking the appliance. Never allow children to play with packaging material. Do not remove the wiring label and other labels attached to the appliance. Do not remove the model/serial number plate. • Cold temperatures can damage the electric controls. When using this appliance for the first time, or when the appliance has not been used for an extended period of time, be sure the appliance has been in temperatures above 32ºF (0ºC) for at least 3 hours before turning on the power to the appliance.
CAN/CGA B149.2 and CSA Standard C22.1, Canadian Electrical code, Part 1-latest editions and local electrical code requirements. Install only per installation instructions provided in the literature package for this appliance. For personal safety, this appliance must be properly grounded.
drawer, or lower double oven. Do not store items of interest to children in the cabinets above the appliance or on the backguards of ranges. Children climbing on or near the appliance to reach items could be seriously injured. • Do not allow children to climb or play around the appliance. The weight of a child on an open-over door may cause the appliance to tip, resulting in serious burns or other injuries. An open drawer when hot may cause burns.
Do not heat unopened food containers - Build-up of pressure may cause the container to burst and result in injury. Wear proper apparel - Loose-fitting or hanging garments should never be worn while using the appliance. Do not let clothing or other flammable materials contact hot surfaces. CAUTION: Do not touch surface burners or elements, areas near these burners or elements, interior surfaces of the oven, or the warmer drawer (if equipped).
the risk of burns, ignition of flammable materials, and spillage due to unintentional contact with the utensil, the handle of the cookware should be positioned so that it is turned inward and does not extend over other cooking areas. • Use proper pan size - This appliance is equipped with one or more surface units of different sizes. Select cookware with flat bottoms that match the surface unit size. Using the proper cookware on the cooking area will improve efficiency.
1.4 IMPORTANT INSTRUCTIONS FOR GLASS AND CERAMIC COOKTOPS • Do not clean or operate a broken cooktop. If the cooktop breaks, cleaning solutions and spillovers may penetrate the broken cooktop and create a risk of electric shock. Contact a qualified technician immediately. Clean cooktop glass with caution. If a wet sponge or cloth is used to wipe spills on a hot cooking area, be careful to avoid a steam burn. Some cleaners can produce harmful fumes if applied to a hot surface.
be moved while oven is hot, do not let potholder contact hot burner or element in oven. Use potholders and grasp the rack with both hands to reposition. Remove all cookware and utensils before moving the rack. Do not use a broiler pan without its insert. Broiler pans and inserts allow dripping fat to drain away from the high heat of the broiler. Do not cover the broiler insert with aluminum foil; exposed fat and grease could ignite. Do not cook food on the oven bottom.
1.7 IMPORTANT INSTRUCTIONS FOR SERVICE AND MAINTENANCE • Do not repair or replace any part of the appliance unless specifically recommended in the manuals. All other servicing should be done only by a qualified technician. This reduces the risk of personal injury and damage to the appliance. • Always contact your dealer, distributor, service agent, or manufacturer about problems or conditions you do not understand. • Ask your dealer to recommend a qualified technician and an authorized repair service.
2. INSTALLATION AND PREPARATION FOR USE IMPORTANT: Save for the local electrical inspector's usage. WARNING: This appliance must be installed by an authorized service person or qualified techniciang, according to the instructions in this guide and in compliance with the current local regulations. • Incorrect installation may cause harm and damage, for which the manufacturer accepts no responsibility, and the warranty will not be valid.
A B D C Preparing for Electrical Connection Effective January 1, 1996, the National Electric Code requires that new construction (not existing) utilize a 4-conductor connection to an electric range. When installing an electric range in new construction follow Steps 3 and 5 for 4-wire connection. Use only a 3-conductor or a 4-conductor UL-listed range cord. These cords may be provided with ring terminals on wire and a strain relief device.
Before Connector block Neutral terminal Neutral terminal Ground Strap (grounding to range) After Ground strap Neutral terminal Grounding plate Power cord Grounding to range 4-Wire Power Cord Installation WARNING: The neutral wire of the supply circuit is connected to the neutral terminal located in the center of the connector block. The power leads must be connected to the outside (brass-colored) terminals.
2.3 ADJUSTING THE FEET Your product stands on four adjustable feet. For safe operation, it is important that your appliance is correctly balanced. Make sure the appliance is level prior to cooking. To increase the height of the appliance, turn the feet anti-clockwise. To decrease the height of the appliance, turn the feet clockwise. It is possible to raise the height of the appliance up to 30 mm by adjusting the feet. The appliance is heavy, and we recommend that a minimum of 2 people lift it.
3. PRODUCT FEATURES Important: Specifications for the product vary and the appearance of your appliance may differ from that shown in the figures below. List of Components 1 2 3 1. Cooktop 2. Control Panel 3. Oven Door Handle 4. Oven Door 5. Adjustable Feet 6. Storage Compartment 4 6 5 Control Panel 66 88 77 7. Oven Function Control Knob 8. Oven Thermostat Knob 9.
4. USE OF PRODUCT 4.1 HOB CONTROLS Ceramic Heater The ceramic heater is controlled by a 6 position knob. The ceramic heater is operated by turning the control knob to the required setting. Near each control knob is a symbol which indicates the heater that is controlled by that knob. The on/off light on the control panel will show if any of the ceramic heaters are in use. Knob Position Function 0 Off LO Keep warm 3-5 7-9 HI which prevents the glass from overheating.
for about 10 minutes. Broiling Function: The oven’s thermostat and warning lights will switch on, and the Broil heating element will start operating. This function is used for Broiling and toasting foods on the upper shelves of the oven. Lightly brush the wire grid with oil to stop food sticking and place food in the center of the grid. Always place a tray beneath the food to catch any drips of oil or fat. It is recommended that you preheat the oven for about 10 minutes.
4.4 ACCESSORIES The Four Wheel Guided Drawer Your appliance includes a drawer for storage of accessories such as trays, shelves, grids, and small pots and pans. WARNING: The inner surface of the drawer may become hot during use. Do not store any food, plastic, or flammable materials in the drawer. 5. CLEANING AND MAINTENANCE The Splashback The splashback is attached to the cooktop with two screws. 5.1 CLEANING WARNING: Switch off the appliance and allow it to cool before cleaning is to be carried out.
on a regular basis. • Cleaning the Ceramic Glass Ceramic glass can hold heavy utensils but could be broken if it is hit with a sharp object. WARNING: Ceramic Cooktops - if the surface is cracked, to avoid the possibility of an electric shock, switch off the appliance and call for service. • Use a cream or liquid cleaner to clean the vitroceramic glass. Then, rinse and dry the glass thoroughly with a dry cloth. Do not use cleaning materials meant for steel as they may damage the glass.
1. Push the glass in the direction of B and release from the location bracket (x). Pull the glass out in the direction of A. x of a screwdriver) up to the end position. a A B 3. Close the door until it almost reaches the fully closed position and remove the door by pulling it towards you. To replace the inner glass: 2. Push the glass towards and under the location bracket (y), in the direction of B. B y 3. Place the glass under the location bracket (x) in the direction of C.
Removal of the Wire Shelf To remove the wire rack, pull the wire rack as shown in the figure. After releasing it from the clips (a), lift it up. a 5.2 MAINTENANCE WARNING: The maintenance of this appliance should be carried out by an authorized service person or qualified technician only. Changing the Oven Lamp WARNING: Switch off the appliance and allow it to cool before cleaning your appliance. • Remove the glass lens, then remove the bulb.
6. TROUBLESHOOTING&TRANSPORT 6.1 TROUBLESHOOTING If you've checked the table below and find that you still need help with your appliance, call our Customer Service facility at 800-932-4267 between 9:00 AM and 5:00 PM ET or visit our website https://www.summitappliance.com/support at any time. We will do our best to answer your questions. Problem Possible Cause Solution The hob or cooking zones cannot be switched on. There is no power supply. Check the household fuse for the appliance.
LIMITED WARRANTY ONE-YEAR LIMITED WARRANTY Within the 48 contiguous United States, for one year from the date of purchase, when this appliance is operated and maintained according to instructions attached to or furnished with the product, warrantor will pay for factory-specified parts and repair labor to correct defects in materials or workmanship. Service must be provided by a designated service company. Outside the 48 states, all parts are warranted for one year from manufacturing defects.
52202020