8” 8lb. DRAIN-FREE ICEMAKER User Manual Models: BIM18SS/ADA BIM18IF/ADA BEFORE USE, PLEASE READ AND FOLLOW ALL SAFETY RULES AND OPERATING INSTRUCTIONS Write the Serial Number here: _______________________ Felix Storch, Inc. Summit Appliance Division An ISO 9001:2015 registered company 770 Garrison Avenue Bronx, NY 10474 www.summitappliance.
TABLE OF CONTENTS Important Safeguards 3 Technical Information 4 Installation Instructions 5 Before Using Your Icemaker 5 Installation of Your Icemaker 5 Connecting Your Water Line 5 Reversing the Door Swing of the Icemaker 6 7–8 Operating Your Icemaker Control Panel 7 “Fast Freeze” Function 7 Defrosting 7 Making Ice 8 Care and Maintenance 9 Cleaning Your Icemaker 9 Power Failure 9 Vacations 9 Transporting Your Icemaker 9 Energy-Saving Tip 9 Problems with Your Icemaker 10-
IMPORTANT SAFEGUARDS Before the appliance is used, it must be properly positioned and installed as described in this manual, so read the manual carefully. To reduce the risk of fire, electrical shock or injury when using the appliance, follow basic precautions, including the following: ● ● ● ● ● ● ● ● Read all instructions before using the icemaker. Plug into a grounded 3-prong outlet. Do not remove the grounding prong, do not use an adapter, and do not use an extension cord.
TECHNICAL INFORMATION Models Type Door Cabinet Door Swing Reversible Level Legs Interior Light Ice Storage Capacity Ice Shape Rated Voltage Rated Current Power Input Power of Heater High Side PSI Low Side PSI Refrigerant Refrigerant Amount Defrost Type Net Weight Interior Dimensions Compressor Step Dimensions Temperature Range Testing Agency BIM18SS/ADA*, BIM18IF**/ADA Icemaker Stainless Steel/Panel Ready Black RHD Yes 4 Yes 8.0 lbs. Crescent 115V AC / 60Hz 1.1A 130W 160W 270.0 103.0 R134a (3.9 oz.) 3.
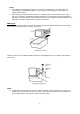
INSTALLATION INSTRUCTIONS Before Using Your Icemaker 1. Remove the exterior and interior packing. CAUTION: After unpacking you MUST allow this appliance to stand upright for at least 2 hours to allow the lubricant and refrigerant to drain back into the compressor and stabilize. Failure to do so may adversely affect performance and the lifetime of this appliance. 2. Clean the interior surface with lukewarm water using a soft cloth. 3. Install the handle on the left side of the door.
NOTE: ● The water valve is equipped with two strainers: a plastic basket type and a wire mesh screen. Turn off the water (the local water service center should be able to provide this service), and disassemble the water valve when cleaning both strainers. Consider installing a second water strainer in the water line if local water conditions require periodic cleaning, or if using a well as a water source. Obtain a water strainer from a local appliance dealer, if needed.
OPERATING YOUR ICEMAKER Control Panel The icemaker should be placed where the ambient temperature is between 61°F and 90°F (16°C to 32°C). If the ambient temperature is above or below this range, the performance of the appliance may be affected. For example, placing the appliance in extremely cold or hot conditions may cause interior temperatures to fluctuate. ON/OFF Power To turn the appliance on or off, press the ON/OFF button.
NOTE: ● If the appliance is unplugged, turned off, or if there is a power failure, you must wait 3 to 5 minutes before restarting the appliance. If you attempt to restart before this time delay, the icemaker will not work. ● When using the icemaker for the first time, or restarting it after it has been shut off for a long time, there could be a few degrees variance between the set temperature and the temperature indicated on the LED readout. This is normal and is due to the length of the inactivated time.
CARE AND MAINTENANCE Cleaning Your Icemaker 1. Turn off the power, unplug the appliance, and remove all items including shelves and racks. 2. Wash the inside surfaces with warm water and baking soda solution. Prepare the solution by mixing about 2 tablespoons of baking soda with a quart of water. 3. Wash the shelves with a mild detergent solution. 4. Wring excess water out of the sponge or cloth when cleaning the area of the controls, or any electrical parts. 5.
PROBLEMS WITH YOUR ICEMAKER You can solve many common icemaker problems easily, saving you the cost of a possible service call. Try the suggestions below to see if you can solve the problem before calling the servicer. TROUBLESHOOTING GUIDE FOR CABINET PROBLEM POSSIBLE CAUSE Icemaker does not operate. Not plugged in. The appliance is turned off. The circuit breaker has tripped or a fuse has blown. Icemaker is not cold enough. Check the temperature control setting.
TROUBLESHOOTING GUIDE FOR IN-CABINET ICEMAKER PROBLEM POSSIBLE CAUSE Not enough ice It will take 48 hours to fill the ice bucket. The in-cabinet icemaker will make ice every 2 to 3 hours. For more ice, adjust the temperature control to a cooler setting. Water in in-cabinet icemaker overflows The appliance is not level.
LIMITED WARRANTY ONE-YEARLIMITED LIMITED WARRANTY ONE-YEAR WARRANTY Withinthe the48 48contiguous contiguousUnited UnitedStates, States,for forone oneyear yearfrom fromthe thedate dateof ofpurchase, purchase,when whenthe thisappliance applianceisisoperated operatedand and Within maintainedaccording accordingto toinstructions instructionsattached attachedto toor orfurnished furnishedwith withthe theproduct, product,warrantor warrantorwill willpay payfor forfactory-specified factory-specified maintained partsa