Automatic Undercounter Ice Maker Máquina automática para hacer hielo User’s Manual (pages 1 - 29) Manual del usuario (páginas 30 a 58) Be sure ice maker is standing upright 24 hours prior to plug-in. Asegúrese que la máquina esté parada en posición vertical 24 horas antes que sea conectada. SUMMIT® APPLIANCE DIVISION Felix Storch, Inc. 770 Garrison Avenue Bronx, NY 10474 Website: www.summitappliance.
TABLE OF CONTENTS Page ICE MAKER SAFETY ................................................................................................... 2 IMPORTANT SAFEGUARDS ..................................................................................3 - 5 TECHNICAL INFORMATION ..................................................................................... 5 INTRODUCTION ........................................................................................................... 6 COMPONENT LOCATIONS ........
ICE MAKER SAFETY Your safety and the safety of others are very important. We have provided many important safety messages in this manual and on your appliance. Always read and obey all safety messages. This is the Safety Alert Symbol. This symbol alerts you to potential hazards that can injure or kill you and others. Safety messages will follow the Safety Alert Symbol and either the words "DANGER", "WARNING" OR "CAUTION".
IMPORTANT SAFEGUARDS Before the ice maker is used, it must be properly positioned and installed as described in this manual, so read the manual carefully. SUMMIT® APPLIANCE strongly recommends that you have a professional install your new machine. The warranty may be affected or voided by an incorrect installation.
• • • • • • • • • • • • • • • ordinances, is required. Do not kink or pinch the power supply cord between the ice maker and cabinet. The fuse (or circuit breaker) size should be 15 amperes. It is important for the ice maker to be leveled in order to work properly. Otherwise water may not flow properly through the evaporator (ice mold). The ice production will be less than normal. You may need to make several adjustments to level it.
Extension Cord Because of potential safety hazards under certain conditions, it is strongly recommended that you do not use an extension cord with this ice maker. TECHNICAL INFORMATION Model: Electrical power: Power consumption: Ice-making /-harvest rated current: Refrigerant: High/Low side pressure: Width x depth x height: BIM44 G 115VAC ~ 60Hz 12.2 kWh/100 lbs of ice 3.0A/3.6A R134a, 3.88oz.
INTRODUCTION The SUMMIT® BIM44 G Ice Maker produces hard, crystal-clear, gourmet cube ice and offers convenience for homeowners and hotel guests. An insulated ice storage bin is built in. This unit must be operated with an external drainage system. This user's manual is intended as a resource for persons installing, using and servicing the model BIM44 G.. It contains valuable information on safety and maintenance.
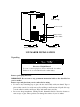
Ice scoop Power cord Water inlet Drain outlet Water supply hose Drain hose ICE MAKER INSTALLATION Unpacking Excessive Weight Hazard Use two or more people to move and install ice maker. Failure to do so can result in back or other injury. Remove packaging materials. IMPORTANT: Do not remove any permanent instruction labels or the data label on your ice maker. Remove tape and glue from your ice maker before using. • To remove any remaining tape or glue, rub the area briskly with your thumb.
Cleaning before use After you remove all of the packaging materials, clean the inside of your ice maker before using it. See "Interior cleaning" in the Cleaning and Maintenance section. Location Requirements INSTALLATION CLEARANCES: SIDE VIEW TOP VIEW 4” 1” Top of unit Rear of unit 1” 1” Side Side Front of unit • This ice maker should be properly installed by qualified personnel. • To ensure proper ventilation for your ice maker, the front of the unit must be • • • • • completely unobstructed.
Operating temperature should be within the range of normal room temperatures. Normal operating water temperature should be between 41°F (5°C) and 90°F (32°C). Operation of the ice maker for extended periods outside of these normal temperature ranges may affect production capacity. • It is strongly recommended that a water filter be used. A filter, if it is of the proper type, can remove taste and odors as well as particles.
Before you move your ice maker into its final location, it is important to make sure you have the proper electrical connection: A standard electrical supply (115V AC only, 60Hz, 15A), properly grounded in accordance with the National Electrical Code and local codes and ordinances, is required. The ice maker should always be plugged into its own individual electrical outlet. It is recommended that a separate circuit, serving only your ice maker, be provided.
Reversing the Door Swing Tools needed: flathead screwdriver, Phillips screwdriver IMPORTANT: Before you begin, unplug the ice maker or disconnect power. To remove door from hinges: 1. Using aflathead screwdriver, separate the axis from Hinge 1. Set aside. 2. Open the door about 20°around the axis of Bottom Hinge 2, then lift the door off Bottom Hinge 2 and set door aside. To replace door on hinges: 1.
Water Supply The water supply should be ready at the point of installation. The water supply pressure should be a minimum of 15 psig with a static pressure not more than 80 psig. (A wall outlet directly behind the ice machine will make installation easier.) IMPORTANT: 1. All installations must be in accordance with local plumbing code requirements. Professional installation is recommended. 2. Make certain the hoses are not pinched or kinked or damaged during installation. 3.
Drain You must connect the drain line before using the ice maker. Follow the steps below. There are two types of ice machine modes, one that drains by gravity and one that has an internal drain pump. This unit can pump out water up to a rise of 1.5m (59”) or over a horizontal length of 1.5m (59”).
Connecting the drain line: NOTE: If there is a drain line near the ice maker, the best choice is to drain water to the drain line through the drain water hose provided with ice maker. 1. Locate the floor drain near the ice maker. The distance should be less than 5 feet since the length of the long drain water hose provided with the ice maker is about 5 feet. 2. Find the drain outlet on the back of ice maker.
Installation Types This ice maker has been designed for Mobile (free-standing) installation. However, it can also be Enclosed (as under a cabinet) or Built-in (sealed to the floor). In any case, there must be adequate air space around the unit for ventilation. Mobile installation: A mobile installation will allow you to install the ice maker free-standing in any place you desire provided you have access to a water supply. You must follow the stated instructions for a. Electrical requirements b.
OPERATION Final Check List before Operation 1. Have all packing materials and tape been removed from the interior and exterior of the ice maker? 2. Did you clean the ice storage bin? 3. Have the installation instructions been followed, including connecting the machine to water and electricity? 4. Has the machine been leveled? 5.
4. 5. 6. 7. ice storage bin. When the ice storage bin is full, the sheet of cubes will not fall completely and will hold the bin-full probe open. The machine stops making ice automatically. The unit will start making ice again after the ice cubes are removed. Then the bin-full probe swings back to operating position. Bin light (if present): The bin light is controlled by a magnetic reed switch that has been installed on the inner surface of the door.
How the machine uses the water The ice maker begins with a fixed charge of water that is contained in the water trough. As the water flows to the freezing evaporator surface, the portion of water that does not contain mineral impurities freezes and sticks to the ice cube molds. The water containing impurities falls back into the water trough. During the ice making process, fresh water enters into the water trough continuously as the water in the trough freezes continuously in the evaporator.
• The PC board activates the water drain pump for 20 seconds, pumping out most of the water contained in the water reservoir. • The water can be pumped out up a rise of to 1.5m (59”) or NOTE: The outlet of the drain hose must be raised higher than the water surface to prevent the drained water from flowing back into the water reservoir. over a on horizontal length of 1.5m (59”).
Normal Sounds Your new ice maker may make sounds that are not familiar to you. Most of the sounds are normal. Hard surfaces like the floor and walls can make the sounds seem louder than they actually are. The following list describes the sounds that might be new to you and what may be causing them. • Rattling noises may come from the flow of the refrigerant or the water line. Items stored on top of the ice maker can also make noises.
Periodic cleaning and proper maintenance will ensure efficiency, top performance, and long life. The maintenance intervals listed are based on normal conditions. You may want to shorten the intervals if you have pets, or there are other special considerations. What shouldn’t be done Never keep anything in the ice storage bin that is not ice: objects like wine and beer bottles are not only unsanitary, but the labels may slip off and plug up the drain.
2. Open the door and take out the removable ice storage bin. With a clean cloth, wipe down the interior of unit and ice bin with a sanitizing solution made of 1 ounce of household bleach or chlorine and 2 gallons of hot (95ºF – 115ºF) water. 3. Pull off the drain hose of the water trough to drain off all water. 4. Rinse thoroughly with clear water. 5. After draining off all water, put back the drain hose of the water trough into the original location. Correct location of 6.
Water distribution tube cleaning When you find the ice cubes are incompletely formed or the output is low, the water distribution tube may be blocked. Turn off the power button, gently take out the water distribution tube, locate the holes in the distribution tube and use a pointed object such as a toothpick to dredge the holes. Then put the water distribution tube back to its original position. If the tube is badly blocked, clean it as follows: 1. 2. 3. 4.
The ice machine cleaner contains acids. DO NOT use or mix with any other solvent-based cleaner products. Use rubber gloves to protect hands. Carefully read the material safety instructions on the container of the ice machine cleaner. Discard the first batch of ice produced after cleaning. 6. Prepare a sanitizing solution made of 1 ounce of household bleach and 2 gallons of hot water (95ºF to 115ºF). Wipe the entire bin inside and outside, covering the entire surface of the walls. 7.
Control panel: _ + Description of LEDs and buttons: 1. Bin Full (Red) LED: Bin full indicator light When this is lit, the ice storage bin is full of ice or there is something blocking the bin-full probe. The unit will stop working. When ice cubes are removed from the ice storage bin, freeing the bin-full probe, the red LED will remain flashing for 3 minutes, then the unit will restart and return to the ice making mode. 2.
2. While in the Ice Size Adjustment mode, press the “Clean” (-) button or the “Mode” (+) button for the desired ice size. Smaller ice setting: By pressing the “Clean” (-) button, you can decrease the size of the ice cubes. The “ICE” LED (green) will flash as you lower the ice size and will finally be blinking at the setting of smallest ice size. Larger ice setting: By pressing the “Mode” (+) button, you can increase the size of the ice cubes.
TROUBLESHOOTING Before Calling for Service If the unit appears to be malfunctioning, read through the OPERATION section of this manual first. If the problem persists, check the Troubleshooting Guide on the following pages. Some of the problems mentioned in the Guide can be solved easily without a service call. Troubleshooting Guide Problem The machine doesn’t operate. Possible Cause Probable Correction The ice maker is unplugged. Plug the ice maker in. Replace fuse.
Cubes are partially Not enough water in the formed or are white water trough. on the bottom. Noise during operation The feet are not leveled and locked. Certain sounds are normal. The electricity is off. The ice maker stops The room temperature is out suddenly while of the stated range. making ice. The ice storage bin is full of ice. The body of the ice The ground line isn't in the maker is electrified. socket. Scaling occurs The hardness level of the frequently inside water is too high. the machine.
SUMMIT® Limited Warranty SUMMIT® Appliance warrants this product to be free from defects in materials and workmanship for a period of one year from the date of original purchase or delivery. Any parts determined to be defective will be replaced by SUMMIT® at no charge to you. Plastic parts and outer cabinets are warranted to be manufactured to commercially acceptable standards and free from defects at the time of delivery.
ÍNDICE Página SÍMBOLOS DE SEGURIDAD ...................................................................................... 31 ADVERTENCIAS DE SEGURIDAD .....................................................................32 - 34 INFORMACIÓN TÉCNICA .......................................................................................... 34 INTRODUCCIÓN ........................................................................................................... 35 UBICACIÓN DE COMPONENTES DE LA MÁQUINA ......
SÍMBOLOS DE SEGURIDAD Su seguridad y la seguridad de los demás es de suma importancia. Tanto en este manual como en la máquina, encontrará varios mensajes de importantes de seguridad. Lea y observe siempre los mensajes de seguridad. Este es el símbolo de Alerta de Seguridad. Advierte sobre posibles riesgos que pueden causar accidentes lesivos e incluso fatales, tanto para usted como para los demás.
CONSERVAR ESTAS INSTRUCCIONES ADVERTENCIAS DE SEGURIDAD Leer atentamente este manual, ya que antes de poner en servicio la máquina para hacer hielo, es necesario ubicarla e instalarla tal como aquí se explica. F SUMMIT® APPLIANCE recomiendan fuertemente que un mecánico professional instala su máquina nueva. La garantía se puede afectar o anular por una instalación inexacta.
• • • • • • • • • • • • • • • • que generen calor excesivo. Las conexiones eléctricas y de agua de la máquina para hacer hielo, deben cumplir con todas las reglamentaciones vigentes que correspondan a nivel municipal y estatal. La máquina se debe conectar a un tomacorriente de 115 Voltios de corriente alterna, 60 Hz, 15 Amperes de capacidad, con descarga a tierra, instalado de acuerdo con el Código Eléctrico Nacional (National Electrical Code) y los reglamentos municipales.
y debe enchufarse a un tomacorriente de 3 patas con circuito de tierra, a fin de reducir al mínimo las posibilidades de electrocución accidental. Es conveniente hacer revisar por un electricista profesional el tomacorriente y el circuito del mismo para verificar que tengan descarga a tierra. Si el tomacorriente disponible para enchufar la máquina fuera uno de dos patas solamente, es responsabilidad del usuario cambiarlo por uno de tres patas con circuito de descarga a tierra.
INTRODUCCIÓN La máquina para hacer hielo BIM44 G de SUMMIT® APPLIANCE produce cubos de hielo de impecable dureza y transparencia, y es cómoda y práctica para uso en el hogar como para huéspedes de hoteles. Un recipiente de hielo con aislación térmica está integrado con la máquina. Esta unidad requiere un sistema externo de desagüe. Este manual tiene información destinada a las personas que instalan, usan y reparan el modelo BIM44 G. Tiene datos e información importantes sobre seguridad y mantenimiento.
Cuchara para hielo Cordón eléctrico Entrada de agua Salida de drenaje Manguera para suministra agua Manguera de drenaje INSTALACIÓN DE LA MÁQUINA Desembalaje ADVERTENCIA Peligro de peso excesivo Mover e instalar la máquina entro dos personas como mínimo. Si lo hace una sola persona, hay riesgo de que se lesione por el esfuerzo excesivo. Quitar los materiales de embalaje IMPORTANTE: No quitar las etiquetas fijas de instrucciones ni la etiqueta de datos de la máquina para hacer hielo.
Requisitos del lugar de instalación DISTANCIAS DE INSTALACIÓN: Vista superior Vista lateral 4” 1” Parte superior Parte de atrás 1” 1” Lado Lado Frente de la unidad • Esta máquina debe ser instalada por el personal calificado. • Para que la máquina tenga ventilación adecuada, no debe haber ninguna obstrucción en el frente de la misma.
• Se recomienda fuertemente que un filtro de agua sea usado. Un filtro adecuado para este tipo de servicio puede eliminar del agua olores, gusto y partículas suspendidas. El agua, si no tratada por su dureza, puede producir cubos de hielo blancos y porosos, que se pegan entre sí. No se recomienda el uso de agua desionizada. • Las conexiones eléctricas y de agua y de la máquina para hacer hielo deben cumplir con todas las reglamentaciones vigentes que correspondan a nivel municipal y estatal.
Circuito de descarga a tierra Por razones de seguridad personal, esta máquina debe tener circuito de descarga a tierra. La máquina viene equipada con un cordón eléctrico con un enchufe de 3 patas, una de la cuales es la conexión al circuito de tierra.
Cambiar el lado de la abertura de la puerta Herramientas necesitadas: destornillador plano, destornillador Phillips IMPORTANTE: Antes de comenzar, desenchufe la màquina o desconecte la alimentación. Para quitar la puerta de las bisagras: 1. Usando un destornillador plano, separar el eje de bisagra 1. Ponga a un lado. 2. Abra la puerta de unos 20 ° alrededor del eje de la bisagra inferior 2, a continuación, levante la puerta de la bisagra inferior 2 y ponga a un lado de la puerta.
Conexiones de entrada de agua La conexión de suministro de agua debe estar preparada en el lugar de instalación. La presión del suministro de agua debe ser una mínima de 15 psig con una presión estática nada menos que 80 psig. (La instalación se simplificará considerablemente si hubiera un tomacorriente directamente detrás de la máquina.) IMPORTANTE: 1. La instalación de plomería debe cumplir con los reglamentos municipales vigentes que correspondan. La instalación profesional se recomienda. 2.
Drenaje Usted debe conectar la línea de drenaje antes de usar al fabricante de hielo. Hay dos tipos de modos del fabricante de hielo, uno que drena por gravedad y uno que tiene una bomba de drenaje interno. Esta unidad puede bombear el agua hasta un aumento de 1,5 m (59 ") VÁLVULA DE AGUA FILTRO DE AGUA NOTA: La salida de la manguera de desagüe debe ser elevada más alto que la superficie del agua con el fin de evitar que el agua drenada fluye de nuevo en el depósito d’agua.
Conexión de la línea de drenaje: NOTA: Si hay una línea de drenaje cerca del fabricante de hielo, la mejor opción deberá drenar el agua a la línea de drenaje por la manguera de drenaje proporcionada con la máquina. 1. Ubique el drenaje en piso cerca del fabricante de hielo. La línea de drenaje debería estar a menos de 5 pies (unos 1,5 metros) de distancia de la máquina, ya que esa es la longitud aproximada de la manguera de drenaje suministrada con la máquina. 2.
2. 3. 4. 5. máquina sobre el piso o sobre una plataforma (depende de las características de instalación). Tener conexiones de suministro de agua y drenaje preparadas antes de instalar la máquina. Abrir el paso en la línea de agua y abrir la válvula de suministro de agua a la máquina. Verificar que las conexiones no tengan pérdidas. Si hubieran pérdidas, ajustar bien todas las conexiones (incluyendo las de la válvula) y tuercas.
Método de uso 1. Prenda la canilla para agua, deje llenar el recipiente de agua, entonces encender la máquina con el interruptor ON/OFF al frente de la unidad. funcionar automáticamente. Etapa de hacer hielo Etapa de recolección de hielo La máquina comenzará a Etapa de hielo completo 2. Después de 3 minutos, la máquina pasará automaticamente a la etapa de hacer hielo y se escuchará el sonido de agua corriente. 3.
Ciclos de funcionamiento de la máquina Gire el interruptor ON/OFF a la posición ON (Prendido). La máquina comenzará automáticamente la etapa der hacer hielo. La máquina tiene dos ciclos distintos: congelamiento y recolección. En el ciclo de congelamiento, el aqua fluye a la superficie del evaporador. En el ciclo de recolección, se transfieren los cubos de hielo al recipiente y se vuelve a cargar agua en la máquina.
Cómo funciona el sistema de desagüe cuando el agua se bombea Los componentes del sistema de drenaje de agua con la bomba son • Depósito de agua • Placa CI y interruptor de nivel de agua 1, 2 • Bomba de drenaje de agua Funcionamiento • Toda el agua que viene de la rebose y el hielo derretido se recoge en el depósito de agua. • Tan pronto como el agua en el depósito alcanza el nivel máximo, el interruptor de nivel de agua 1 se cierra, se transmite una corriente de voltaje bajo a la placa CI.
• Si el interruptor de nivel de agua 2 se cierra, transmitiendo una corriente a la placa de circuito impreso de voltaje bajo, la placa CI se activa la alarma zumbador, le informa de que la bomba de drenaje, interruptor de nivel de agua o el tubo de drenaje pueden estar funcionando mal.
• Quite el tubo de drenaje del recipiente de agua para desaguar toda el agua. • Abrir la puerta para facilitar la circulación de aire y evitar la formación de moho. • Dejar la línea de agua y el cordón eléctrico desconectados hasta que la máquina esté lista para entrar nuevamente en servicio. IMPORTANTE: • No toque el enchufe cuando las manos se mojan. • Nunca desenchufe la unidad estirando en el enchufe. Agarre el enchufe y lo estire fuera firmemente.
Limpieza externa La puerta y el gabinete se pueden limpiar con una solución de detergente y agua tibia, preparada, por ejemplo, con una onza de detergente de cocina con 2 galones (7,5 litros) de agua tibia. No usar productos limpiadores con solvente ni abrasivos ni fuertes para limpiar la unidad. Utilizar una esponja suave y enjuagar con agua limpia. Secar con una toalla limpia de tela suave, para evitar que queden manchas de agua.
Limpieza del condensador Un condensador sucio o taponado reduce la circulación de aire y consecuentemente afecta la capacidad de hacer hielo y eleva la temperatura de la máquina, con el riesgo de causar la falla de componentes. Limpiar el condensador al menos una vez cada seis meses. 1. Desconectar la máquina o cortar la alimentación de la línea. 2. Quitar suavemente el panel de tablillas al fondo delantero. Superficie del 3.
2. 3. 4. 5. ciclo se completa, entonces apaga la máquina (OFF) por medio del interruptor ON/OFF. Quite todo el hielo del recipiente. Mantener conectada la línea de agua. Cargar en el recipiente de agua 8 onzas de solución de limpieza Nickel-Safe. Poner el interruptor ON/OFF en la posición ON y aprete el botón CLEAN (Limpiar). Ahora la máquina funcionará en modo de limpieza automática. Esperar unos 30 minutos para que se haga una buena limpieza. Apagar la máquina con el interruptor (OFF).
Descripción de luces (LED) y botones: 1. LED rojo: Luz indicadora de recipiente de hielo lleno Cuando se enciende esta luz, significa que se ha colmado el recipiente de hielo o que hay algo obstruyendo la sonda de lleno de hielo. La máquina se detendrá automáticamente. Cuando disminuye la cantidad de hielo en el recipiente, la sonda detecta el espacio libre y la luz roja queda encendida intermitentemente durante tres minutos. Luego la máquina arranca automáticamente para hacer más hielo. 2.
NOTA: Durante el ajuste del tamaño de hielo, cuando los LEDs "BIN FULL", "ICE" y "HARVEST" parpadean de una vez, la unidad está en la configuración de fábrica del tamaño de los cubos. FUNCIONES PRINCIPALES 1. Activación de funcionamiento es totalmente automático. 2. Cuando el recipiente de hielo está lleno, la máquina dejà de hacer hielo automáticamente. Vuelve a arrancar cuando el nivel de cubos haya descendido. 3.
DIAGNÓSTICO DE FALLAS Antes de llamar al servicio de reparación Si la máquina manifestara síntomas de estar funcionando defectuosamente, leer atentamente la sección de USO DE LA MÁQUINA en este manual. Si el problema continuara, leer la GUÍA DE DIAGNÓSTICO DE FALLAS más abajo y en las páginas siguientes. A veces, el problema es simple y se puede resolver sin llamar a un servicio técnico. Guía de diagnóstico de fallas Problema La máquina no funciona. No hay entrada de agua después que la máquina arranca.
Problema Los cubos de hielo no se terminan de formar o son de color blanco en la parte inferior. Posible causa No hay suficiente agua en el recipiente. Solución probable Verificar que la presión de agua no sea inferior a 15 psig. Revisar el filtro de agua: podría estar bloqueado. Comprobar que no exista una pérdida en el recipiente de agua. Los pies no están nivelados y trabados. Nivelar y trabar los pies en posición. Véase la sección Nivelación de la máquina. Ciertos ruidos son normales.
Notes / Notas 57
Garantía Limitada de SUMMIT® SUMMIT® Appliances garantiza este producto para ser libre de defectos en materias y destreza por un período de un año de la fecha de la compra original o de la entrega. Cualquier pieza que es determinada a ser defectuosa será reemplazada por SUMMIT® sin carga a usted. Las piezas plásticas y los gabinetes exteriores se garantizan para ser fabricados a estándares comercialmente aceptables y libres de defectos al tiempo de la entrega.
Tested and certified to NSF standard 12 by NSF International Probado y certificado por NSF International de acuerdo con la norma NSF 12 BIM44 G OM-ES-10 Printed in China Impreso en China 59