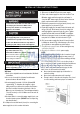
Model / Modèle:CLIM15 Model / Modèle:BIM45 BUILT-IN ICE MAKER MACHINE À GLAÇONS Makes 32 lbs daily / Ice storage capacity: 25 lbs 32 livres par jour / la capacité de la boîte de glace est 25 livres Owner’s Manual Manuel du propriétaire BEFORE USE, PLEASE READ AND FOLLOW ALL SAFETY RULES AND OPERATING INSTRUCTIONS AVANT D’UTILISER CET APPAREIL, VEUILLEZ LIRE ET RESPECTER TOUTES LES RÈGLES DE SÉCURITÉ ET INSTRUCTIONS D’UTILISATION Write the Serial Number here: Inscrivez le numéro de série ici : Felix St
TABLE OF CONTENTS Important Safety Information ...........................................................................2 Installation Instructions .............................................................................. 3 – 8 Before Using Your Ice Maker ....................................................................3 Installation of Your Ice Maker ....................................................................3 Installation Specifications (Built-In) .......................................
IMPORTANT SAFETY INFORMATION READ ALL SAFETY INFORMATION BEFORE USING. WARNING: RISK OF CHILD ENTRAPMENT An empty ice maker is a very dangerous attraction to children. Remove either the gasket, latches, lock and/or doors from unused or discarded appliances, or take some other action to make sure it is harmless. GROUNDING INSTRUCTIONS PRECAUTIONS To avoid installation/operation difficulties, read these instructions thoroughly. WARNING: This appliance must be grounded.
INSTALLATION INSTRUCTIONS INSTALLATION INSTALLATION SPECIFICATIONS SPECIFICATIONS (BUILT-IN) (BUILT-IN) BEFORE USING USING YOUR YOUR BEFORE ICE ICE MAKER MAKER Remove the exterior and interior packaging. Before connecting the Ice Maker to the power source, let it stand upright for approximately 2 hours. This will reduce the possibility of a malfunction in the cooling system from handling during transportation. Clean the interior surface with lukewarm water using a soft cloth.
INSTALLATION INSTRUCTIONS To Connect Water Supply Line to Ice Maker Inlet Valve 1. Disconnect Ice Maker from electric power supply. 2. Place end of water supply line into sink or bucket. Turn ON water supply and flush supply line until water is clear, turn OFF water supply at shut off valve. Unscrew plastic cap from water valve inlet and save. 3. Slide brass compression nut, then ferrule (sleeve), onto water supply line, as shown in Fig. A. 4.
Connecting Ice Maker To Water Supply (cont’d): Drain-pipe Connection (Drain hose not provided) If you choose direct drainage or force drainage mode, you need to purchase an external drain pipe available at your local hardware store. The connection instructions are below: Connect one side of the external drain pipe linked to the outlet pipe of the ice maker; put the other side into the drain hole. (See Fig B.
INSTALLATION INSTRUCTIONS Please disconnect unit from power. To avoid electric shock, make sure no water is near the ice maker or on floor board and follow the steps below. Your ice maker has three different performance modes. You can choose the most suitable mode according to your requirements. Please see detailed instructions on following page. 1. Ice bin 2. Bottom board of ice bin 3. Drain nut (front) 4. Drain seal (front) 5. Water level indicator 6. Drain seal (back) 7. Drain nut (back) 8.
INSTALLATION INSTRUCTIONS Ice Maker Performance Mode Instructions (cont’d) Please read the following installation methods before using, and choose the correct drain mode for your situation. Set up your ice maker accordingly. Performance Mode Instructions Suitable situation Operation instruction Direct drainage Excess water The height of drain hole Ref.: Fig. A, Fig. B & Fig.
INSTALLATION INSTRUCTIONS Ice Maker Performance Mode Instructions (cont’d) Performance Mode Instructions Suitable situation Operation instruction Ref.: Fig. A, Fig. B & Fig. C Manual drainage system mode Manually drain the water from the ice bin. There is no drain hole in the room. (If you’re operating using the “Manual drainage system mode”, ice water will restrict drain water from flowing out.
OPERATING INSTRUCTIONS CONTROLS OF THE ICE MAKER Control Type Condition Function Explanation Button Press Button Press To turn the Ice Maker on/off, press and hold this button for approximately 3 seconds. Small size of ice Button Press Medium size of ice Button Press Large size of ice Indicator Light ON FLASHING ON Small size of ice is selected. Water tank is full. ① Medium size of ice is selected. ON FLASHING ON OFF FLASHING Large size of ice is selected. Ice bin is full of ice.
OPERATING INSTRUCTIONS CONTROLLING THE SIZE OF ICE CUBES ICE BIN 1. Please insure the water supply is properly connected. The default setting of the ice maker is set to make medium ice. If you need to revise the ice size, you can press buttons Your ice bin is designed to be easily removed, if you want to take it out, lift up the front part of the bin, then simply pull it out. (See picture below.) The relevant Indicator light will display. 2.
CARE AND MAINTENANCE CLEANING YOUR ICE MAKER MOVING YOUR ICE MAKER Turn off the power, unplug the appliance, and remove the ice bin. Wash the inside surfaces with a warm water and baking soda solution. The solution should be about 2 tablespoons of baking soda to a quart of water. Wash the ice bin with a mild detergent solution. Wring excess water out of the sponge or cloth when cleaning area of the controls, or any electrical parts.
CARE AND MAINTENANCE CLEANING THE INNER WATER CONTAINER NOTE: If the unit is unplugged, has lost power, or is turned off, you must wait 3 to 5 minutes before restarting the unit. If you attempt to restart before this time delay, the Ice Maker will not start. Please disconnect unit from power. To avoid electric shock, make sure no water is near the ice maker or on floor board and follow the steps below. 1. Ice maker machine cover board 2. Ice maker machine cover plate 3. Water container 4. Drain tube 1.
TROUBLESHOOTING Occasionally, a problem is minor and a service call may not be necessary. Use this troubleshooting guide for a possible solution. If the unit continues to operate improperly, call an authorized servicer or our toll-free number 1-800-932-4267. PROBLEM POSSIBLE CAUSE • Not plugged in. • The appliance is turned off. • No power to unit. • The ambient temperature is too high. • The door is opened too often. • The door is ajar. • The door gasket does not seal properly. • Incorrect mode was set.
NOTES 14
LIMITED WARRANTY ONE-YEAR LIMITED WARRANTY Within the 48 contiguous United States, for one year from the date of purchase, when this appliance is operated and maintained according to instructions attached to or furnished with the product, warrantor will pay for factory-specified parts and repair labor to correct defects in materials or workmanship. Service must be provided by a designated service company. Outside the 48 states, all parts are warranted for one year from manufacturing defects.
TABLE DES MATIÈRES Information importante de sécurité .............................................................................17 Consignes d'installation .............................................................................18 – 23 Avant d’utiliser votre machine à glaçons ..................................................18 Installation de votre machine à glaçons ....................................................18 Spécifications d’installation (encastré) ......................................
CONSIGNES DE SÉCURITÉ IMPORTANTES LISEZ TOUTES LES INFORMATIONS DE SÉCURITÉ AVANT DE FAIRE FONCTIONNER L’APPAREIL. ADVERTISSEMENT: RISQUE DES DENFANTS DEVIENNENT COINCERADANS L’APPAREIL. Un vidé unité est une attraction dangereuse aux enfants. Enlever les joints étanches, les loquets, les couvercles ou les porte des appareils qui ne sont pas utiliser, ou faites de soit que l’appareil ne présente aucun danger.
CONSIGNES D’INSTALLATION AVANT D’UTILISER VOTRE MACHINE À GLAÇONS DIRECTIVES D’INSTALLATION POUR L’ENCASTRAGE • Enlevez l’emballage extérieur et intérieur. • Avant de brancher la machine à glaçons sur la source d’alimentation, laissez-la reposer à la verticale pendant environ 2 heures. Cela réduira le risque que le système de refroidissement subisse une défaillance causée par la manutention lors du transport. • Nettoyez la surface intérieure à l’eau tiède, au moyen d’un chiffon doux.
CONSIGNES D’INSTALLATION RACCORDEMENT DE LA MACHINE À GLAÇONS À L’ARRIVÉE D’EAU AVERTISSEMENT Afin de prévenir tout choc électrique pouvant entraîner un décès ou de graves blessures corporelles, débranchez la machine à glaçons de la source d’alimentation électrique avant d’y raccorder une conduite d’arrivée d’eau. MISE EN GARDE Il est recommandé d’utiliser un tuyau en cuivre pour la conduite d’arrivée d’eau.
CONSIGNES D’INSTALLATION Raccordement de la machine à glaçons à l’arrivée d’eau (suite) Raccordement du tuyau de drainage (tuyau de drainage n'est pas fourni) • Si vous choisissez le mode de drainage direct ou le mode de drainage forcé, vous devrez vous procurer vous-même le tuyau de drainage externe, et suivre les directives ci-dessous : Raccordez une extrémité du raccord du tuyau de drainage externe au tuyau de sortie de la machine à glaçons et l’autre extrémité au drain (voir schéma B).
CONSIGNES D’INSTALLATION DIRECTIVES SUR LES MODES DE PERFORMANCE DE LA MACHINE À GLAÇONS AVERTISSEMENT Veuillez débrancher l’appareil de sa source d’électricité. Pour éviter les décharges électriques, assurez-vous qu’il n’y ait pas d’eau près de la machine à glaçons ou sur le plancher et suivez les étapes ci-dessous. Votre machine à glaçons comporte trois modes de performance différents, que vous pouvez sélectionner en fonction de vos besoins.
CONSIGNES D’INSTALLATION DIRECTIVES SUR LES MODES DE PERFORMANCE DE LA MACHINE À GLAÇONS (suit) AVERTISSEMENT Veuillez lire les directives d'installation suivantes avant d'utiliser l'appareil. Choisir le bon mode d'évacuation de l'eau selon la situation et régler la machine à glace en conséquence.
CONSIGNES D’INSTALLATION DIRECTIVES SUR LES MODES DE PERFORMANCE DE LA MACHINE À GLAÇONS (suit) Mode de performance Mode de drainage Manuel (Si vous utilisez le « mode de drainage manuel »,la glace empêchera l’é vacuation Directives Drainage manuel de l’eau du bac à glace. Situation Directive d’utilisation Il n’y a aucun drain dans la pièce. Réf.
OPÉRATION COMMANDES DE LA MACHINE À GLAÇONS Control Type Condition Bouton Appuyer Explication de la fonction Pour allumer ou éteindre la machine à glaçons, appuyez sur ce bouton et maintenez-le enfoncé pendant environ 3 secondes. Bouton Appuyer Bouton Appuyer Taille moyenne de glace Bouton Appuyer Grande taille de glace ALLUMÉ Une petite taille de glace a été sélectionnée. Le bac à glace est plein. ① Une taille moyenne de glace a été sélectionnée.
OPÉRATION RÉGLAGE DE LA TAILLE DES GLAÇONS BAC À GLACE Votre bac à glace est conçu pour être facilement enlevé si vous le désirez. Soulevez l’avant du bac, puis retirez-le en le faisant glisser vers l’extérieur. (voir image ci-dessous) 1. Assurez-vous que le tuyau d’eau est bien raccordé à la machine à glaçons.
NETTOYAGE ET ENTRETIEN DÉPLACEMENT DE VOTRE MACHINE À GLAÇONS NETTOYAGE DE VOTRE MACHINE À GLAÇONS • Coupez l'alimentation, débranchez l'appareil et enlevez le bac à glaçons. • Lavez les surfaces internes avec une solution d’eau chaude et de bicarbonate de sodium. La solution doit contenir 2 cuillérées à table de bicarbonate de sodium dans un litre d’eau. • Lavez le bac à glaçons avec une solution de détergent doux. • Lavez l’extérieur du machine à glaçons avec de l’eau chaude et un détergent liquide doux.
NETTOYAGE ET ENTRETIEN NETTOYAGE DU RÉCIPIENT D'EAU INTÉRIEUR AVERTISSEMENT REMARQUE : • Lorsque l’appareil est débranché ou éteint, ou en cas de panne d’alimentation, vous devez attendre de 3 à 5 minutes avant de le remettre en marche. En cas de tentative de remise en marche avant l’expiration de ce délai, la machine à glaçons ne se remettra pas en marche. Veuillez débrancher l’appareil de sa source d’électricité.
DÉPANNAGE De temps en temps, un problème est mineur et un appel de service peut ne pas être nécessaire. Utilisez ce guide de dépannage pour trouver une solution possible. Si l’unité continue de fonctionner incorrectement, appelez un dépôt de service autorisé ou notre numéro sans frais 1-800-932-4267 pour obtenir de l'assistance.
GARANTIE LIMITÉE GARANTIE LIMITÉE D’UN AN Garantie limitée valable sur le territoire limitrophe des États-Unis, soit les 48 États, et cette garantie se limite à une période de douze (12) mois à partir de la date d’achat originale.