SUMMIT CLASSIC COLLECTION Electric Range Model CLARE User's manual FELIX STORK, INC. 770 Garrison Avenue Bronx, New York 10474 www. summitappliance.com Write Serial No.
A WARNING: if tre information in this manual is not followed exactly, a fire or explosion may result causing property damage, personal injury or death, 5 /\ WARNING Tip-Over Hazard “A child or adult can tip the range and be killed. : th i the wail the anti-4 stricture inf Se “Re-engage the anti-tip device if the range is moved. See installation instructions. “Failure to follow these Instructions can rascal in In death or serious burns to children or adults.
Please read these instructions before installation or using your appliance! Dear Customer, We would ike you to obtain the best performance from your product which has been manufactured in modern facilities and passed through strict quality control procedures. Therefore. we advise you to read through this user manual carefully before using your product and keep it for futures reference. If you hand over the product to someone else, deliver the user manual as well.
Table of Contents 1 IMPORTANT INSTRUCTIONS 5 § HOW TO OPERATE THE OVEN 26 Basic safely instructions Safety for children Safely when working with electricity. 8 @ Disposal Packaging material , . Future transportation... a 2 INSTALLATION 10 Installation and connection Clearances and Dimensions 10 Important notes to the consumer... 10 Important notes to the Installer Anti-tip stability device installation instructions [A 14 Connection to the power supply ..
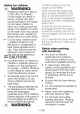
Ha IMPORTANT INSTRUCTIONS Basic safety instructions + This appliance can be used by children aged from 8 years and above and persons with reduced physical, sensory or mental capabilities or lack of experience and knowledge if they have been given supervision or instruction concerning use of the appliance in a safe way and understand the hazards involved. Children must not play with the appliance. Cleaning and user maintenance must not be made by children without suspension.
extend over adjacent surface units to reduce the risk of burns, ignition of flammable materials, and spillage due to unintentional contact with the utensil, the handle of a utensil should be positioned so that it is turned inward, and does not extend over adjacent surface units. Use care when opening door let hot air or steam escape before removing or replacing food. Placement of oven racks -always place oven racks in desired location while oven is cool.
by the use of alcohol and/or drugs. Do not operate the appliance if it is defective or shows any visible damage. Be careful when using alcoholic drinks in your cooking. Alcohol evaporates at high temperatures and may cause fire since it will catch fire when it gets in contact with hot surfaces. Do not heat closed food containers and glass jars. Pressure that may buildup in the jar can cause it to burst. Do not use the oven for a storage area. Items stored in an oven can ignite.
Safety for children A WARNING: Stepping, leaning or sitting on the door or drawers of this range can result in serious injuries and also cause damage to the range. Do not allow children to climb on or play around the range. The weight of a child on an open door may cause the range to tip, resulting in serious burns or other injury. + Do not leave children alone children should not be left alone or unattended in area where appliance is in use.
Intended use The appliance is designed for domestic use only. Commercial use is not permissible. This appliance is not intended to use in mobile homes or recreational vehicles. This appliance should not be used for warming the plates under the roller, hanging towels and dish cloths on the handles, for drying and the space heating purposes. All openings in the wall behind the appliance and in the floor under the appliance shall be sealed.
INSTALLATION The kitchen floor must be able to carry the weight of the appliance plus the additional weight of cookware and bake ware and food. + If an appliance hood is lo be fitted, refer to the manufacturer's instructions regarding fixing height. * Any kitchen furniture next to the appliance must be heat-resistant {212 °F min).
fountain Fig. Bal Proper positioning of outlet must be flush . Nothing located in shaded earn can extend more than 27 (5, 1m) from wall or range will not slide all the way back.
Important notes to the installer AN WARNING Head manual before Installing the range. All ranges can tip and injury to persons Observe all governing codes and could result. ordinances. Be sure to leave these instructions with the consumer.
Anti-tip stability device installation instructions There is ably ane anti-tip stability device with product. You can use it for right back foot or left back foot. 1. The anti-tip device has to be attached to the rear wall or floor as shown in Figure a.
Connection to the power supply A DANGER: Risk of electric shock! Before starting any work on the electrical installation, the elect real power fo the range must be shut off while line connections are being made. Failure to follow these instructions can result in death. firs, or electrical shock, IMPORTANT: cicatrices installation should comply with national and focal codes.
A WARNING: musk of fire or electrical shock exists If an incorrect size appliance cord Kit is used or the Installation manual or strain relief clap are disregarded. A WARNING: 0 rot chosen the nuts which secure the factory installed range wiring to the terminal block while connecting range. Electrical failure or loss of electrical connection may acct. When installed where it is not permitted to ground through the neutral, a 4-conductor cord or cable assembly must be used. See manufacturers instructions.
After completing connections put terminal block cover back to the original location and tighten the screws, Power connections /\ WARNING: Risk of electric shock! Frame grounded to neutral of appliance through a link.
tighten. Allow enough slack to easily attach the wires to the terminal block. A Listed conduit connector may also be used for this purpose. 1 Remove the terminal block cover {on the back of the range) by removing the screws as shown in Figure 4.
Power connections Three wire connection: [0 IMPORTANT: Tre neural ar ground wire of the power cord must be connected to the neutral terminal located in the center of the terminal block. The power leads must be connected to the lower left and lower right terminals of the terminal block. 1 Loosen the lower screw on each terminal of the terminal block. 2 Insert leads into terminal block and tighten. Note: The ground terminal shown in the figure 8 above is not used for this installation.
3 Insert the ground lead from the power supply into the copper grounding lug as show in the Figure 9 above. Tighten S Crew. 4 Replace terminal block cover, + To align the appliance with the worktop, adjust the feet muting right or left hand as required. For products with cooling fan The cooling fan cools both the built-in cabinet and the front of the product. Cooling fan continues to operate for about 20-30 minutes after the oven Is switched off. 1. Cooling fan 2. Control panel 3.
[EH] PREPARATION Tips for saving energy The following tips will neap you to use your appliance in an ecological way and to save energy: «Use dark colored and enamel coated trays, since the heat transmission will be better. * While cooking your meals, perform a preheating operation if it is advised in the user manual or cooking instructions. + During cooking, do not open the oven door frequently.
Initial heating A WARNING: Hot surfaces may Cause burns! Do not touch the hot surfaces of the appliance. Use oven gloves. Keep children away from the appliance. A IMPORTANT: Coors and smoke may be emitted during first heating. Ensure that the room is well ventilated, Any production residues or protective layers must be burnt off before the first use, Heat up the appliance for about 30 minutes and then switch it off, Electric oven 1. Take all baking trays and racks out of the oven. 2. Close oven door, 4.
n HOW TO USE THE COOK TOP General information on cooking DANGER: Risk of fire by overheated oii! Her you heat oil, do not leave it unattended, Never try to extinguish the fire with water! When oil has caught fire, immediately cover the pot or pan with a lid. Switch off the burner/plate if safe to do 50 and phone the fire department. Only use flat bottomed pots or pans.
not extend over adjacent surface units. To reduce the risk of burns, ignition of flammable materials, and spillage due to unintentional contact with the utensil, the handle of a utensil should be positioned so that iris trued Inward, and does not extend aver adjacent surface units. Splashes may damage the ceramic surface and can cause fire. [Do not use pots that have concave or convex bottoms, Use pots and pans with smooth bottoms.
If cook top should break, cleaning solutions and spillovers may penetrate the broken cook-top and create a risk of electric shock. Contact a qualified technician immediately. The ceramic glass burner/plate is equipped with an operating lamp and a residual heat indicator, The residual heat indicator indicates the position of the switched on plate and remains Illuminated after switching off. (When the temperature of the plate falls below touchable temperature the indicator it will go off).
EH HOW TO OPERATE THE OVEN General information on baking, roasting and broiling A DANGER: Risk of scalding by hot steam! Stand away from the range when opening vane door. Hot alr or steam which escapes can cause bums to hands, face, and/or eyes. Let hot air or steam escape before removing or relocating food. Tips for baking + Use non-stick coated appropriate metal plates or aluminum containers or heat-resistant silicon molds. * Make the best use of the space on the rack.
rack with materials such as aluminum foil. Doing so blocks airflow through the over and may cause carboniferous poisoning. Aluminum foil linings may also trap heat, causing a fire hazard. Select temperature and operating mode Chge Rg wd HEE 1. Thermostat lamp 2, Thermostat knob 3. Function knob 4. Function lamp The operating modes of the electric oven are selected with the function knob. The temperature is adjusted with the thermostat knob.
2, If cake has fallen, your vegetable dishes in a pan with a lid If a vegetable dish does not get » Place it on a lower rack, lower = Boll the vegetables beforehand or temperature, and increase the prepare them like canned food and put In x Use less quid or lower the instead of a tray. temperature by 50°F. 2. 3. Forsake is too dark on top, cooking time. the oven. 4.
Table of Cooking Times [i] IMPORTANT: The values indicated In the table Baking and roasting [2] IMPORTANT: Level 1s the bottom level in the below are data indicative, They may aver. vary according to the type of food as well as your preferences of cooking, Food Cooking level Rack Temperature Cooking time number position {min (approx Cake in fray One level = 4 350 25.30 Cake in mold One level = 2 355 40... 80 Cakes in paper [One label © 3 350 25.30 Sponge cake Gre level = 3 380 5.
How to operate the broiler [i] IMPORTANT: Before using the oven the clock time must be set. If the clock time is not set, the main oven will not work. /2\ WARNING: Hat surfaces can cause bums! Close oven door during broiling. Switch on broil 1. Bet the function knob onto the broil symbol, 2. Set broil temperature, 3. Preheat for approximately 5 minutes, if necessary. » The thermostat lamp is on. Switch off orbiter 1. Turn broil control knob to off position (top).
B MAINTENANCE AND CARE General information A DANGER: Risk of electric shock! Switch off the electricity before cleaning appliance to avoid an electric shock. 4\ DANGER: Hot surfaces may cause burns! Allow the appliance ta cool down before you clean it. A NOTICE: The surface could be damaged by some detergents or cleaning materials. Do not use abrasive detergents, cleaning powder/cream or any sharp objects. He careful to avoid steam burns. Some cleaners can produce noxious fumes if applied fo a hot surface.
1. Remove the front section of the side rack by pulling it in the opposite direction of the side wall, 2. Remove the side rack completely by pulling it towards you, Clean oven door Don't use any harsh abrasive cleaners or sharp metal scrapers for cleaning the oven door. They could scratch the surface and damage the glass. Removal of oven door 1. Open the oven door 2. Open the clips at the hinge housing on the right and left hand sides of the oven door by pressing them dawn as frustrated in the figure.
Boh socket ted in place) Each oven is equipped with one halogen light bulb located in the back wall of the oven. The light is switched on when the color is opened or when the oven is in a cooking cycle, The oven light is not illuminated during self-clean. Each light assembly consists of a removable lens, alight bulb as well as a light socket Fests that 1s fixed place tight bulk replacement is considered to be a routine maintenance item. To replace a fight bulb: 1. Read warming on this page. 2.
GENERAL INFORMATION Overview 1...
Technical Data GENERAL Outer dimensions (height/width/depth) 33 1/3/23 inches Voltages frequency 120/240V ~ 80 Hz Total electric power 8,6 kW Fuse protection min.
Proper positioning of the wire shelf on sliding shelves It is important to position the broil and/or dripping pan on the wire shelves correctly. Slide the broil or the dripping pan completely between the 2 rails and make sure it is stable before putting a dish on it {Please ses the following figure). 1. Owen roller 2. Drawer roller [a IMPORTANT: Dc riot remove drawer while hot or during operation. Be sure drawer is empty before removing.
B TROUBLESHOOTING A DANGER: Risk of electric shock, short circuit or fire from nonprofessional repairs! Repairs on the appliance must be carried out by an approved service center. Electrical equipment Normal operating conditions + Smoke and odors may be emitted for a couple of hours during the first operation. » tis normal that steam escapes during operation.
Ba Limited Warranty Within the 48 contiguous United States, for one year from the dale of purchase, when this appliance fs operated and maintained according to instructions attached to or furnished with the product, warrant or will pay for factory-specified parts and repair labor to correct defects in materials or workmanship. Service must be provided by a designated service company. Outside the 48 states, all parts are warranted for one year from manufacturing defects.