FF1512SSIM FF1511SS en Instruction Manual
Please read this user manual first! Dear Customer, We hope that your product, which has been produced in modern plants and checked under the most meticulous quality control procedures, will provide you an effective service. Therefore, read this entire user manual carefully before using the product and keep it as a reference. If you hand over the product to someone else, give the user manual as well. The user manual will help you use the product in a fast and safe way.
Contents 1 Important instructions for safety and environment 3 2 Your appliance 7 3 Installation 8 3.1. 3.2. 3.3. 3.4. Appropriate installation location 8 Adjusting the feet . . . . . . . . . . . . . . . .9 Electrical connection . . . . . . . . . . . . .9 Connecting the water hose to the refrigerator . . . . . . . . . . . . . . . . . . . . . 10 3.5. Connecting the water line to the water supply . . . . . . . . . . . . . . . . . . . 10 3.6. Reversing the doors . . . . . . . . . . . . 12 3.7.
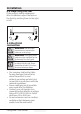
1 Important instructions for safety and environment This section contains safety instructions that will help protect from risk of personal injury or property damage. Failure to follow these instructions shall void any warranty. 1.
Instructions for safety and environment • Do not damage the cooling circuit, where the refrigerant is circulating, with drilling or cutting tools. The refrigerant that might blow out when the gas channels of the evaporator, pipe extensions or surface coatings are punctured may cause skin irritations and eye injuries. • Do not cover or block the ventilation holes on the refrigerator with any material. • Keep bottled beverages with high alcohol content tightly closed and vertical.
Instructions for safety and environment 1.1.2 For products with a water dispenser 1.3 Children’s safety • Pressure for cold water inlet shall be maximum 90 psi (6.2 bar). If your water pressure exceeds 80 psi (5.5 bar), use a pressure limiting valve in your mains system. If you do not know how to check your water pressure, ask for the help of a professional plumber. • If there is risk of water hammer effect in your installation, always use a water hammer prevention device in your installation.
Instructions for safety and environment 1.5 Compliance with RoHS Directive: • The product you have purchased complies with EU RoHS Directive (2011/65/EU). It does not contain harmful and prohibited materials specified in the Directive. 1.6 Package information • Packaging materials of the product are manufactured from recyclable materials in accordance with our National Environment Regulations. Do not dispose of the packaging materials together with the domestic or other wastes.
2 Your appliance *1 *16 14 17 *15 *3 14 *4 *5 *2 *13 *6 18 *12 *7 *11 *10 *9 8 8 1. 2. 3. 4. 5. 6. 7. 8. 9. Freezer - compartment door shelf Temperature setting button Water dispenser filling tank Egg section Water dispenser reservoir Storage container under the door shelf Movable door shelf Adjustable feet Crisper C 10. 11. 12. 13. 14. 15. 16. 17. 18.
3 Installation 3.1. Appropriate installation location Contact an Authorized Service for the installation of the product. In order to prepare the product for use, refer to the information in the user manual and ensure that electrical installation and water installation are appropriate. If not, call a qualified electrician and technician to have any necessary arrangements carried out. B B A • Appropriate air ventilation must be provided around your product in order to achieve an efficient operation.
Installation 3.2.Adjusting the feet If the product stands unbalanced after installation, adjust the feet on the front by rotating them to the right or left. 3.3.Electrical connection A B C WARNING: Do not make connections via extension cables or multi-plugs. WARNING: Damaged power cable must be replaced by the Authorized Service Agent. If two coolers are to be installed side by side, there should be at least 1½ inches distance between them.
Installation 3.4. Connecting the water hose to the refrigerator Connect the water line to a water supply valve. If a valve is not present or you are not sure, consult a qualified plumber. 3.5.Connecting the water line to the water supply 1.Slip the union (B) onto the water hose (A). 2.Push the water hose downwards firmly to slip it onto the water inlet valve (C). 3.Tighten the union (C) by hand to secure it onto the water inlet valve. Normally, you are not required to tighten the union with a tool.
Installation Height (cm/inch) unpacked 172 -67 23/32” Width (cm/inch) unpacked 70.4 -27 23/32” Depth (cm/inch) unpacked 68.7- 27 3/64” Height (cm/inch)packed 178.8-70 25/64” Width (cm/inch)packed 74.5 - 29 21/64” Depth (cm/inch) packed 68.4-26 59/64” Gross Weight (Kg) / lbs 78 - 172 72 - 158.
Installation 3.6. Reversing the doors Proceed in numerical order .
Installation 3.7.Reversing the doors Proceed in numerical order .
4 Preparation 4.1. Things to be done for energy saving A energy saving and preserve the food quality. Connecting the product to electric energy saving systems is risky as it may cause damage to the product. • Do not leave the doors of your refrigerator open for a long time. • Do not put hot food or drinks in your refrigerator. • Do not overload the refrigerator, cooling capacity will fall when the air circulation inside is hindered.
5 Operating the product 5.1. Temperature setting button 5.2.Fast freeze The interior temperature of your refrigerator changes for the following reasons; • Seasonal temperatures, • Frequent opening of the door and leaving the door open for long periods, • Food put into the refrigerator without cooling down to the room temperature, • The location of the refrigerator in the room (e.g. exposing to sunlight). • You may adjust the varying interior temperature due to such reasons by using the setting button.
Operating the product 5.3.Vacation function If the doors of the product are not opened for 12 hours after the temperature control knob is switched to the hottest position, then the vacation function will be activated automatically. To cancel the function, change the knob setting. It is not recommended to store food in cooler compartment when the vacation function is active. • When the setting operation is completed, you may press the temperature control knob and have it hidden.
Operating the product 5.4. Indicator panel Indicator panels may vary according to the product model. Audio – visual functions on the indicator panel help you in using your product. *1 2 3 4 10 9 8 *7 6 5 1. Automatic Ice Machine Off/On indicator 2. Fridge Compartment Indicator 3. Error Status Indicator 4. Temperature Indicator 5. Vacation Button 6. Temperature Setting Button 7. Ice Cancel Button 8. Compartment Selection Button 9. Freezer Compartment Indicator 10.
Operating the product 8. Refrigerator Compartment 1. Automatic Ice Machine Off/On indicator Selection Button Press Refrigerator Compartment Selection Button to switch between fridge and freezer compartments. This symbol appears on the display when Ice Off function is activated. 2. Fridge Compartment Indicator Fridge compartment light illuminates when adjusting the fridge compartment temperature. 3.
Operating the product 5.5. Egg holder 5.7. Crisper You can install the egg holder to the desired door or body shelf. If it will be placed on body shelves then the lower cooler shelves are recommended. A 5.6. Crisper of the product is designed specially to keep the vegetables fresh without losing their humidity. For this purpose, cool air circulation is intensified around the crisper in general.
Operating the product 5.9. Auto Icematic Model FF1511SS does not include the Auto Icematic feature. (This feature is optional) The Auto Icematic allows you to make ice in the fridge easily. Remove the water tank in the fridge compartment, fill it with water and install it back to obtain ice from the Icematic. First ice cubes will be ready in approximately 2 hours in the Icematic drawer located in the freezer compartment.
Operating the product 5.10. Freezing fresh food • In order to preserve the quality of the food, it should be frozen as quickly as possible when it is placed in the freezer compartment. Use the fast freezing feature for this purpose. • You may store the foods longer in freezer compartment when you freeze them while they are fresh. • Pack the food to be frozen and close the packing so that it will be air-tight. • Ensure that you wrap your foods well before putting them in the freezer.
Operating the product 5.11. Recommendations for preserving frozen food Compartment no higher than -18°C. 1. Put packages in the freezer as quickly as possible after purchase without allowing them to thaw. 2. Check whether the "Use By" and "Best Before" dates on the packaging are expired or not before freezing. 3. Ensure that the food package is not damaged. 5.12. Deep-freeze information According to IEC 62552 standards, the product shall freeze at least 4.5 kg(9.
Operating the product Fresh zone compartment Delicatessen (breakfast food, meat products that will be consumed in a short time) 5.14. Door open warning The lamp(s) used in this appliance is not suitable for household room An audio warning signal will be given illumination. The intended purpose of when the door of your product is left this lamp is to assist the user to place open for at least 1 minute.
6 Maintenance and cleaning Service life of the product is increased if it is regularly cleaned B WARNING: First unplug the product before cleaning your refrigerator. • Never use any sharp or abrasive tools, soap, household cleaners, detergent and wax polish for cleaning. • Dissolve one teaspoon of baking soda in a half-quart of water. Soak a cloth with the solution and wring it out thoroughly. Wipe the interior of the appliance with this cloth and then dry thoroughly.
Maintenance and cleaning Non-alkaline and non-corrosive materials must be used for cleaning so that the service life of this coating lasts for a long time. This glass is tempered to increase its durability against impacts and breaking. A safety film is also applied to its rear surface as an extra safety measure to prevent damage to its surroundings in case of a breakage.
7 Troubleshooting Check this list before calling for service. Doing so will save you time and money. This list includes frequent complaints that are not related to faulty workmanship or materials. Certain features mentioned herein may not apply to your product. The refrigerator is not working. • The power plug is not fully seated. >>> Plug it in to seat completely into the socket. • The fuse connected to the socket powering the product or the main fuse is blown. >>> Check the fuses.
Troubleshooting • The new product may be larger than your previous one. Larger products will run for longer periods. • The room temperature may be high. >>> The product will normally run for long periods in higher room temperature. • The product may have been recently plugged in or a new food item is placed inside. >>> The product will take longer to reach the set temperature when recently plugged in or a new food item is placed inside.
Troubleshooting • The floor is not level or firm. >>> If the product is vibrating, adjust the stands to balance the product. Also make sure the floor is firm enough to bear the product. • Any items placed on the product may cause noise. >>> Remove any items placed on the product. The product is making noise of liquid flowing, spraying etc. • The product’s operating principles involve liquid and gas flows. >>> This is normal and not a malfunction. There is sound of wind blowing coming from the product.
8 LIMITED WARRANTY LIMITED WARRANTY ONE-YEAR LIMITED WARRANTY Within the 48 contiguous United States, for one year from the date of purchase, when this appliance is operated and maintained according to instructions attached to or furnished with the product, warrantor will pay for factory-specified parts and repair labor to correct defects in materials or workmanship. Service must be provided by a designated service company.
es Manual de instrucciones
Lea este manual de usuario antes de utilizar el aparato. Estimado cliente: Esperamos que este aparato, que ha sido fabricado en plantas dotadas de la más avanzada tecnología y sometido a los más estrictos procedimientos de control de calidad, le preste un servicio eficaz. Por lo tanto, lea detenidamente este manual de instrucciones antes de utilizar el aparato y guardar el manual como referencia. Si entrega el aparato a otro propietario, no olvide incluir el manual de usuario.
Contenidos 1 Instrucciones importantes para la seguridad y el medio ambiente 3 2 Familiarizarse con el electrodoméstico 8 3 Instalación 9 3.1. Ubicación adecuada para la instalación . . . . . . . . . . . . . . . . . . . .9 3.2. Ajuste de los pies . . . . . . . . . . . . . . 10 3.3. Conexión eléctrica . . . . . . . . . . . . . 10 3.4. Conexión de la manguera de agua al frigorífico . . . . . . . . . . . . . . . . . . . .11 3.5. Conectar el agua al frigorífico al suministro de agua . . . . . . . . .
1 Instrucciones importantes para la seguridad y el medio ambiente Esta sección contiene instrucciones sobre seguridad que le ayudarán a protegerse de posibles riesgos de lesiones o daños a la propiedad. La no observancia de estas instrucciones invalidará la garantía. • Se recomienda limpiar regularmente la punta del enchufe con un paño seco. 1.1.
Instrucciones para la seguridad y el medio ambiente • No utilice dispositivos mecánicos u otros medios para acelerar el proceso de descongelación distintos de los recomendados por el fabricante. • No utilice nunca elementos del frigorífico tales como la puerta y el cajón como medio de sujeción o como escalón. ya que podría provocar que el aparato volcara o dañar algunas de sus partes. • Evite dañar el circuito del refrigerante con herramientas cortantes o de perforación.
Instrucciones para la seguridad y el medio ambiente C C A Si el aparato está equipado con un sistema de refrigeración que 1.2. Finalidad prevista contiene gas R134a, ignore esta • Este aparato ha sido diseñado para advertencia. uso doméstico. No es adecuado Puede ver qué gas se ha para un uso comercial y no debe utilizado en la fabricación dársele otros usos distintos del uso de su aparato en la placa de previsto. características ubicada en la • El aparato debe utilizarse solamenparte interior izquierda.
Instrucciones para la seguridad y el medio ambiente 1.6 Información sobre el embalaje 1.4.Conformidad con la normativa RAEE y eliminación del aparato al final de su vida útil: Este producto es conforme con la directiva de la UE sobre residuos de aparatos eléctricos y electrónicos (WEEE) (2012/19/UE). Este producto tiene un símbolo de clasificación para el deshecho de equipos eléctricos y electrónicos (RAEE).
Instrucciones para la seguridad y el medio ambiente A A ADVERTENCIA:: Riesgo de incendio o explosión. Deshágase del aparato adecuadamente, según lo dispuesto por las normativas nacionales o locales. Se usa refrigerante inflamable. ADVERTENCIA:: Precaución - Riesgo de incendio o explosión debido a la perforación de los tubos de refrigerante; siga las instrucciones cuidadosamente. Se usa refrigerante inflamable.
2 Familiarizarse con el electrodoméstico *1 *16 14 17 *15 *3 14 *4 *5 *2 *13 *6 18 *12 *7 *11 *10 *9 8 8 1. Estante de la puerta del compartimento congelador 2. Botón de ajuste de la temperatura 3. Contenedor de llenado del dispensador de agua 4. Huevera 5. Depósito del dispensador de agua 6. Contenedor de almacenamiento bajo el estante de la puerta 7. Estante móvil 8. Pies ajustables 9. Cajón de frutas y verduras C 10. 11. 12. 13. 14. 15. 16. 17. 18.
3 Instalación 3.1. Ubicación adecuada para la instalación • Para lograr un funcionamiento eficiente, el aparato debe instalarse en una zona que disponga de una Contacte con un Servicio Técnico ventilación adecuada. Si va a colocar autorizado para la instalación del el aparato en un hueco de la pared, no aparato.
Instalación 3.2.Ajuste de los pies Si el aparato no queda equilibrado tras su instalación, ajuste las pies frontales girándolos de la derecha a la izquierda. • No use cables de extensión ni múltiples tomacorrientes sin cable entre el aparato y la toma de pared. 3.3.Conexión eléctrica A B C ADVERTENCIA: No utilice cables de extensión ni ladrones para realizar la conexión eléctrica. ADVERTENCIA: Deje en manos de un servicio técnico autorizado la sustitución de un cable de alimentación dañado.
Instalación 3.4. Conexión de la manguera de agua al frigorífico Conecteel agua al frigorífico a una válvula de suministro de agua. En caso de que no haya esta válvula no esté presente o si tiene alguna duda, consulte a un fontanero cualificado. 3.5.Conectar el agua al frigorífico al suministro de agua 1.Inserte la manguera de agua (A) en el racor (B). 2.Empuje la manguera del agua hacia abajo con fuera para que se introduzca en la válvula de entrada de agua (C). 3.
Instalación Altura: (cm/inch) desempaquetados 172 -67 23/32” Anchura: (cm/pulgadas) desempaquetados 70.4 -27 23/32” Profundidad: (cm/pulg) desempaquetados 68.7- 27 3/64” Altura: (cm/inch) empaquetados 178.8-70 25/64” Anchura: (cm/pulgadas) desempaquetados 74.5 - 29 21/64” Profundidad: (cm/pulg) empaquetado 68.4-26 59/64” Peso Bruto (Kg) / lbs 78 - 172 Peso Neto (Kg) / lbs 72 - 158.
Instalación 3.6. Inversión de las puertas Proceder en orden numérico.
Instalación 3.7.Inversión de las puertas Proceder en orden numérico.
4 Preparación 4.1. Consejos para el ahorro de energía A electrodoméstico. Por lo tanto, se debe evitar todo contacto con el/los sensor/es. El aparato podría sufrir daños si se conecta a sistemas de ahorro de energía, por lo que es arriesgado. • No deje las puertas del frigorífico abiertas durante periodos largos de tiempo. • No introduzca alimentos o bebidas calientes en el frigorífico.
4 Preparación C C C Se oye un ruido cada vez que el compresor se pone en funcionamiento. Los líquidos y los gases contenidos en el sistema de refrigeración pueden también generar ruidos, incluso aunque el compresor no esté funcionando, lo cual es normal. Es posible que las aristas delanteras del aparato se noten calientes al tacto. Esto es normal. Estas zonas deben permanecer calientes para evitar la condensación.
5 Manejo del aparato 5.1. Botón de ajuste de la temperatura 5.2.Congelación rápida Si va a congelar grandes cantidades de alimentos frescos, ponga el mando de control en la posición de ( ) máx. 24 Temperatura de la estación. horas antes de depositar los alimentos Abrir la puerta con frecuencia y dejarla en el compartimento de congelación abierta durante mucho tiempo. rápida.
Funcionamiento del aparato Recuerde volver a situar el mando del termostato en su posición previa una vez los alimentos se hayan congelado. 5.3.Función de vacaciones Si las puertas del aparato no se abren durante 12 horas tras poner el termostato en la posición de máximo calor, la función de vacaciones se activará automáticamente. Para cancelar la función, cambie los ajustes del mando. No se recomienda almacenar alimentos en el compartimento de más frío cuando la función de vacaciones esté activa.
Funcionamiento del aparato 5.4. Panel indicador Los paneles indicadores pueden variar dependiendo del modelo de aparato. Las funciones audiovisuales del panel indicador le ayudan a utilizar el aparato. *1 2 3 4 10 9 8 *7 6 5 1. Indicador de funcionamiento automático de la máquina de hielo automática 2. Indicador del compartimento frigorífico 3. Indicador de error 4. Indicador de temperatura 5. Botón del modo vacaciones 6. Botón de ajuste de la temperatura 7.
Funcionamiento del aparato 1. Indicador de funcionamiento automático de la máquina de hielo automática 6. Botón de ajuste de la temperatura 2. Indicador del compartimento frigorífico 7. Botón de cancelación de la formación de hielo Este símbolo aparece en la pantalla al activar la función de cancelación de la formación de hielo La luz del compartimento frigorífico se enciende al ajustar la temperatura del compartimento frigorífico. 3.
Funcionamiento del aparato 5.5. Huevera Puede instalar la huevera en la puerta o el estante que desee. Si va a colocarlo en los estantes del cuerpo, se recomienda usar los estantes inferiores más fríos. A 5.6. No ponga la huevera en el compartimento congelador 5.7. Cajón de frutas y verduras El cajón de frutas y verduras de su aparato está especialmente diseñado para mantener la frescura de sus vegetales sin que pierdan su humedad.
Funcionamiento del aparato 5.9. Icematic automático (Característica opcional) El Icematic automático le permite fabricar hielo en el frigorífico fácilmente. Retire el depósito del agua del compartimento frigorífico, llénelo de agua y vuélvalo a colocar para obtener hielo del sistema Icematic. Los primeros cubitos estarán disponibles al cabo de unas dos horas en la cubitera del sistema Icematic ubicada en el compartimento congelador.
Funcionamiento del aparato 5.10. Congelación de alimentos frescos • Para preservar la calidad de los alimentos, debe congelarlos tan pronto como sea posible cuando los coloque en el compartimento congelador. Utilice la función de congelación rápida para esta finalidad. • Puede guardar los alimentos durante más tiempo en el compartimento congelador cuando los congele cuando estén frescos. • Envuelva los alimentos que vaya a congelar y cierre el envase para que quede hermético.
Funcionamiento del aparato 5.11. Recomendaciones para la conservación de alimentos congelados El compartimento no debe está a más de -18 °C. 1. Coloque los paquetes de alimentos congelados en el congelador lo antes posible tras su compra sin dejar que se descongelen. 2. Compruebe si las fechas de consumo preferente y caducidad de los envases han vencido o no antes de congelarlos. 3. Asegúrese de que el envase de comida no esté dañado. 5.12.
Funcionamiento del aparato Cajón de frutas y Verduras y frutas verduras Las delicatesen Compartimento (comida de desayuno, de alimentos productos cárnicos que frescos vayan a consumirse en poco tiempo) 5.14. Aviso de puerta abierta 5.16. Lámpara de iluminación (Característica opcional) El frigorífico emitirá una señal acústica de aviso cuando la puerta del aparato permanezca abierta más de un 1 minuto.
6 Mantenimiento y limpieza 6.1. Cómo evitar malos olores La vida útil del aparato aumentará si lo limpia regularmente. B ADVERTENCIA: Desenchufe primero el aparato antes de limpiarlo. • No utilice nunca para la limpieza herramientas afiladas o abrasivas, jabones, limpiadores domésticos, detergentes ni ceras abrillantadoras. • Disuelva una cucharadita de bicarbonato en medio cuarto de agua. Empape un trapo en la solución y escúrralo totalmente.
Mantenimiento y limpieza 6.3. Vidrios de las puertas Retire la lámina protectora de los vidrios. Hay una capa que reduce al mínimo la formación de manchas y ayuda a eliminarlas con facilidad, así como la suciedad que pueda depositarse.
7 Resolución de problemas Consulte la siguiente lista antes de llamar al servicio técnico. Si lo hace podrá ahorrar tiempo y dinero. La lista incluye las quejas más comunes que no tienen relación con un problema de fabricación ni con el material usado. Puede que ciertas características mencionadas aquí no sean de aplicación a este aparato. El frigorífico no funciona. • El enchufe de alimentación no está colocada correctamente. >>> Enchúfelo para colocarlo correctamente en la toma de alimentación.
Resolución de problemas • Puede que su nuevo aparato sea más grande que el que tenía anteriormente. Los aparatos más grandes funcionarán durante más tiempo. • Puede que la temperatura ambiente sea alta. >>> El aparato funcionará normalmente durante largos períodos de tiempo con una temperatura ambiente más alta. • Puede que el aparato se haya enchufado recientemente o que se haya colocado un nuevo alimento en su interior.
Resolución de problemas • La temperatura del compartimento congelador está fijada a un grado muy bajo. >>> La temperatura del compartimento refrigerador incide en la temperatura del compartimento congelador. Cambie las temperaturas del frigorífico o el congelador y espere hasta que la temperatura de los compartimentos correspondientes estén a un nivel adecuado. • Las puertas se han abierto demasiado a menudo o se dejan abiertas durante largos períodos de tiempo.
Resolución de problemas El interior huele mal. • El producto no se limpia regularmente. >>> Limpie el interior regularmente con una esponja, agua caliente y bicarbonato. • Ciertos recipientes y materiales de embalaje pueden causar mal olor. >>> Utilice recipientes y materiales de embalaje libres de malos olores. • Los alimentos están guardados en recipientes no sellados. >>> Guarde los alimentos en recipientes sellados.
8 GARANTÍA LIMITADA LIMITED WARRANTY ONE-YEAR LIMITED WARRANTY Within the 48 contiguous United States, for one year from the date of purchase, when this appliance is operated and maintained according to instructions attached to or furnished with the product, warrantor will pay for factory-specified parts and repair labor to correct defects in materials or workmanship. Service must be provided by a designated service company.
57 6496 0000/AE EN-ES