USE & CARE GUIDE PLUS Series REFRIGERATORS AND FREEZERS FOR GENERAL PURPOSE STORAGE MED/MEDDT Series REFRIGERATORS AND FREEZERS FOR MEDICAL STORAGE If you need service or call with a question, please have this information ready. We advise you to keep this Use & Care Guide in your possession. Model: ___________ Serial number: _________________ Options added: Date of purchase: Dealer: NOTE: This manual is also available in French. Look on our website. FELIX STORCH, INC.
Model Numbers PLUS Models: • FF6 / FF7 / FF28LWH / FF511L / FF521BL / FFAR2L / FFAR21L / FFAR24L / FF590SSHH PLUS Series All-refrigerators with automatic defrost or frost-free operation • VT65ML PLUS Series Low temperature freezers • FFAR10 PLUS Series Full-size storage all-refrigerators • FS20L / FS21L / FS22L / FS24L PLUS Series Compact all-freezers (-20°C) • CM411L / CM421BL / CP35LL / CT66 / S19LWH PLUS Series Compact refrigerator-freezers • FCL44 / FS30L / FS60ML / FS407L / FS408BL PLUS Series Com
Table of Contents Model Numbers ......................................................................... 1 Appliance Safety ....................................................................... 3 Proper disposal of an old appliance ..................................... 3 Installation Instructions ........................................................... 4 Key Eject lock ....................................................................... 4 Location Requirements ......................................
Appliance Safety Your safety and the safety of others are very important to us. We have provided many important safety messages in this manual and on your appliance. Always read and obey all safety messages. You can be seriously injured or even killed if you don’t follow instructions. Safety messages will tell you what the potential hazard is, how to reduce the chance of injury, and what can happen if the instructions are not followed.
Installation Instructions Excessive Weight Hazard ! Use two or more people to move and install your appliance. Failure to do so can result in back or other injury. ALLOW APPLIANCE TO SIT UPRIGHT FOR 24 HOURS BEFORE TURNING ON, TO ALLOW THE COMPRESSOR LUBRICANT TO DRAIN. 1. Remove packaging materials. 2. Remove tape and glue residue from surfaces before turning on the appliance. Rub a small amount of liquid dish soap over the adhesive with your fingers. Rinse with warm water and dry. 3.
Location Requirements Keep flammable materials and vapors, such as gasoline, away from appliances. Failure to do so can result in fire, explosion or death. Location: IMPORTANT: Do not install the appliance near an oven, radiator, or other heat source, nor in a location where the temperature will fall below 40°F (5°C). Do not place in direct sunlight. Check the strength of the floor before installing your appliance. It should hold the weight of a fully loaded appliance.
Leveling your appliance (some upright models): Locate the two front leveling legs that may be taped among the packing materials. (In many models these legs are already mounted into the underside of the appliance.) 1. Screw these legs into the front holes on the bottom of the appliance. The back of the appliance rests on two fixed supports. (Built-in models also have rear level legs that can provide more precise leveling). 2. Adjust the front legs just enough to lift the cabinet up off the floor.
Appliance Care Cleaning a frost-free appliance: Use nonflammable cleaners. Frost-free means that you do not have to defrost your appliance. Frost is removed by air moving and collecting any moisture and depositing it on the cooling coil. The cooling coil periodically warms up enough to melt the frost, and the water then flows down to the drain pan (located behind the base grill) where it is evaporated. Complete cleaning should be done at least once a year. 1. Unplug appliance or disconnect power. 2.
Base grill (some models only): To Remove and Replace the Base Grill: 1. Open the appliance door and remove the base grill by pulling down and out from the top. 2. Replace the base grill by putting the clips in the openings in the appliance panel. Push in until the base grill snaps into place. Changing the light bulb (some models only): NOTE: Not all appliance bulbs will fit your appliance. Be sure to replace the bulb with one of the same size, shape, base size and wattage. You can purchase bulbs from www.
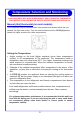
Temperature Selection and Monitoring YOUR APPLIANCE MAY HAVE A MECHANICAL (DIAL) OR DIGITAL THERMOSTAT. DIAL INSTRUCTIONS ARE BELOW. DIGITAL INSTRUCTIONS ARE ON PAGE 10. Manual (dial) thermostat (on most models): Your refrigerator may be controlled with a thermostat knob located inside the unit, towards the right-hand corner. Turn the knob clockwise from the STOP (0) position toward the higher numbers for colder temperatures.
Digital thermostat (on certain models): If you find it necessary to change the temperature setting for your digital-thermostat controlled appliance, please refer to the following instructions. The front panel of the melting thermostat is illustrated here: snowflake snowflake UP & DOWN arrows SET key To see the SET POINT: Push and immediately release the SET key. The display will show the SET POINT value. Wait 5 seconds and the probe value will display again.
Traceable thermometer/alarm (MED models): Every MED unit is equipped with a Traceable Thermometer/Alarm that simultaneously displays minimum, maximum and current interior temperatures and provides a visual and audible signal when the temperature inside the unit falls outside the set temperature range. The temperature sensor, or probe, is enclosed in a glycol-filled bottle that you insert into the location to be monitored, such as inside a refrigerator or freezer, once the unit has been programmed.
Thermometer/alarm instructions (cont’d): By default, the low and high alarms should be audible. To turn alarms on/off: Audible High Alarm Setting: To make sure the high alarm is audible, press HIGH/LOW key ONCE (to activate HI-SET on the screen). Then press the ALERT ON/OFF key ONCE to activate the HIGH-ALARM beeping sound. Press again to deactivate. Audible Low Alarm Setting: To make sure that the low temperature alarm is audible, press the HIGH/LOW key TWICE to activate LOW-SET on the screen.
Operation of Specific Models SCFF51OSWH MED Series These frost-free all-freezers can be built-in or free-standing. They do not require defrosting and have a digital thermostat, LED lighting and a lock. At the top of the unit is a cooling system that uses a fan to provide cold air. For best operation, do not block the air flow with contents.
Troubleshooting Try these solutions first to avoid the cost of an unnecessary service call. Your appliance will not operate: • Has a household fuse blown or circuit breaker tripped? Replace the fuse or reset the circuit breaker. • Is the freezer defrosting (on some models)? Recheck to see whether the freezer is operating in 30 minutes. Your freezer will regularly run an automatic defrost cycle. There is water in the defrost drain pan (on some models): • Is the freezer defrosting? The water will evaporate.
Limited Warranty ONE YEAR LIMITED WARRANTY FOR APPLIANCE Within the 48 contiguous United States, for one year from the date of purchase, when this appliance is operated and maintained according to instructions attached to or furnished with the product, warrantor will pay for factory-specified parts and repair labor to correct defects in materials or workmanship. Service must be provided by a designated service company. Outside the 48 states, all parts are warranted for one year from manufacturing defects.