
Use and Care Manual


11
Starting + Stopping
The variable speed trigger switch delivers higher speed with
increased trigger pressure and lower speed with decreased
trigger pressure.
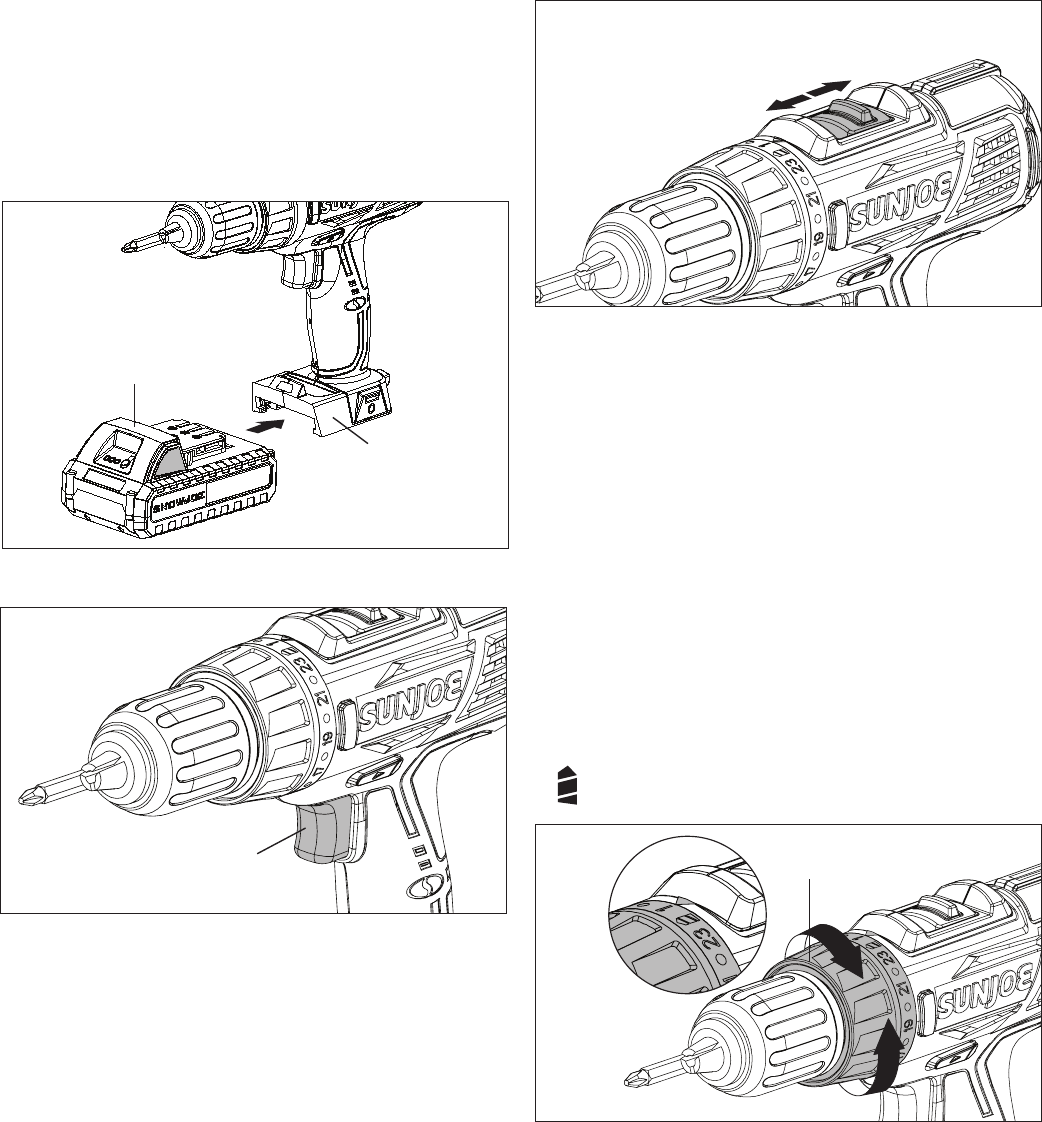
1. Set the direction of rotation selector in the OFF (center
lock) position to lock the switch trigger (Fig. 12).
2. Insert the battery in the battery compartment (Fig. 13).
3. To turn the drill ON, depress the trigger switch (Fig. 14).
4. To turn it OFF, release the trigger switch and allow the
chuck to come to a complete stop (Fig. 14).
NOTE: A whistling or ringing noise coming from the switch
during use is a normal part of the switch function.
NOTE: Running at low speeds under constant usage may
cause the drill to become overheated. If this occurs, cool the
drill by running it without a load and at full speed.
Speed Settings
1. Select low speed (1) for applications requiring higher
power and torque, such as driving screws and drilling in
metal (Fig. 16).
2. Select high speed (2) for fast drilling or driving
applications, for drilling in wood or masonry (Fig. 15).
mCAUTION! Never change speeds while the tool is
running. Failure to obey this caution could result in serious
damage to the drill.
NOTE: If you have diculty changing from one speed range to
the other, turn the chuck by hand until the gears engage.
Adjusting Torque
Select the proper torque setting by aligning the adjustment ring
with the indicator arrow to suit the type of material and size of
screw you are using (Fig. 16).
• 1 - 4 For driving small screws
• 5 - 8 For driving screws into soft material
• 9 - 12 For driving screws into soft and hard materials
• 13 - 16 For driving screws into hard wood
• 17 - 20 For driving large screws
• 21 - 23 For heavy drilling
•
For heavy drilling
LED Light
The cordless drill/driver is equipped with an LED light to
provide additional lighting for operation in low light conditions.
The LED light will turn on when the trigger switch is pressed
(Fig. 17).
Fig. 13
Battery
compartment
Battery
Fig. 14
Trigger switch
Fig. 15
Speed settings
2
1
Fig. 16
Torque adjustment ring