
Use and Care Manual

9
IMPORTANT! Never allow the battery pack to become fully
discharged as this will cause irreversible damage to the
battery.
6. When charging is complete, remove the battery from the
charger by pulling the push lock button and sliding the
battery backward to unlock it from the charger.
Assembly
mWARNING! Always remove battery pack from the tool
when you are assembling parts, making adjustments, cleaning,
or when not in use. Removing battery pack will prevent
accidental starting that could cause serious personal injury.
mWARNING! Do not use any attachments or accessories
not recommended by the manufacturer of this product.
The use of attachments or accessories not recommended can
result in serious personal injury.
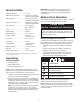
Applications
You may use this drill/driver for the purposes listed below:
• Drilling in all types of wood products (lumber, plywood,
paneling, composition board, and hard board), ceramics,
plastics, berglass, laminates, and metals; driving screws
into wood and drywall with screwdriver bits.
Operation
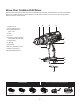
Installing + Removing Drill Bits
The arrows on the keyless chuck indicate which direction to
rotate the chuck sleeve to tighten or release the drill bit.
Do not use a wrench to tighten or loosen the chuck jaws.
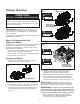
1. To install bits, set the direction of rotation selector in the
LOCK (center lock) position to lock the switch trigger
(Fig. 4).
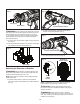
2. Rotate the chuck sleeve counterclockwise to open the
chuck jaws until the opening is slightly larger than the bit
size you intend to use (Fig. 5).
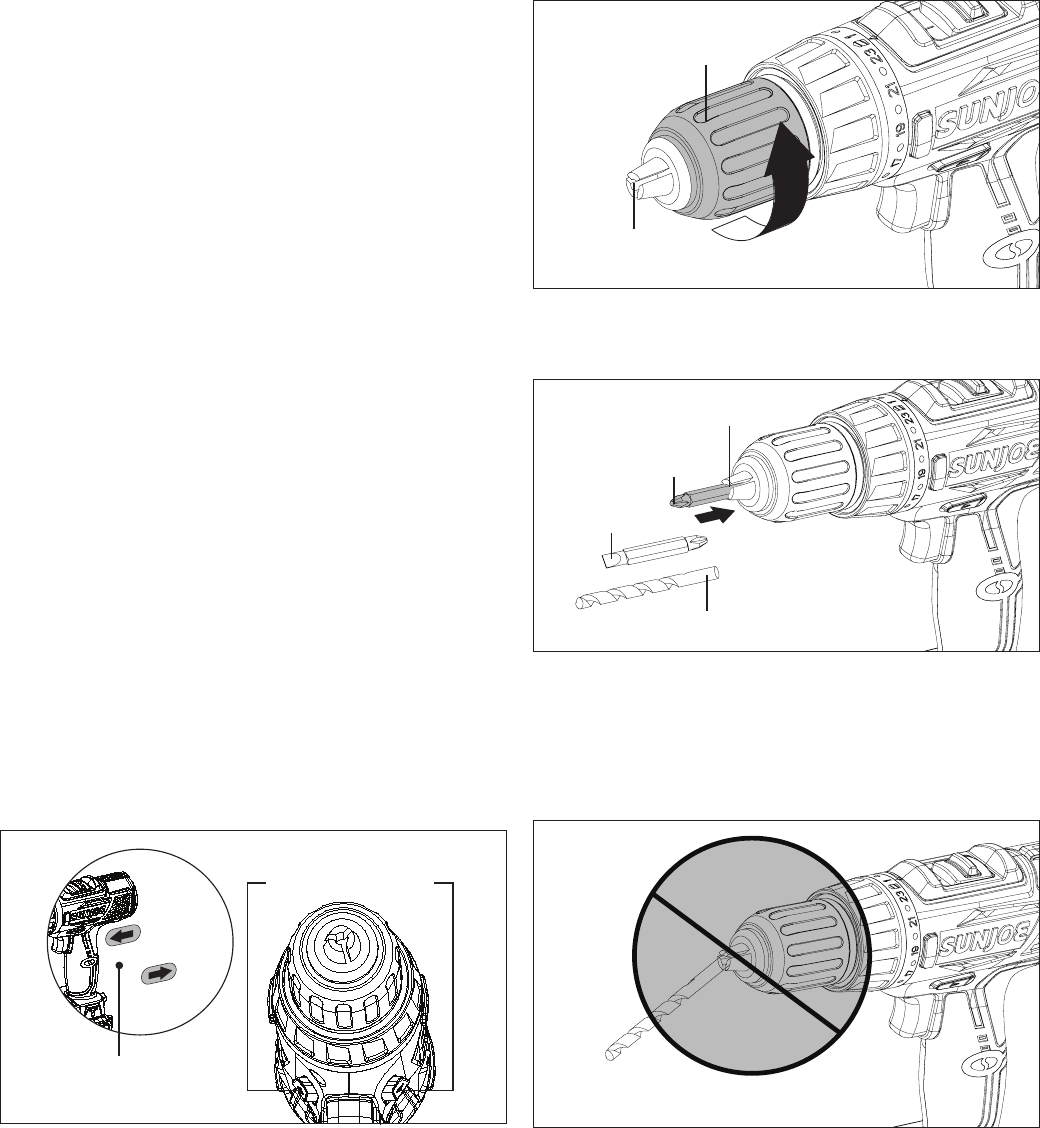
3. Raise the front of the drill slightly and insert the double-
ended driver bit or drill bit (Fig. 6).
NOTE: Drill bit is not included.
mWARNING! Make sure to insert the driver bit/drill bit
straight into the chuck jaws. Do not insert the driver bit/drill bit
into the chuck jaws at an angle, then tighten. This could cause
the driver bit/drill bit to be thrown from the drill, resulting in
possible serious personal injury or damage to the chuck
(Fig. 7).
4. Rotate the chuck sleeve clockwise to close and tighten
the chuck jaws (Fig. 8).
Fig. 4
Direction of
rotation selector
Forward
Reverse
Lock
Center
"LOCK"
position
Fig. 5
Chuck sleeve
Chuck jaws
opening
Fig. 6
Drill bit (not included)
Slotted
head
Opening
Phillips
head
Fig. 7
Wrong/incorrect