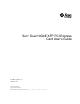
Sun™ Dual 10GbE XFP PCI Express Card User’s Guide Sun Microsystems, Inc. www.sun.com Part No. 820-0184-13 January 2009, Revision A Submit comments about this document at: http://www.sun.
Copyright 2009 Sun Microsystems, Inc., 4150 Network Circle, Santa Clara, California 95054, U.S.A. All rights reserved. Sun Microsystems, Inc. has intellectual property rights relating to technology embodied in the product that is described in this document. In particular, and without limitation, these intellectual property rights may include one or more of the U.S. patents listed at http://www.sun.com/patents and one or more additional patents or pending patent applications in the U.S.
Contents Preface 1. xiii Product Overview Components 1 1 Product Description 1 Hardware and Software Requirements Features 2. 2 3 Installing and Setting Up the Driver 5 Downloading and Installing the Driver on a Solaris SPARC or x86 Platform ▼ To Download the Driver on a Solaris Platform 5 ▼ To Remove the Driver from a Solaris Platform 8 Downloading and Installing the Driver on a Linux Platform ▼ 3.
▼ To Verify the Hardware Installation Rebooting the System 4.
▼ To Set Parameters Using the ethtool Utility ▼ To Set Parameters Using the Bundled configtool Utility 44 Tuning for Maximum Performance on a Linux Platform 6. Configuring the Jumbo Frames Feature Jumbo Frames Overview 51 51 To Show the Driver Statistics in a Solaris Environment Enabling Jumbo Frames in a Solaris Environment 53 To Enable Jumbo Frames in a Solaris Environment Using nxge.
A. Specifications Connectors 71 71 Performance Specifications Physical Characteristics B.
Tables TABLE 1-1 Hardware and Software Requirements for Sun SPARC and X64 Servers TABLE A-1 XFP Connector Characteristics TABLE A-2 Performance Specifications TABLE A-3 Physical Characteristics TABLE A-4 Low-Profile Power Requirements TABLE B-1 SunVTS Documentation 2 72 72 73 73 76 vii
viii Sun Dual 10GbE XFP PCI Express Card User’s Guide • January 2009
Figures FIGURE 1-1 Sun x8 Express Dual 10 Gigabit Ethernet Fiber XFP Low Profile Adapter 2 FIGURE 8-1 Example of Servers Supporting Multiple VLANs With Tagging Adapters FIGURE 8-2 Ethernet Tag Header Format FIGURE A-1 Sun x8 Express Dual 10 Gigabit Ethernet XFP Low Profile Adapter Connectors 68 70 73 ix
x Sun Dual 10GbE XFP PCI Express Card User’s Guide • January 2009
Declaration of Conformity Compliance Model Number: Product Family Name: ATLS2XGF Sun x8 Express Dual 10 Gigabit Ethernet Fiber XFP Low Profile Adapter EMC USA—FCC Class A This equipment complies with Part 15 of the FCC Rules. Operation is subject to the following two conditions: 1. This equipment may not cause harmful interference. 2. This equipment must accept any interference that may cause undesired operation.
xii Sun Dual 10GbE XFP PCI Express Card User’s Guide • January 2009
Preface This guide provides instructions for installing both the hardware and software for the Sun Dual 10GbE XFP PCI Express card. This manual also describes how to configure the nxge driver, which controls the card. These instructions are designed for enterprise system administrators with experience installing network hardware and software.
Chapter 6 describes how to configure the Jumbo Frame feature. Chapter 7 describes how to configure link aggregation. Chapter 8 explains Virtual Local Area Networks (VLANs) in detail and provides configuration instructions and examples. Appendix A lists the specifications for the Sun x8 Express Dual 10 Gigabit Ethernet Fiber XFP Low Profile Adapter. Appendix B provides an overview of the SunVTS™ diagnostic application and instructions for updating the SunVTS software to recognize the adapter.
Shell Prompts Shell Prompt C shell machine-name% C shell superuser machine-name# Bourne shell and Korn shell $ Bourne shell and Korn shell superuser # Typographic Conventions Typeface* Meaning Examples AaBbCc123 The names of commands, files, and directories; on-screen computer output Edit your.login file. Use ls -a to list all files. % You have mail.
Related Documentation The documents listed as online are available at: http://www.sun.com/documentation/ Application Title Part Number Format Location Release Notes Sun x8 Express Dual 10 Gigabit Ethernet XFP Low Profile Adapter Release Notes 820-0185 PDF HTML Online Safety and compliance Safety and Compliance Manual 816-7190 PDF HTML Online Documentation, Support, and Training Sun Function URL Documentation http://www.sun.com/documentation/ Support http://www.sun.
Sun Welcomes Your Comments Sun is interested in improving its documentation and welcomes your comments and suggestions. You can submit your comments by going to: http://www.sun.
xviii Sun Dual 10GbE XFP PCI Express Card User’s Guide • January 2009
CHAPTER 1 Product Overview This chapter provides an overview of the Sun x8 Express Dual 10 Gigabit Ethernet Fiber XFP Low Profile Adapter, including: ■ ■ ■ ■ “Components” on page 1 “Product Description” on page 1 “Hardware and Software Requirements” on page 2 “Features” on page 3 Components The carton in which your Sun x8 Express Dual 10 Gigabit Ethernet Fiber XFP Low Profile Adapter was shipped should contain the following items: ■ ■ ■ Sun x8 Express Dual 10 Gigabit Ethernet Fiber XFP Low Profile Ada
FIGURE 1-1 Sun x8 Express Dual 10 Gigabit Ethernet Fiber XFP Low Profile Adapter Hardware and Software Requirements Before installing the adapter, make sure your system meets the hardware and software requirements. TABLE 1-1 lists the supported hardware and software.
Features The Sun x8 Express Dual 10 Gigabit Ethernet Fiber XFP Low Profile Adapter provides the following features: ■ Two full-duplex 10 gigabit Ethernet interface that use a 10 gigabit Ethernet small form factor pluggable (XFP), optical transceiver with duplex LC fiber connector ■ IEEE 802.3ae 2002 compliant ■ Uses Sun’s own ASIC and software for innovative throughput networking design ■ Networking I/O virtualization supporting Solaris LDOM 1.0.
4 Sun Dual 10GbE XFP PCI Express Card User’s Guide • January 2009
CHAPTER 2 Installing and Setting Up the Driver This chapter explains how to download and install the nxge driver. The nxge gigabit Ethernet driver (nxge(7D)) is a multi-threaded, loadable, clonable, GLD-based STREAMS driver. The nxge driver is managed by the dladm(1M) command line utility, which allows VLANs to be defined on top of nxge instances and for nxge instances to be aggregated. See the dladm(1M) man page for more details on configuring the data-link interfaces and link aggregations.
2. Uncompress the gzipped tar file: # gunzip nxge.tar.gz 3. Unpack the tar file: # tar xvf nxge.tar a. For SPARC systems, change to the following directory: # cd 10_GigabitEthernet/Solaris_10/sparc/Packages b. For x86 systems: # cd 10_GigabitEthernet/Solaris_10/i386/Packages 4. For SPARC systems, determine which architecture your system is running: # uname -m a. For sun4v systems, install the software packages by typing the following at the command line: # /usr/sbin/pkgadd -d SUNWnxge.v SUNWnxgem b.
5. For x86 systems, install the software packages by typing the following at the command line: # /usr/sbin/pkgadd -d A menu similar to the following displays: The following packages are available: 1 SUNWnxge Sun PCI-E 10G/1G Ethernet Adapter Driver (i386) 1.0,REV=2006.12.05.10.0 Select package(s) you wish to process (or ’all’ to process all packages). (default: all) [?,??,q]: 6. Select the packages you want to install: ■ ■ Press Return or type all to accept the default and install all packages.
7. Verify that the nxge driver is installed on the system: Sun PCI-E 10G/1G Ethernet Adapter Driver(i386) 1.0,REV=2006.12.05.10.0 Copyright 2006 Sun Microsystems, Inc. All rights reserved. Use is subject to license terms. ## Executing checkinstall script. Using as the package base directory. ## Processing package information. ## Processing system information. 4 package pathnames are already properly installed. ## Verifying package dependencies. ## Verifying disk space requirements.
Downloading and Installing the Driver on a Linux Platform 1. Login to your system. 2. Download the driver RPM for your operating system: http://www.sun.com/download/products.xml?id=44eb1efd For example: nxge-1.0-1.x86_64.rpm 3.
Note – In RHEL5.0 and later releases, the driver is packaged in the kmod driver binary package format. This packaging allows forward and backward driver binary compatibility within the same flavors of RHEL5 releases. Driver packages nxge version 2.0.0 and later are not compatible with the earlier nxge-1.x-x releases. To upgrade from 1.x-x to 2.x.x rpm package, it is necessary to remove nxge-1.xx package before installing the 2.x.x package. The RHEL5 nxge 2.x.
7. Use the ethtool command to check the parameter configurations that apply to the nxge driver. (For 10G) # ethtool -i eth4 driver: nxge version: 2.0.1 firmware-version: 2XGF PXE1.47 FCode 3.9 07/04/24 bus-info: 0000:84:00.0 (Equivalent for 1G) # ethtool -i eth4 driver: nxge version: 2.0.1 firmware-version: QGC PXE1.47 FCode 3.9 07/04/24 bus-info: 0000:02:00.2 ▼ To Remove the Driver From a Linux Platform ● To remove the driver packages from a Linux Platform use the rpm -e command: # rpm -e nxge-1.
12 Sun Dual 10GbE XFP PCI Express Card User’s Guide • January 2009
CHAPTER 3 Installing the Adapter This chapter describes how to install the Sun x8 Express Dual 10 Gigabit Ethernet Fiber XFP Low Profile Adapter in your system and verify that it has been installed correctly.
Adapter in slot-2 of a Sun Fire T2000 system. The SATA cables from the adjacent card slot prevent the proper installation of an Sun x8 Express Dual 10 Gigabit Ethernet Fiber XFP Low Profile Adapter in this slot. (Note that this issue does not exist for Sun Fire T2000 that is RoHS compliant.
Note – These illustrations show the Sun x8 Express Dual 10 Gigabit Ethernet Fiber XFP Low Profile Adapter being installed into a Sun Fire T2000, which requires a standard height bracket for the low profile adapter. 6. Open the retaining clip at the edge of the PCI-E opening. 7. Holding the adapter by the edges, align the adapter edge connector with the PCI-E slot. Slide the adapter face plate into the small slot at the end of the PCI-E opening. 8.
9. Secure the retaining clip Caution – Do not use excessive force when installing the adapter into the PCI-E slot. You might damage the adapter’s PCI connector. If the adapter does not seat properly when you apply even pressure, remove the adapter and carefully reinstall it. 10. Detach the wrist strap and close the system unit.
11. Install the optical transceivers. Note – Illustrations for installing the adapter and installing the optical transceiver show different systems. This difference in systems provides the maximum clarity for installing the optical tranceiver and shows the most complicated adapter installation. Installing an Optical Transceiver The Sun x8 Express Dual 10 Gigabit Ethernet Fiber XFP Low Profile Adapter requires an optical transceiver in each port to create and Ethernet connection.
▼ To Install an Optical Transceiver 1. Pull the white locking handle into the full horizontal position. You will feel the handle click into position when it is fully opened. Note – If you are installing an optical transceiver in a SunFire T1000, ensure that the label and the edge connector is visible to you. 2. Holding the optical transceiver by the edges, align the transceiver with the slot in the Sun x8 Express Dual 10 Gigabit Ethernet Fiber XFP Low Profile Adapter and slide it into the opening. 3.
4. Push the handle closed to lock the optical transceiver in place. 5. Repeat Step 1 through Step 4 to install the second optical transceiver 6. Detach the wrist strap. Caution – If you pull the locking handle down when the optical transceiver is installed, remove the optical transceiver entirely and reinstall it. The handle operates an internal lock. Pulling the handle down can disconnect the optical transceiver, even though it might appear to be connected.
7. Connect the Ethernet cables. Verifying the Hardware Installation After you have installed the Sun 10-Gigabit Ethernet adapter, but before you boot your system, perform the following tasks to verify the installation. Refer to the your Solaris documentation for the detailed instructions. Note – Verification is not required if your system supports dynamic reconfiguration (DR). Verification is not supported if your system is running Solaris x86 software. ▼ To Verify the Hardware Installation 1.
3. View the device that you installed. Using the previous example, type: ok cd /pci@7c0/pci@0/pci@8/network@0,1 4. Use the .properties command to display a list of device properties. The .properties command displays the specific information about the device. If you are using the Sun x8 Express Dual 10 Gigabit Ethernet Fiber XFP Low Profile Adapter, your output will be similar to the following: ok .
5. Type the following when you finish looking at the .properties values: ok device-end Rebooting the System After verifying the adapter installation, use the boot -r command to perform a reconfiguration boot on your system.
CHAPTER 4 Network Configuration This chapter describes how to edit the network host files after the adapter has been installed on your system.
1. At the command line, use the grep command to search the /etc/path_to_inst file for nxge interfaces. # grep nxge /etc/path_to_inst # "/pci@7c0/pci@0/pci@9/network@0" 0 "nxge" # "/pci@7c0/pci@0/pci@9/network@0,1" 1 "nxge" # In this example, the device instance is from a Sun x8 Express Dual 10 Gigabit Ethernet Fiber XFP Low Profile Adapter installed in slot 1. Be sure to write down your device path and instance, which in the example is "/pci@7c0/pci@0/pci@9/network@0" 0.
■ The host name must be different from any other host name of any other interface, for example: /etc/hostname.nxge0 and /etc/hostname.nxge1 cannot share the same host name. The following example shows the /etc/hostname.nxgenumber file required for a system called zardoz that has a Sun x4 PCI-Express Gigabit Ethernet driver (zardoz-11). # cat /etc/hostname.nxge0 zardoz # cat /etc/hostname.nxge1 zardoz-11 3. Create an appropriate entry in the /etc/hosts file for each active nxge interface.
▼ To Set Up a 10-Gigabit Ethernet Port on a Diskless Client 1. Locate the root directory of the diskless client on the host server. The root directory of diskless client system is commonly installed in the host server’s /export/root/client-name directory, where client_name is the diskless client’s host name. In this procedure, the root directory is: /export/root/client-name 2. Download the software for Sun x8 Express Dual 10 Gigabit Ethernet Fiber XFP Low Profile Adapter onto the server’s drive. 3.
Installing the Solaris Operating System Over a 10-Gigabit Ethernet Network The Solaris Advanced Installation Guide describes the full procedure for installing the Solaris Operating System over the network. The following procedure assumes that you have created an install server, which contains the image of the Solaris CD, and that you have set up the client system to be installed over the network.
2. Find the root directory of the client system. The client system’s root directory can be found in the install server’s /etc/bootparams file. Use the grep command to search this file for the root directory. # grep client-name /etc/bootparams client_name root=server-name:/netinstall/Solaris_10/Tools/Boot install=server-name:/netinstall boottype=:in rootopts=:rsize=32768 In this example, the root directory for the Solaris 10 client is /netinstall.
5. Shut down and halt the client system. Use the shutdown command to go to the OpenBoot (ok) prompt. # shutdown -i0 -g0 -y . . . (shutdown command messages omitted) . . . ok 6. At the ok prompt, use the show-nets command to find the device path of the 10Gigabit Ethernet device. The show-nets command lists the system devices. You should see the full paths and names of the network devices, similar to the example below.
9. After installing the Solaris Operating System, install the Sun x8 Dual 10 Gigabit Ethernet software on the client system. The software installed in Step 4 is required to boot the client system over the 10Gigabit Ethernet interface. You now need to install the software in order for the operating system to use the client’s 10-Gigabit Ethernet interfaces in normal operation. Before installing the Sun 10-Gigabit Ethernet driver, ensure that the client system does not already have the driver installed.
Booting Over the 10-Gigabit Ethernet Network for Solaris x86 and Linux Systems ▼ To Boot Over the Network on Solaris x86 and Linux Systems 1. Obtain the MAC address from the target Sun x8 Express Dual 10 Gigabit Ethernet Fiber XFP Low Profile Adapter. 2. Set up the PXE boot server with the MAC addresses . 3. Choose one of the adapter ports as the boot interface. 4. Plug the Ethernet cable to the adapter port. 5. Power on the system. 6. Press the F2 key or the Control/E keys to go to the BIOS. 7.
9. Press the F10 key to save the boot configuration changes and exit. System should reboot after saving the boot configuration.
10. Press the F12 key to install the OS from the network. If the cable is connected to the right port, you should see the MAC address that you assigned to your PXE server displayed by BIOS. image : pxe-mac-addr PXE-E61: Media test failure, check cable PXE-MOF: Exiting Intel Boot Agent. NVIDIA Boot Agent 217.0513 Copyright (C) 2001-2005) NVIDIA Corporation Copyright (C) 1997-2000) NVIDIA Corporation PXE-E61: Media test failure, check cable PXE-MOF: Exiting Intel Boot Agent. NVIDIA Boot Agent 217.
34 Sun Dual 10GbE XFP PCI Express Card User’s Guide • January 2009
CHAPTER 5 Configuring the nxge Device Driver Parameters The nxge device driver controls the Sun x8 Express Dual 10 Gigabit Ethernet interfaces. You can manually set the nxge driver parameters to customize each device in your system. This chapter lists the available device driver parameters and describes how you can set these parameters.
processing. The Sun 10-Gigabit Ethernet Adapter utilizes Sun’s own innovative MAC Controller to map the 10-Gigabit XAUI interface onto the PCI Express form factor. It supports 10 Gb/sec bandwidth using eight transmit and eight receive lanes. Setting nxge Driver Parameters on a Solaris Platform You can set the nxge device driver parameters in two ways: ■ ■ Using the ndd utility Using the nxge.conf file If you use the ndd utility, the parameters are valid only until you reboot the system.
▼ To Specify Device Instances for the ndd Utility Before you use the ndd utility to get or set a parameter for a nxge device, you must specify the device instance for the utility. 1. Check the /etc/path_to_inst file to identify the instance associated with a particular device.
After you enter the parameter name, the ndd utility prompts you for the parameter value. 2. To list all the parameters supported by the nxge driver, type ?.
▼ To Set Driver Parameters Using an nxge.conf File 1. Obtain the hardware path names for the nxge devices in the device tree. a. Check the /etc/driver_aliases file to identify the name associated with a particular device: # grep nxge /etc/driver_aliases nxge "pciex108e,abcd" b. Locate the path names and the associated instance numbers in the /etc/path_to_inst file.
# apply only to 10gigabit ports. # Half duplex is not supported on any NIU card. # # adv-autoneg-cap # Advertise auto-negotiation capability. # default is 1 # adv-autoneg-cap = 1; # # adv_10gfdx_cap # Advertise 10gbps Full duplex capability. # default is 1 # adv_10gfdx_cap = 1; # # adv_1000fdx_cap # Advertise 1gbps Full duplex capability. # default is 1 # adv_1000fdx_cap = 1; # # adv_100fdx_cap # Advertise 100mbps Full duplex capability.
# #------- Receive DMA Configuration ---------------------------# # rxdma-intr-time # Interrupts after this number of NIU hardware ticks have # elapsed since the last packet was received. # A value of zero means no time blanking (Default = 8). # # rxdma-intr-pkts # Interrupt after this number of packets have arrived since # the last packet was serviced. A value of zero indicates # no packet blanking (Default = 20). # # Default Interrupt Blanking parameters.
b. The following parameters operate on a per port basis and can be set using the /platform/sun4u/kernel/drv/nxge.conf file. # # # # # # # # # # # # # # # # # # # = # # = # # = # # = # ------- How to set parameters for a particular interface -------The example below shows how to locate the device path and set a parameter for a particular nxge interface.
d. The following example shows ports on two different cards being set. Only one node needs to be specified. name = "pciex108e,abcd" parent = "/pci@780/pci@0/pci@8/" unit-address = "0" class-opt-ipv4-tcp = 0x100; name = "pciex108e,abcd" parent = "/pci@7c0/pci@0/pci@9/" unit-address = "0" class-opt-ipv4-tcp = 0x40; 3. Save the nxge.conf file.
3. Add the following to a startup script, or use ndd before plumbing the interface: # ndd -set /dev/ip ip_soft_rings_cnt 8 Utilizing more soft-rings provided by the Solaris TCP/IP stack significantly improves bulk throughput for Rx. The default number of soft-rings is 2, but changing it to 8 improves performance. (You can increase the number to 16 in UltraSparc-T1 based systems). ▼ To Improve Performance on an AMD CPU Based Sun Platform 1.
▼ To Obtain Higher Throughput Using the Generic Tunables for the Solaris TCP/IP Stack ● To obtain higher throughput, add the following to a startup script: ndd ndd ndd ndd ndd ndd -set -set -set -set -set -set /dev/tcp /dev/tcp /dev/tcp /dev/tcp /dev/tcp /dev/tcp tcp_conn_req_max_q 8192 tcp_conn_req_max_q0 8192 tcp_max_buf 4194304 tcp_cwnd_max 2097152 tcp_recv_hiwat 400000 tcp_xmit_hiwat 400000 Chapter 5 Configuring the nxge Device Driver Parameters 45
Setting Parameters on a Linux Platform ▼ To Set Parameters Using the ethtool Utility 1. Determine which parameters are available using the ethtool utility: # ethtool -help eth4 ethtool version 1.
ethtool -G DEVNAME \ [ rx N ] \ [ rx-mini N ] \ [ rx-jumbo N ] \ [ tx N ] ethtool -i DEVNAME ethtool -d DEVNAME ethtool -e DEVNAME \ [ raw on|off ] \ [ offset N ] \ [ length N ] ethtool -E DEVNAME \ [ magic N ] \ [ offset N ] \ [ value N ] ethtool -k DEVNAME ethtool -K DEVNAME \ [ rx on|off ] \ [ tx on|off ] \ [ sg on|off ] \ [ tso on|off ] ethtool -r DEVNAME ethtool -p DEVNAME [ %d ] ethtool -t DEVNAME [online|(offline)] ethtool -s DEVNAME \ [ speed 10|100|1000 ] \ [ duplex half|full ] \ [ port tp|aui|bnc|
Following are some common parameters that can be changed: # ethtool -c eth8 Coalesce parameters for eth8: Adaptive RX: off TX: off stats-block-usecs: 0 sample-interval: 0 pkt-rate-low: 0 pkt-rate-high: 0 rx-usecs: 8 rx-frames: 512 rx-usecs-irq: 0 rx-frames-irq: 512 tx-usecs: 0 tx-frames: 0 tx-usecs-irq: 0 tx-frames-irq: 0 rx-usecs-low: rx-frame-low: tx-usecs-low: tx-frame-low: 0 0 0 0 rx-usecs-high: 0 rx-frame-high: 0 tx-usecs-high: 0 tx-frame--high: 0 rx-usecs and rx-frames control the RX interrupt rate
2. To change RX interrupt Coalesce parameters use the ethtool -C command: # ethtool -C eth4 rx-usecs 20 # ethtool -c eth4 Coalesce parameters for eth4: Adaptive RX: off TX: off stats-block-usecs: 0 sample-interval: 0 pkt-rate-low: 0 pkt-rate-high: 0 rx-usecs: 20 rx-frames: 512 rx-usecs-irq: 0 rx-frames-irq: 512 tx-usecs: 0 tx-frames: 0 tx-usecs-irq: 0 tx-frames-irq: 0 rx-usecs-low: rx-frame-low: tx-usecs-low: tx-frame-low: rx-usecs-high: rx-frame-high: tx-usecs-high: tx-frame-high: 0 0 0 0 0 0 0 0 3.
▼ To Set Parameters Using the Bundled configtool Utility 1.
3. To set a particular variable, use the /usr/local/bin/nxge_config if_name set param_name value: # /usr/local/bin/nxge_config eth4 set class_opt_ipv4_tcp 0xfe0 Tuning for Maximum Performance on a Linux Platform The following tunings will improve the performance of the Sun x8 Express Dual 10 Gigabit Ethernet device driver on a system running the Linux operating system. 1. Create the conf file (for example, sysctl_nxge.conf) that will be called by the sysctl utility.
2. Set up the sysctl utility. # sysctl -p /etc/sysctl_nxge.
CHAPTER 6 Configuring the Jumbo Frames Feature This chapter describes how to configure the Jumbo Frames feature. It contains the following sections: ■ ■ ■ ■ “Jumbo Frames Overview” on page 53 “Checking Jumbo Frames Configurations” on page 53 “Enabling Jumbo Frames in a Solaris Environment” on page 55 “Enabling Jumbo Frames in a Linux Environment” on page 57 Jumbo Frames Overview Configuring Jumbo Frames enables the Ethernet interfaces to send and receive packets larger than the standard 1500 bytes.
▼ To Show the Driver Statistics in a Solaris Environment 1. Use the kstat command to display driver statistics, for example: # kstat nxge:1 |grep rdc_packets rdc_packets rdc_packets rdc_packets rdc_packets rdc_packets rdc_packets rdc_packets rdc_packets 798982054 792546171 803941759 805674872 798714912 799293256 806470537 805413540 The previous example diplays the receive packet counts on all of the eight Receive DMA channels on interface 1.
2. Use the kstat command to display driver statistics of a VLAN interface, for example:. # kstat nxge:38001 module: nxge name: nxge38001 brdcstrcv brdcstxmt collisions crtime ierrors ifspeed ipackets ipackets64 multircv multixmt norcvbuf noxmtbuf obytes obytes64 oerrors opackets opackets64 rbytes rbytes64 instance: 38001 class: net 0 0 0 3842.
▼ To Enable Jumbo Frames in a Solaris Environment Using nxge.conf 1. Enable Jumbo Frames for a port using the nxge.conf file. For example, name = "pciex108e,abcd" parent = "/pci@780/pci@0/pci@8/network@0" unit-address = "0" accept-jumbo=1; 2. Reboot the system: % boot -r 3. Set the maximum MTU for maximum performance: # ifconfig nxge mtu 9194 ▼ To Check Layer 2 Configuration ● View the maximum transmission unit (MTU) configuration of an nxge instance at any time with the kstat command.
▼ To Check Layer 3 Configuration ● Check the Layer 3 configuration by using the dladm command with the show-link option, as shown in the following example: # dladm show-link e1000g0 type: e1000g1 type: e1000g2 type: e1000g3 type: nxge0 type: nxge1 type: nxge38001 type: non-vlan non-vlan non-vlan non-vlan non-vlan non-vlan vlan 38 mtu: mtu: mtu: mtu: mtu: mtu: mtu: 1500 1500 1500 1500 9194 9194 9194 device: device: device: device: device: device: device: e1000g0 e1000g1 e1000g2 e1000g3 nxge0 nxge1 nx
3. Set the MTU for maximum performance: # ifconfig ethx mtu 9194 Where x is the instance number of the interface you want to configure jumbo frames on. ▼ To Show the Driver Statistics in a Linux Environment 1. Use the ifconfig utility to display driver statistics, for example: # ifconfig eth4 eth9 Link encap:Ethernet HWaddr 00:14:4F:6C:78:E9 inet addr:38.38.9.42 Bcast:38.38.9.255 Mask:255.255.255.
3.
60 Sun Dual 10GbE XFP PCI Express Card User’s Guide • January 2009
CHAPTER 7 Configuring Link Aggregation This chapter describes how to configure link aggregation. It contains the following sections: ■ “Overview of Link Aggregation” on page 61 ■ “Configuring Link Aggregation in a Linux Environment” on page 64 Overview of Link Aggregation Link Aggregation allows one or more network links to be aggregated together to form a link aggregation group. This link aggregation group appears to MAC clients as a regular link. Link aggregation is defined by IEEE 802.
▼ To Configure Link Aggregation in a Solaris Environment 1. Aggregate nxge0 and nxge1 to form an aggregation and a random number 33 as key. a. Unplumb the interfaces to be aggregated: # ifconfig down unplumb nxge0 # ifconfig down unplumb nxge1 b. Create a link-aggregation group with key 33 without specifying mode: # dladm create-aggr -d nxge0 -d nxge1 33 As the command returns, one line appears in /etc/aggregation.
2. Plumb up the interface aggrkey, which is aggr33 is this case: # ifconfig aggr33 plumb # ifconfig aggr33 aggr33: flags=1000842 mtu 1500 index 8 inet 0.0.0.0 netmask 0 ether 0:3:ba:d8:9d:e8 # ifconfig aggr33 192.168.1.1/24 broadcast + up # ifconfig aggr33 aggr33: flags=1000843 mtu 1500 index 8 inet 192.168.1.1 netmask ffffff00 broadcast 192.168.1.255 ether 0:3:ba:d8:9d:e8 3.
5. Use the dladm show-aggr -L command to display LACP specific information: # dladm show-aggr -L key: 33 (0x0021) policy: L4 address: 0:3:ba:d8:9d:e8 (auto) LACP mode: off LACP timer: short device activity timeout aggregatable sync coll dist defaulted expired nxge0 passive short yes no no no no no nxge1 passive short yes no no no no no For more information refer to the man pages for dladm, man dladm.
3. Configure bond0 interface. In this example, bond0 is the master of the two interfaces eth4 and eth5. # ip addr add 192.12.38.
66 Sun Dual 10GbE XFP PCI Express Card User’s Guide • January 2009
CHAPTER 8 Configuring VLANs This chapter explains Virtual Local Area Networks (VLANs) in detail and provides configuration instructions and examples. It contains the following sections: ■ ■ ■ “Overview of VLANs” on page 67 “Configuring VLANs in a Solaris Environment” on page 69 “Configuring VLANs in a Linux Environment” on page 71 With multiple VLANs on an adapter, a server with a single adapter can have a logical presence on multiple IP subnets.
Accounting Server (VLAN 3) Main Server Adapter Gigabit/Tagged (All VLANs) VLAN 1 VLAN 2 VLAN 3 Shared Media Segment Software PC 2 (VLAN 2) Software PC 1 (VLAN 2) FIGURE 8-1 Engineering PC 3 (VLAN 1) Accounting PC 4 (VLAN 3) Engineering/ Software PC 5 Adapter Gigabit/Tagged (VLAN 1 & 2) Example of Servers Supporting Multiple VLANs With Tagging Adapters The example network has the following features: The physical LAN network consists of a switch, two servers, and five clients.
The Main Server is a heavily used server that needs to be accessed from all VLANs and IP subnets. The server has a Sun x8 Express Dual 10 Gigabit Ethernet Fiber XFP Low Profile Adapter installed. All three IP subnets are accessed by means of the single physical adapter interface. The server is attached to one of the switch’s Gigabit Ethernet ports, which is configured for VLANs 1, 2, and 3. Both the adapter and the connected switch port have tagging turned on.
Tagging an Ethernet frame requires the addition of a tag header to the frame. The header is inserted immediately following the destination MAC address and the Source MAC address. The tag header consists of two bytes of Ethernet Tag Protocol identifier (TPID, 0x8100) and two bytes of Tag Control Information (TCI). FIGURE 8-2 shows the Ethernet Tag Header format.
2. Use the ifconfig(1M) to configure a VLAN virtual device, for example: # ifconfig nxge123000 plumb up # ifconfig nxge224000 plumb up The output of ifconfig -a on a system having VLAN devices nxge123000 and nxge224000: # ifconfig -a lo0: flags=1000849 mtu 8232 index 1 inet 127.0.0.1 netmask ff000000 hme0: flags=1000843 mtu 1500 index 2 inet 129.144.131.91 netmask ffffff00 broadcast 129.144.131.
2. Plumb the Sun x8 Express Dual 10 Gigabit Ethernet Fiber XFP Low Profile Adapter interface: # ifconfig eth2 xxx.xxx.xx.xxx up where xxx.xxx.xx.xxx = the IP address of the interface. 3. Insert the VLAN module: # /sbin/modprobe 8021q 4. Add the VLAN instance (VID): # /sbin/vconfig add eth2 5 5. Configure the nxge VLAN (eth2 in this example): # ifconfig eth2.5 xxx.xxx.xx.xxx up where xxx.xxx.xx.xxx = the IP address of the interface.
APPENDIX A Specifications This appendix lists the specifications for the Sun x8 Express Dual 10 Gigabit Ethernet Fiber XFP Low Profile Adapter. It contains the following sections: ■ ■ ■ ■ “Connectors” on page 73 “Performance Specifications” on page 74 “Physical Characteristics” on page 75 “Power Requirements” on page 75 Connectors FIGURE A-1 shows the connector for the Sun x8 Express Dual 10 Gigabit Ethernet Fiber XFP Low Profile Adapter.
TABLE A-1 lists the characteristics of the fiber connectors used by the Sun x8 Express Dual 10 Gigabit Ethernet Fiber XFP Low Profile Adapter.
Physical Characteristics TABLE A-3 Physical Characteristics Dimension Measurement Length 167.65 mm (6.6 inches) Width 68.90 mm (2.713 inches) Height Component side = 14.48 mm (0.57 inches) maximum Solder side = 2.67 mm (0.105 inches) maximum Power Requirements TABLE A-4 Low-Profile Power Requirements Specification Measurement Power consumption 20.74W typical 24.33W peak Voltage 12V and 3.
76 Sun Dual 10GbE XFP PCI Express Card User’s Guide • January 2009
APPENDIX B Diagnostic Software This appendix provides an overview of the SunVTS diagnostic application and instructions for updating the SunVTS software to recognize the adapter.
http://www.sun.com/products-n-solutions/hardware/docs/Software /system_administration/tools/testing_valid/sunvts/index.html Select the document for the Solaris release on your system.
Using the SunVTS netlbtest You must have the Ethernet card and the device driver installed, a loopback connector in place, and Intervention mode enabled before running netlbtest. netlbtest cannot run if the network interface is connected to a live network, and requires that the Ethernet device be configured offline before running the test. Use the ifconfig(1M) command to bring the Ethernet device down before running netlbtest. ▼ To Use the netlbtest 1.
80 Sun Dual 10GbE XFP PCI Express Card User’s Guide • January 2009
Index Symbols N /etc/hostname.nxgenumber file, 24 ndd utility, 37 A P assigning an IP address, 24 parameter values how to modify and display, 37 C configuring the network host files, 23 configuring VLANs, 69 D diskless clients, 25 documentation SunVTS, 78 E editing the network host files, xiii, 23 S setting nxge driver parameters using ndd using nxge.
82 Sun Dual 10GbE XFP PCI Express Card User’s Guide • January 2009