GrindFresh Conical Burr Coffee Grinder Instruction Booklet EM0440 Please read these instructions carefully and retain for future reference.
Contents Sunbeam’s Safety Precautions 1 Features of your coffee grinder 2 Operating your coffee grinder 4 Adjusting the Grind Setting 6 Care and Cleaning 7 Important instructions – retain for future use.
Sunbeam’s Safety Precautions SAFETY PRECAUTIONS FOR YOUR SUNBEAM COFFEE GRINDER • Check the grinding bowl for the presence of foreign objects before using. • Always operate the grinder with the ground coffee container properly inserted in the grinder. • • • • • • • • Sunbeam is very safety conscious when designing and manufacturing consumer products, but it is essential that the product user also exercise care when using an electrical appliance.
Features of your Coffee Grinder 250g Bean hopper Grind adjustment collar Large and easy to use, the collar has a widerange of 25 grind settings. The coffee maker can select a fine grind to suit commercial espresso or adjust the setting for other brewing styles – from Turkish to plunger. With such precise settings the user controls the particle size and ultimately the quality of the brew.
Burr shield Italian conical burrs Italian designed and manufactured, the metal conical burr design achieves excellent grind consistency and minimises heat transfer to the coffee due to the slowly rotating burrs. Group handle locator Cord stuff Hides away unwanted cord to keep bench top clean. Burr cleaning brush Strong bristles help sweep out grinds from the burrs. Silicon spout cover Simply slide the spout cover onto the grinder spout.
Heading Operating your coffee grinder Before using the coffee grinder, wipe the base exterior with a damp cloth. Wash the bean hopper, hopper lid and ground coffee container in warm soapy water, then rinse and dry. 3. Now attach the bean hopper. Insert the bean hopper by aligning the notches on the base of the hopper with the guides on the inside of the collar. Position until the hopper sits flat. See figure 2. Note: Do not immerse the burrs in water or any other liquid.
Heading Operating your coffee grinder (continued) 8. Select the grind by turning the grind adjustment collar to the desired setting, see figure 4. 10. To grind coffee, press the group handle against the button located in the centre of the group handle locator, see figure 6. Figure 4 Refer to the grind setting table on page 6 to assist you in selecting the correct grind level for the desired brewing method. 9. Position the group handle into the group handle locator, see figure 5. Figure 6 11.
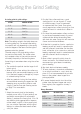
Heading the Grind Setting Adjusting A starting point for grind settings: SETTING BREWING METHOD 2–6 Turkish 12 – 16 Espresso 12 – 16 Stove Top 20 – 23 Drip Filter 20 – 23 Plunger Note: The settings noted in the table above are a starting guide only. For example the setting for espresso will vary depending on the quality and roast degree of the beans and the type of espresso extraction desired. The wide-range of 25 grind settings allows for precision adjustment.
Care and Cleaning Important Notes: • Spots and marks on the surface of the burrs are part of the hardening process. These marks do not affect the performance of the grinder or the taste of the coffee. 2. To remove the bean hopper with top burr and collar from the grinder base, turn the collar anti-clockwise until it stops. See figure 7. • Ensure the coffee grinder is switched off and unplugged from the power outlet prior to cleaning. • Do not immerse the motor base of the coffee grinder in water.
Care and Cleaning (continued) 4. Lift and remove bean hopper and collar from base. Then pull the bean hopper away from the collar to detach the two pieces and clean using the burr-cleaning brush. 7. Attach the bean hopper by aligning the notches on the base of the hopper with the guides on the inside of the collar. Position until the hopper sits flat. See figure 11 5. Clean the bottom burr using the burrcleaning brush, see figure 9. Figure 11 8.
12 Month Replacement Guarantee In the unlikely event that this appliance develops any malfunction within 12 months of purchase (3 months commercial use) due to faulty materials or manufacture, we will replace it for you free of charge. Should you experience any difficulties with your appliance, please phone our customer service line for advice on 1300 881 861 in Australia, or 0800 786 232 in New Zealand. Alternatively, you can send a written claim to Sunbeam at the address listed below.
Need help with your appliance? Contact our customer service team or visit our website for information and tips on getting the most from your appliance. In Australia Visit www.sunbeam.com.au Or call 1300 881 861 In New Zealand Visit www.sunbeam.co.nz Or call 0800 786 232 is a registered trademark. Made in China. Due to minor changes in design or otherwise, the product may differ from the one shown in this leaflet. © Copyright. Sunbeam Corporation Limited 2012.