User's Manual Safety Instructions 1. Read Instructions -– All the safety and operation instructions should be read before the Sunfire Component is operated. 2. Retain Instructions — The safety and operating instructions should be kept for future reference. 10. Cleaning — The Component should be cleaned only as recommended in this manual. 3. Heed Warnings — All warnings on the Component and in these operating instructions should be followed. 11.
User's Manual 15. To prevent electric shock, do not use this polarized plug with an extension cord, receptacle or other outlet unless the blades can be fully inserted to prevent blade exposure. Pour préevenir les chocs électriques ne pas utiliser cette fiche polariseé avec un prolongateur, un prise de courant ou une autre sortie de courant, sauf si les lames peuvent être insérées à fond sans laisser aucune pariie à découvert. 16.
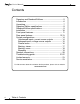
User's Manual Contents Signature and Standard Editions ....................................... 5 Introduction ........................................................................ 6 Unpacking .......................................................................... 7 Signature Edition specifications ......................................... 8 Standard Edition specifications .......................................... 9 Installation ........................................................................
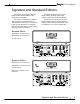
User's Manual Signature and Standard Editions This manual covers both the Signature Edition and the Standard Edition of the Sunfire Series II Amplifiers. The Signature Edition has more power output and uses premium quality output terminals compared to the Standard Edition. The Architect’s Choice line of amplifiers and preamplifiers are designed with a 17” wide chassis and remote turn on circuits.
User's Manual Introduction Dear Friend: Bob Carver, Amplifier Designer, Physicist Thank you for purchasing my Sunfire Architect’s Choice Series II two channel power amplifier. I hope you enjoy it and the music it makes as much as I have enjoyed creating it for you. This magnificent amplifier represents my very latest thinking - and my best amplifier design ever. I’ve spent over twenty years developing it, and cannot imagine how I could make it any better, or refine it any further.
User's Manual Unpacking Your Sunfire Amplifier should reach you in perfect condition. If you do notice any shipping damage, please contact your Sunfire Dealer immediately. Gently lift out the unit and remove all the packing material and accessories. It is important to save all the packing materials and the box in case your amplifier ever needs to be moved or shipped for repair. Make sure that you keep your sales receipt.
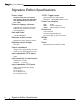
User's Manual Signature Edition Specifications Power output 625 watts continuous, per channel, both channels driven into eight ohms, from 20Hz-20kHz with no more than 0.5% T.H.D. Power at clipping, minimum: 1250 watts per channel into four ohms. 2500 watts per channel into two ohms (time limited basis). Hum and Noise -118 dB, A-Weighted Maximum output current 100 amperes peak to peak per channel Maximum output voltage 70.
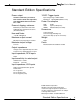
User's Manual Standard Edition Specifications Power output 325 watts continuous, per channel, both channels driven into eight ohms, from 20Hz-20kHz with no more than 0.5% T.H.D. Power at clipping, minimum: 650 watts per channel into four ohms. 1300 watts per channel into two ohms (time limited basis).
User's Manual Installation Read and follow all safety instructions shown on pages 2 and 3. Observe the following precautions when choosing a location for your Sunfire Amplifier: • • Protect it from prolonged exposure to direct sunlight and other direct sources of heat, such as heating vents and radiators. Connection Tips Before setting up your new system, please consider the following : • Always make sure that your components are all turned OFF before making or changing connections.
User's Manual Front Panel Features (Signature Edition shown) Overview Illumination Your Sunfire Amplifier is a two channel power amplifier combined in a 17 inch wide chassis for the purpose of reproducing music or video soundtracks. It accepts line level signals from a controlling preamplifier and amplifies them to a higher level, suitable for driving powerful stereo and home theater speakers. The meter is illuminated by an incandescent lamp operating at a very warm color temperature.
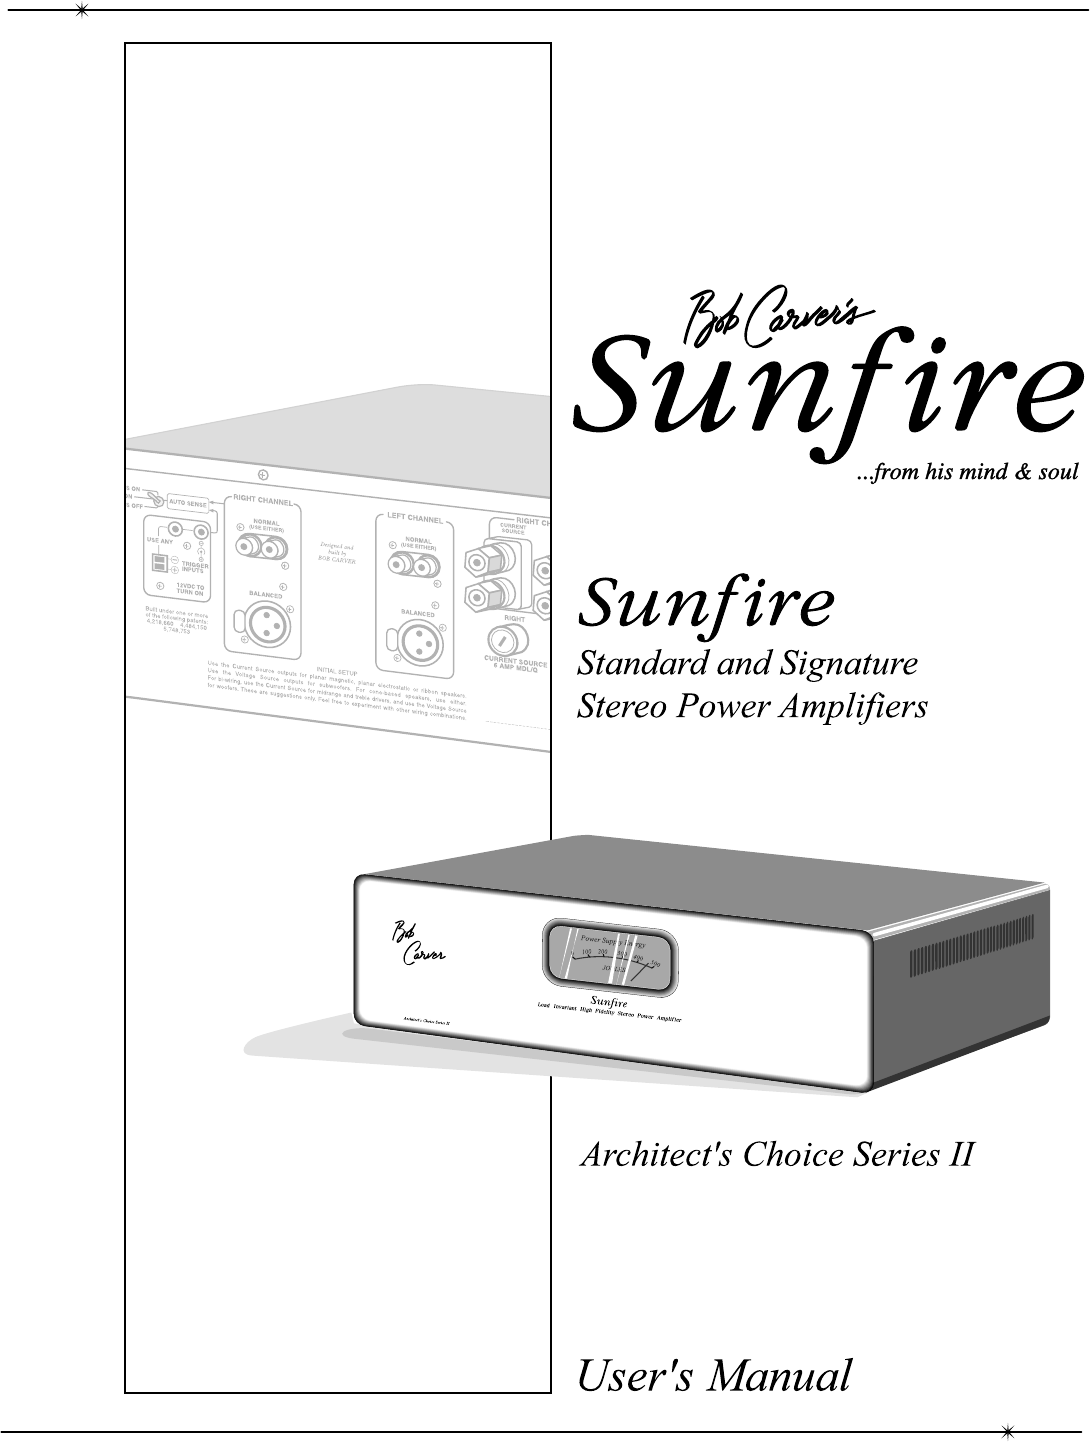
User's Manual Rear Panel Features (Signature Edition shown) 1 2 3 4 5 6 7 1. AUTO/ON/OFF Switch Your Sunfire amplifier is designed with an automatic on/off circuit. • In the AUTO-ON position, the amplifier will automatically turn on if an audio signal is present at the right input, or if it receives a 12VDC input trigger voltage at the 12VDC inputs.
User's Manual 4. XLR Inputs If your preamplifier has XLR outputs, connect them to the XLR inputs. The female XLR inputs are wired as follows: Pin 1 is ground Pin 2 is positive (hot) Pin 3 is negative (cold) According to your taste, you may select the current source for electrostatic, planar magnetic or ribbon speakers. Select the voltage source for subwoofers. For cone based systems, use either.
User's Manual System Configurations The following diagrams show some typical connections that you might make in your installation. They show how the inputs and outputs of the Sunfire Amplifier are connected to your preamplifier and speakers. UNBALAN C PREAMP O ED UTPUTS RIGHT LEFT + - + - RIGHT LEFT LOUDSPE AKERS If your preamplifier has RCA outputs, it can be connected to the amplifier inputs as shown.
User's Manual BALANCE PREAMP O D UTPUTS RIGHT LEFT + - + - RIGHT LEFT LOUDSPE AKERS If your preamplifier has XLR outputs, it can be connected to the XLR inputs as shown. This diagram also shows the voltage source output connections to the speaker inputs. (The current source outputs can be used instead, as shown on the previous page).
User's Manual Parallel Mono The Sunfire Amplifier can be connected in Parallel Mono to create an immensely powerful system. You will need one amplifier for each speaker, unless you are driving a single subwoofer for example. • • • Using insulated speaker wire, join the amplifier’s right and left positive current source outputs together. Using insulated speaker wire, join the amplifier’s right and left negative current source outputs together.
User's Manual Biwiring Stereo Biwire Connections If your speakers can be biwired or biamped, they will have separate input terminals for the woofer section and the upper range. Inputs • Connect the amplifier’s right voltage source output to the right speaker’s woofer input terminals. • Connect the amplifier’s right current source output to the right speaker’s upper range input terminals. • Connect the amplifier’s left voltage source output to the left speaker’s woofer input terminals.
User's Manual Mono Biwire connections If you have two Sunfire amplifiers and your speakers can be biwired, you can create a very powerful and efficient system as follows: • Connect one amplifier’s right voltage source output to the right speaker’s woofer input terminals. • Connect the same amplifier’s left current source output to the right speaker’s upper range input terminals. • Connect your preamplifier’s right output to one of the amplifier’s right input jacks.
User's Manual Biamping connections Make sure that you adjust the crossover frequency to suit your speakers. Check the speaker’s specifications. This diagram shows how to create a very efficient system with an external active crossover. The crossover will split your incoming preamp signal into two frequency ranges: one above and one below the crossover frequency. An alternative connection method is to have one amplifier running the two woofers and the other running the two tweeters.
User's Manual Speaker connections If your speakers cannot be biwired, the normal configuration is to have one speaker connected per channel. The connection of more than one per channel will tend to degrade the speaker’s frequency response. For the best results use one speaker per channel.
User's Manual Troubleshooting The Sunfire Amplifier is expertly designed and built to provide years of trouble-free performance. Most problems that occur can usually be solved by checking your setup or making sure that the components connected to the amplifier are on and fully operational. • If you have connected speakers in parallel, the overall impedance may be too low.
User's Manual • If the hum persists, disconnect all the source components one at a time from the back of the preamp, until you identify the problem. Poor bass performance • Make sure that your preamp does not have the bass level turned down. • Try moving the speaker cables away from any power cords. Try just one speaker, connecting it to different channels and see if an amplifier channel is bad.
User's Manual Limited Warranty Sunfire Corporation is proud of its products which have been built with care using advanced technology and premium component parts. Your unit has been crafted to perform properly for many years. Sunfire Corporation offers the following warranty to you, the owner of a new Sunfire product: This Warranty gives you specific legal rights, and you may also have other rights which vary from state to state.
Manual part number : 913-041-00 Rev A