
User Manual


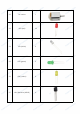


Table Of Contents

7
Get Started
Preparation
1. Prepare a MicroSD/TF car of no less than 8GB, a 5V 2A DC power adapter with a
MicroUSB port, and a network cable (to connect your router and Raspberry Pi, or plug in
the USB WiFi adapter directly if you have one).
2. Download the image for the Raspbian system onto your computer. Refer to instructions
through DOWNLOADS->RASPBIAN on the official website raspberrypi.org:
https://www.raspberrypi.org/documentation/installation/installing-images/README.md,
write the image into the microSD/TF card, and then plug the card into the slot on your
Raspberry Pi.
How to Open a Terminal
In the subsequent tutorials, the terminal will be used from time to time. It is a platform for
interactions in Linux. Therefore, before starting the lessons, you may need to know more
about TERMINAL.
Raspberry Pi as Master (recommended for beginners)
1. Preparations: a screen monitor, an HDMI cable (if your monitor only has a VGA port, use
a VGA-HDMI converter), a USB mouse, a USB keyboard and a network cable.
2. Connect the monitor to power. Then connect it with the Raspberry Pi via the converter
cable. Connect the LAN port of the router to the network port on the RPi by a network
cable, and the mouse and keyboard to USB ports. At last, connect a 5V 2A DC power
to the RPi. Power on the screen if needed. Then you can see the display showing the
Raspberry Pi icon as shown below.
If the monitor displays colored texts with a black background after booting, it indicates
that the option for automatically loading a graphic user interface (GUI) is not active. To
activate it, you can type in startx with the keyboard and press Enter. Wait for a while
and the display will show up as below.