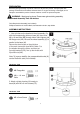
Owner’s Manual OUTDOOR PATIO HEATER MODEL: PHRDGH/SS DANGER If you smell gas: 1. Shut off gas to the appliance. 2. Extinguish any open flame. 3. If odor continues, keep away from the appliance and immediately call your gas supplier or fire department. WARNING Do not store or use gasoline or other flammable vapors and liquids in the vicinity of this or any other appliance. An LP-cylinder not connected for use shall not be stored in the vicinity of this or any other appliance.
PACKAGE CONTENTS PART 2 DESCRIPTION QUANTITY A Reflector Panel 3 B Reflector Plate 1 C Head Assembly 1 D Screw Coupler 1 E Table 1 F Tightening Spacer 1 G Fastening Nut 1 H Cylinder Housing 1 I Door (preassembled) 1 J Post 1 K Gas Hose 1 L Regulator 1 M Base 1 N Bucket(preassembled) 1 O Wheel Kit 1
HARDWARE CONTENTS M8 Flange Nut M5 x 8 mm Qty. 2 M8 x 16 mm Screw M6 x 10 mm Bolt Qty. 4 Bolt Qty. 2 Qty. 4 M6 x 10 mm Cap Nut Screw Qty. 9 Qty. 9 Wing Nut Qty. 3 Stainless Steel Bolt Qty. 4 Φ6 Small Φ8 Flat Washer Washer Reflector Qty. 9 Spacer Qty. 4 Qty. 3 Wrench Qty. 1 (not actual size) Φ6 Washer Qty. 9 Reinforced Ring Qty. 1 (not actual size) SAFETY INFORMATION Deck Ring Qty.
SAFETY INFORMATION DANGER DANGER • CARBON MONOXIDE HAZARD • This heater is a combustion appliance. All combustion appliances produce carbon monoxide (CO) during the combustion process. This product is designed to produce extremely minute, non-hazardous amounts of CO if used and maintained in accordance with all warnings and instructions. Do not block air flow into or out of the heater.
SAFETY INFORMATION WARNING California Proposition 65 Combustion by-products produced when using this product contain chemicals known to the State of California to cause cancer, birth defects, and other reproductive harm. WARNING BURN HAZARD • Never leave heater unattended when hot or in use. • Keep out of reach of children. WARNING Certain materials or items, when stored under the heater, will be subjected to radiant heat and could be WARNING • This product is fueled by propane gas.
PREPARATION Before beginning assembly of product, make sure all parts are present. Compare parts with package contents list and hardware contents above. If any part is missing or damaged, do not attempt to assemble the product. Contact customer service for replacement parts. WARNING – Metal may be sharp. Please wear gloves during assembly.
ASSEMBLY INSTRUCTIONS 3. Open the preassembled door (I) on cylinder Housing (H) and place post (J) through the hole on the top. 4. Secure post (J) to cylinder housing (H) using the reinforced ring (NN), M6 x 10 mm bolts (DD) and Φ6 small flat washers (EE). Fasten and cover with the deck ring (OO). Hardware Used M6 x 10 mm Bolt Φ6 Small Flat Washer Reinforced Ring Deck Ring 5. & 6. Slide fastening nut (G) down the post (J) with the rounded side facing down.
ASSEMBLY INSTRUCTIONS 7. Attach reflector spacers (FF) and Ø8 washers 7 (GG) to the top of head assembly (C). Tighten the reflector spacers (FF). Hardware Used Reflector spacer Φ8 Washer 8. Unscrew stainless steel bolts (LL) from head assembly (C). Hardware Used Stainless Steel Bolt 9. Insert hose of head assembly (C) into post (J). Secure head assembly (C) to post (J) with stainless steel bolts (LL). Note: The control knob on head assembly (C) should be above the decal on post (J).
ASSEMBLY INSTRUCTIONS 10. Remove protective cover from reflector panel (A) and reflector plate (B). Note: In order to achieve proper alignment of reflector sections, it may be necessary to loosen the preassembled bolts prior to assembly and retighten once complete. 11. Attach reflector panels (A) together using M6 x 10 mm screws (II) and Φ6 washers (HH). Secure loosely with cap nuts (JJ). Hardware Used Φ 6 Washer M6 X 10 mm Screw Cap nuts 12.
ASSEMBLY INSTRUCTIONS 13. Slide Φ8 washers (GG) over the threaded ends of reflectors spacers (FF). Attach reflector assembly to head assembly (C). Place Φ8 washers (GG) over threaded ends of reflector spacers (FF) sticking out through reflector assembly and secure with wing nuts (KK). Note: Do not over tighten. Hardware Used Reflector Spacer Φ8 Washer Wing Nut 14. Screw gas hose (K) and regulator (L) onto propane 14 cylinder (not included). Do not cross-thread.
ASSEMBLY INSTRUCTIONS A dented, rusted or damaged propane cylinder may be hazardous and should be checked by your cylinder supplier. Never use a propane cylinder with a damaged valve connection. The propane cylinder must be constructed and marked in accordance with the specifications for LP gas cylinders of the U.S. Department of Transportation (DOT) or the standard for cylinders, spheres and tubes for transportation of dangerous goods and commission, CAN/CSA-B339.
OPERATION INSTRUCTIONS Leak Check To check for a leak: 1. Make 2-3 oz. leak check solution (one part liquid dishwashing detergent and three parts water). 2. Apply several drops of solution where regulator connects to cylinder and to all hose and valve connections 3. Make sure all patio heater and light valves are OFF. 4. Turn cylinder valve ON. WARNING • Perform all leak tests outdoors. • Extinguish all open flames. • NEVER leak test when smoking.
OPERATION INSTRUCTIONS DANGER • CARBON MONOXIDE HAZARD • For outdoor use only. Never use inside house, or other unventilated or enclosed areas. This heater consumes air(oxygen). Do not use in unventilated or enclosed areas to avoid endangering your life. Caution: Do not attempt to operate until you have read and understand all General Safety Information in this manual and all assembly is complete and leak checks have been performed. Before Turning Gas Supply ON: 1.
As you are depressing the control knob, place long stem lighter into the ignition hole on the emitter screen to light the pilot. Repeat step 7. 9. Push in and turn the control knob to the “LOW”, then release control knob. If you want a higher temperature, push in the control knob and turn counterclockwise to the “HIGH”. Note: If pilot fails to remain lit, all valves should be closed and a waiting period of at least 5 minutes should pass before attempting to light.
WARNING FOR YOUR SAFETY Heater will be hot after use. Handle with extreme care. Shut Down: 1. Turn control knob clockwise to PILOT. (Normally, burner will make a slight popping sound when extinguished.) Burner will extinguish but PILOT will remain ON. 2. To extinguish PILOT depress control knob and continue to turn it clockwise to OFF. 3. Turn cylinder valve clockwise to OFF and disconnect regulator when heater is not in use. Note: After use, some discoloration of the emitter screen is normal.
CARE AND MAINTENANCE WARNING FOR YOUR SAFETY: • Do NOT touch or move heater for at least 45 minutes after use. • Reflector is hot to the touch. • Allow reflector to cool before touching. Keep exterior surfaces clean. Use warm soapy water for cleaning. Never use flammable or corrosive cleaning agents. While cleaning your unit, be sure to keep the area around the burner and pilot assembly dry at all times. Do not submerge the control valve assembly. If the gas control is submerged in water, do NOT use it.
• If desired, cover heater to protect exterior surfaces and to help prevent build-up in air passages. Never leave LP cylinder exposed to direct sunlight or excessive heat. Note: Wait until heater is cool before covering. Service Only a qualified service person should repair gas passages and associated components. Caution: Always allow heater to cool before attempting service. ANS Z83.26-2007/CSA 2.37-2007 Gas-Fired Outdoor Infrared Patio Heaters ANS Z83.26a-2008/CSA 2.
TROUBLESHOOTING PROBLEM POSSIBLE CAUSE CORRECTIVE ACTION Cylinder valve is closed Open valve Blockage in orifice or pilot tube Clean or replace orifice or pilot tube Air in gas line Open gas line and bleed it (pressing control knob in) for not more than 1 - 2 minutes or until you smell gas Low gas pressure with cylinder valve fully open Turn cylinder valve OFF and replace cylinder Igniter fails Use match to light pilot; obtain new igniter and replace Dirt built up around pilot Clean dirt from
ONE-YEAR LIMITED WARRANTY This product is inspected, tested and carefully packaged to minimize the chance of damage during shipment. If a part within one year from the date of purchase proves to be defective in material or fabrication under normal use, the part will be repaired or replaced. Sunheat International’s obligation under the warranty is to replace or repair defective parts at our discretion.