Owner’s Manual OUTDOOR PATIO HEATER MODEL: PHSQGH/SS DANGER If you smell gas: 1. Shut off gas to the appliance. 2. Extinguish any open flame. 3. If odor continues, keep away from the appliance and immediately call your gas supplier or fire department. WARNING WARNING indicates an imminently hazardous situation which, if not avoided, will result in death or serious injury. WARNING Do not store or use gasoline or other flammable vapors and liquids in the vicinity of this or any other appliance.
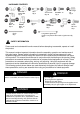
PACKAGE CONTENTS Reflector Flame Screen Glass Tube Upper Support Protective Guard Black Silicone Ring Control Box Assy.
HARDWARE CONTENTS Wing nut Qty. 3 Screw M5 X 12 Qty. 6 Small flat washer Φ6 Qty. 6 Screw M5 X 12 Qty. 6 Stud Qty. 3 3/16” Screw Qty. 42 Wrench Qty. 1 Philips screwdriver Qty. 1 Chain Qty.1 Bolt M6 X 12 Qty. 4 Knob Qty. 1 M6 Flange nut Qty. 4 Screw M4 X 10 Qty.1 Long Stem Lighter Qty. 1 Used in conjunction with match to ignite manually Qty.1 SAFETY INFORMATION Please read and understand this entire manual before attempting to assemble, operate or install the product.
SAFETY INFORMATION DANGER DANGER • CARBON MONOXIDE HAZARD • This heater is a combustion appliance. All combustion appliances produce carbon monoxide (CO) during the combustion process. This product is designed to produce extremely minute, non-hazardous amounts of CO if used and maintained in accordance with all warnings and instructions. Do not block air flow into or out of the heater.
SAFETY INFORMATION WARNING WARNING WARNING California Proposition 65 Combustion by-products produced when using this product contain chemicals known to the State of California to cause cancer, birth defects, and other reproductive harm. • This product is fueled by propane gas. Propane gas is invisible, odorless, and flammable. An odorant is normally added to help detect leaks and can be described as a “rotten egg” smell.
ASSEMBLY INSTRUCTIONS 1. Assemble the wheel assembly to the bottom plate. Fix the wheel assembly to the bottom plate using 4pcs bolt M6X12 and 4pcs flange nut M6. Hardware Used Bolt M6 X 12 M6 Flange nut Wrench 2. Insert the pins of the base to the holes of lower support, press to secure the pins. Using 4pcs screw M5x12 to secure the lower support and base. Insert the pins of the control box assembly to the holes of upper support, press to secure the pins.
ASSEMBLY INSTRUCTIONS 3. Assemble block belt. Fix the block belt to the 2pcs of lower support behind the front door, using 2pcs screw M5X12. Hardware Used Screw M5 X 12 Philips screwdriver 4. Assemble the middle support. Insert the 4pcs upper support to the lower support. Secure them with 8pcs screw 3/16”.
ASSEMBLY INSTRUCTIONS 5. Assemble the flame screen to the upper support. Secure the flame screen to the upper support using 8pcs screw 3/16”. Note: This may require a step ladder. Hardware Used 3/16” Screw Philips screwdriver 6. Assemble the reflector onto the flame screen. Screw the 3pcs stud on the flame screen, put 3pcs washer Φ6 onto the top of stud, then put the reflector onto the stud, secure them with 3pcs washer Φ6 and 3pcs wing nut. Note: This may require a step ladder.
ASSEMBLY INSTRUCTIONS 7. Carefully install the glass tube by lifting up and inserting through the center hole in the upper plate. Ensure the black silicone ring is attached to the lower edge of the glass tube as illustrated. Slide the glass tube through the hole of the lower plate cover and onto the middle plate. Check and ensure that the glass tube is positioned properly and is completely covering the center hole of the middle plate.
ASSEMBLY INSTRUCTIONS 9. Attach the three side panels to the heater using 18pcs screw 3/16”. Note : Do not cover the front side where the control knob is. Hardware Used 3/16” Screw Philips screwdriver 10. Install the knob to M4x10 screw. Hang the chain to the hole on the control box assembly and put the pothook of front panel to the holes of bottom plate.
ASSEMBLY INSTRUCTIONS 11. Screw gas hose and regulator to propane cylinder (not included). Do not cross-thread. WARNING: Use a standard 20 lb. propane cylinder only. Use this heater only with a propane vapor withdrawal supply system. See chapter 5 of the standard for storage and handling of liquefied petroleum gas, ANS/NFPA 58. Your local library or fire department should have this book. A minimum supply pressure of 0.4 P.S.I. is required for the purpose of input adjustment for propane gas.
Never fill the cylinder beyond 80 percent full. Place the dust cap on the cylinder valve outlet whenever the cylinder is not in use. Only install the type of dust cap on the cylinder valve that is provided with the cylinder valve. Other type of caps or plugs may result in leakage of propane. OPERATION INSTRUCTIONS Leak Check • Perform all leak tests outdoors. • Extinguish all open flames. • NEVER leak test when smoking. • Do not use the heater until all connections have been leak tested and do not leak.
OPERATION INSTRUCTIONS DANGER • CARBON MONOXIDE HAZARD • For outdoor use only. Never use inside house, or other unventilated or enclosed areas. This heater consumes air (oxygen). Do not use in unventilated or enclosed areas to avoid endangering your life. Caution: Do not attempt to operate until you have read and understand all General Safety Information in this manual and all assembly is complete and leak checks have been performed. Before Turning Gas Supply ON: 1.
7. If after repeating steps 4 to 6 unit does not light, then: -Push in control knob and turn counterclockwise to “PILOT” (Figure 3). -As you are depressing the control knob, place long stem lighter (See figure OO on page 3) through the hole located in between the igniter and the variable control knob to light the pilot (Figure 5). -Repeat step 6. 8. Push in and turn the control knob to the “HIGH”, then release control knob.
OPERATION INSTRUCTIONS WARNING FOR YOUR SAFETY Be careful when attempting to manually ignite this heater. Holding in the control knob for more than 10 seconds before igniting the gas will cause a ball of flame upon ignition. When heater is ON: The flame should be blue with straight yellow tops. If excessive yellow flame is detected, turn off heater and consult “Troubleshooting” on page 19.
14. All burner passages are clear. 15. All air circulation passages are clear. 16. Children and adults should be alerted to the hazards of high surface temperatures and should stay away to avoid burns or clothing ignition. 17. Young children should be carefully supervised when they are in the area of the heater. 18. Clothing or other protective material should not be hung from the heater, or placed on or near the heater. 19.
tube from the heater and wash and clear. After that assembly the glass tube and the rest of parts. Note: In a salt-air environment (such as near an ocean), corrosion occurs more quickly than normal. Frequently check for corroded areas and repair them promptly. TIP: Use high-quality automobile wax to help maintain the appearance of your heater. Apply to exterior surfaces from the pole down. Do not apply to emitter screen or domes. Storage Between uses: Turn Control Knob OFF. Disconnect LP cylinder.
TROUBLESHOOTING PROBLEM Pilot won’t light Note: Heater operates at reduced efficiency below 40ºF (5ºC) Pilot won’t stay lit Burner won’t light Burner flame is low POSSIBLE CAUSE CORRECTIVE ACTION Cylinder valve is closed Open valve Blockage in orifice or pilot tube Clean or replace orifice or pilot tube Air in gas line Open gas line and bleed it (pressing control knob in) for not more than 1 - 2 minutes or until you smell gas Low gas pressure with cylinder valve fully open Turn cylinder valv
ONE-YEAR LIMITED WARRANTY This product is inspected, tested and carefully packaged to minimize the chance of damage during shipment. If a part within one year from the date of purchase proves to be defective in material or fabrication under normal use, the part will be repaired or replaced. Sunheat International’s obligation under the warranty is to replace or repair defective parts at our discretion.