Assembly Instructions Item #: L-GZ1023PST-A IMPORTANT Thank you very much for choosing Sunjoy Group. Please take time to read these instructions thoroughly and follow each step carefully for safe and easy operation. Keep this manual for future reference. We would like to hear from you with any comments or suggestions. You can call us toll-free at 1-866-578-6569 from 8:00 a.m. EST to 8:00 p.m. PST. You can also send the email to customer.care@sunjoygroup.com or visit www.sunjoyonline.com to get tech.
Cautions: •1. Keep all children and pets away from assembly area. Children and pets should be supervised when they are in the area of the production construction. •2. This package contains small items and plastic bags that should be kept away from children. •3. Keep assembly area at least 6 ft. from any obstruction such as a fence, garage, house, overhanging branches, laundry line or electrical wires. •4. Proper placement of your product is essential. Do not place the product underneath electrical lines.
Parts List Stake Cover A 4 Decorative Part B 1 Stake Plate C 4 Post 1 D1 2 Post 2 D2 1 Post 3 D3 1 Short Beam E1 4 Long Beam E2 4 Beam Support Tube E3 4 Middle Beam Connector F 4 Oblique Beam G1 4 Oblique Beam Down Tube G2 4 Middle Beam H1 4 Middle Beam Down Tube H2 4 Tabletop I 1 Tabletop Support J 1 Small Top Connector K 1 Small Top Oblique Beam L 4 Big Top Connector M 1 Hook N 1 Barometric Bar S 2 Awning Frame Corner Part O1 2
Awning frame horizontal pipe 1 O2 2 Awning frame horizontal pipe 2 O3 2 Awning frame vertical pipe 1 O4 1 Awning frame vertical pipe 2 O5 1 Awning frame support pipe O6 1 Awning frame locating piece O7 1 Big canopy P 1 Small canopy Q 1 Awning R 1 Hardware Pack 1 AA M6*15 Flat Bolt 16 PCS BB M6 Washer 58 PCS CC M6*15 Hex Bolt 34 PCS II M6*25 Hex Bolt 8 PCS Z M6 Wrench 1 PC
Fig.1: Firstly attach the bottom of Posts (D1,D2, D3) into Stake Cover(A) and raise them up. Then use Bolt (AA) and Washer (BB) to fasten the Stake Plate(C) on the bottom of posts. Fig.2: Attach the Short Beam (E1) with Long Beam (E2) tightly using Bolt (CC) and Washer (BB). Fig.3: Use Bolt (AA) and Washer (BB) to fasten the Middle Beam Connector (F) on the assembled beams. Fig.
Fig.7: Insert the Oblique Beam (G1) into the Down Tube (G2). Fig.8: Insert the Oblique Beam (G1) into the Big Top Connector (M). Fig.9: Use Bolt (EE), Washer (BB) and Nut (DD) to fasten the Oblique Beam Down Tube (G2) on the U plate of Posts (D1, D2, D3). Fig.10: Firstly insert the Middle Beam (H1) into the Down Tube (H2). Fig.11: Insert the Middle Beam (H1) into the Big Top Connector (M), then attach the Hook (N) on the Big Top Connector (M). Fig.
Fig.16: Attach the assembled small top on the tube of Oblique Beam (G1) through Small Top Oblique Beam (L). Fig.17-1: Cover the Big Canopy (P) on the big top, then button up canopy on the Oblique Beam Down Tube (G2). Fig.17-2: Cover the four cloth buttons which in the middle of Big Canopy (P) on the Middle Beam Down Tube (H2).
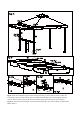
Fig.18 Insert the awning frame part into the Awning (R) as the pic. shows, and use velcro to fasten the Vertical Pipe ( (O4, O5) on the Awning (R). The outside Horizontal Pipe (O2 O3) and Support Pipe (O6) also use velcro to fasten to Awning (R),but the inside Horizontal Pipe (O2,O3) insert to Awning (R). Fig.18-1: Insert the Horizontal Pipe 2 (O3) into the Horizontal Pipe 1 (O2), then use Bolt (CC) and Washer (BB) to fasten it.
Fig.18-2: Use Bolt (CC) and Washer (BB) to fasten the Awning Frame Support Pipe (O6) on the Assembled Awning Frame 1 (O2) and Awning Frame 2 (O3). Fig.18-3: Insert the Horizontal Pipe 2 (O3) and Awning Frame Vertical Pipe 2 (O5) into the Awning frame Corner Part O1 , then use Bolt (CC) and Washer (BB) to fasten it. Awning Frame Horizontal Pipe 1 (O2) and Awning Frame Vertical Pipe 1 ( O4) and Awning Frame Corner Part O1 as the same method. Fig.
Care & Maintenance •Before using, clean the product completely with a soft, dry towel. When not in use, wipe free of any dirt or loose objects, wash with a mild solution of soap and water; rinse thoroughly and dry completely. •Do not use strong detergent or abrasive cleaners. •Do not machine wash. •Bolts can loosen over time. Be sure to check bolts occasionally, tightening as needed. •Protecting furniture from the elements, when not in use is highly recommended.