MOBILE TS2035M, TS2015M WALL TS2035W, TS2015W
Table of Contents 1. SHIPPING CARTON & CONTENTS.......................................................... 3 2. INTRODUCTION ........................................................................................ 4 3. OPERATION .............................................................................................. 5 4. ASSEMBLY OF TRISTAR MOBILE ......................................................... 5 5. ASSEMBLY AND INSTALLATION OF TRISTAR WALL.......................... 5 6. ABOUT YOUR TRISTAR ..
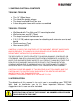
1. SHIPPING CARTON & CONTENTS TS2015M / TS2035M • • • • The 14” (35cm) base The Hand-Ez upright column The lamp head and Dual/Flex arm A four-wing wire frame with casters assembled TS2015W / TS2035W • • • • Wall board with Tee Nuts and “U” mounting bracket Wall extension arm 30” (75cm) The lamp head with the balance arm 2 X (1/4”-20) socket cap screws for attaching wall extension arm to wall board • Plastic washers (Two) • Allen wrench (5/32) CAREFULLY CHECK THE CONTENTS OF THE SHIPMENT.
2.1 APPLICATIONS The Sunnex Tristar offers an economical alternative to traditional minor surgical and examination lights. 2.2 TECHNICAL DATA This light is certified according to the following standards: CAN/CSA-C22.2 No. 601.
Plug the three prong molded plug into an appropriate Hospital Grade receptacle. Power-on your light via the rocker switch in the back cover of the lamp head. The TRI*STAR is powered by a 105W isolation, step-down transformer, that contains an internal thermal cutoff for your added safety. The transformer steps down ordinary wall current to allow for activation of the three lamp reflectors. 4. ASSEMBLY OF TRISTAR MOBILE Remove the Hand-Ez upright column and the lamp head assembly from the shipping carton.
1. The length of the board has been chosen so that two wooden wall studs may be engaged during installation. 2. The wooden wall studs or surface holding the mounting board and the four (4) lag bolts, SHOULD SUPPORT A MINIMUM OF 100 POUNDS PULL ON EACH MOUNTING BOLT, AND A MINIMUM OF 100 SHEAR ON EACH BOLT. 3. Use no smaller than 1/2” lag bolts. The bolts should penetrate the wooden wall studs to at least a depth of 2 1/2”.
WASHER 2. Raise the metal QUIK-CONNECT collar at the base of the DUAL/FLEX arm, and slip the assembly onto the standoff on top of the wall extension arm. Once in place, push down on the collar to properly seat the connection. CAUTION! IF YOU DO NOT EITHER HEAR IT SNAP INTO PLACE OR FEEL A POSITIVE SEATING, PROPER CONNECTION HAS NOT BEEN ACCOMPLISHED. CHECK AGAIN TO ENSURE YOU HAVE SECURELY CONNECTED THE LAMP HEAD/ARM ASSEMBLY TO THE STANDOFF. 3.
THE DUAL/FLEX ARM: A vinyl covered 17” flexible positioning arm connects the lamp head to the Hand-Ez upright column, via a QUIKLOK CONNECTOR. The arm is engineered to two sections with different degrees of tension. The lower section has a tenseness which allows for proper positioning of the lamp head while ensuring the beam does not drift. The upper section provides a lesser degree of tension to allow you the fine lamp head adjustments needed for more precise positioning.
The covers and frame may be easily cleaned with a soft damp cloth of a mild soap and water solution or, mineral spirits. Isopropyl alcohol is another acceptable cleansing agent. The heat absorbing glass filters offer a protection between the patient and the lamp/reflectors. They provide you a BARRIER to falling pieces of those assemblies should they experience a physical failure.
PUSH HERE TO REMOVE CAUTION: ONLY USE OSRAM/SYLVANIA TRU-AIM TITAN BULBS, ANY DEVIATION FROM THE DIRECTIONS MAY SERIOUSLY DAMAGE YOUR LIGHT. 35W IS MAXIMUM ALLOWED. When a lamp/reflector burns out, ALLOW SUFFICIENT TIME FOR IT TO COOL BEFORE ATTEMPTING A REPLACEMENT. Once cool, you should: 1. Refer to figure. Turn the lamp head over so the three glass assemblies face upward. 2. With one hand supporting the backside of the lamp, grasp the notched ring assembly (1) and twist it counter clockwise. 3.
. The light is now ready for use. Only use the following bulbs: Sunnex part# 18560 3x35W: Sylvania Tru-Aim Titan FRB 35MR16Q/10/NSP/T 3x35W: Osram IRC 35W 10° CAUTION! A CHOICE OF A REPLACEMENT LAMP/REFLECTOR CAN AFFECT THE PERFORMANCE OF YOUR TRISTAR LIGHT. WE STRONGLY SUGGEST THAT ONLY OSRAM/SYLVANIA TRU-AIM TITAN ESX LAMP/REFLECTORS BE USED. THESE ARE DESIGNED TO FILTER BOTH INFRARED AND ULTRAVIOLET RAYS, PROVIDING YOU A CONTINUED SAFE, COOL PERFORMANCE.
GROUND SWITCH ON SWITCH OFF CAUTION 9. WARRANTY Limited Warranty Sunnex warrants that the Product, if properly used, will be free from defects in material and workmanship, for a period of three (3) years from the date of shipment to Customer. This Limited Warranty extends only to the original buyer. If the Product is determined to be defective within the warranty period, Sunnex, at its option, will repair or replace the Product, at no charge or refund the then-current value of the Product. 8.
REPAIR, REPLACEMENT OR REFUND, AS PROVIDED UNDER THIS LIMITED WARRANTY, ARE CUSTOMER’S SOLE AND EXCLUSIVE REMEDIES.
(b) Customer is required to follow the user manual associated with the Product for proper operation. (c) Customer is required to perform periodic preventive maintenance as called for in the user manual associated with the Product. (d) Any modifications or repairs made to the Product without prior written authorization from Sunnex will render this Limited Warranty null and void. Instances whereby this is determined to be the case by Sunnex technical staff will be subject to an initial service charge of $75.
CAUTION! DISCONNECT THE LIGHT FROM THE POWER SUPPLY BEFORE ATTEMPTING ANY OF THE ELECTRICAL CHECKS MENTIONED BELOW.
REV. 1.