
Instructions / Assembly


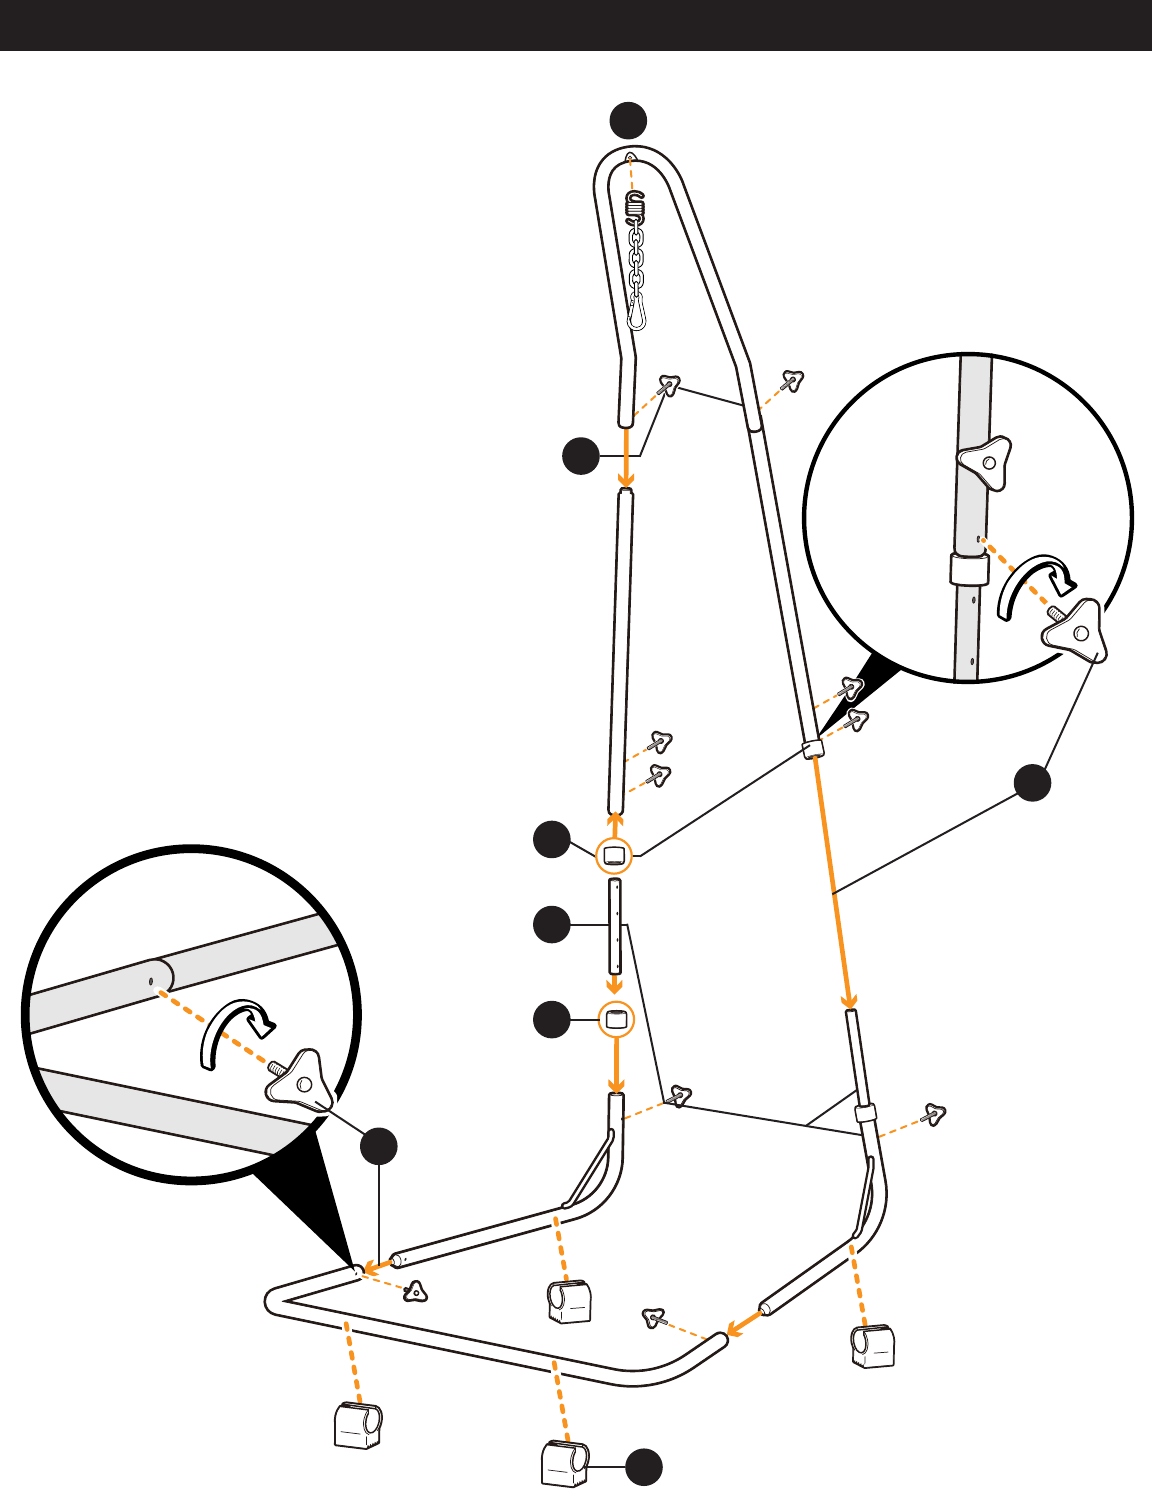
ASSEMBLY
09/2019 Page 2 / 3
1. Carefully snap Foot (Y) onto Base Front (E)
and Base Leg (D) as shown.
2. Slide Base Legs (D) into Front Base (E) and
secure with Threaded Knob (H).
3. With the narrow side of Spacer (G) facing
upwards, rmly press it all the way onto
Base Leg (D).
4. Slide Frame Adjustment Pole (C) into Base
Leg (D). Align the bottom hole of pole (C)
with the hole in the top of leg (D) and secure
with Threaded Knob (H).
5. Firmly press Spacer (G) all the way onto the
wider end of Side Frame (B).
6. Slide the narrow ends of Side Frame (B) into
Top Frame (A) and secure with 2 Threaded
Knobs (H).
7. Slide assembled top (A & B) onto Adjustment
Poles (C) so the holes align evenly. Secure
with 4 Threaded Knobs (H).
8. Hang Spring Hook (F) onto Top Frame (A)
Use optional hanging hardware, Chain (M)
and Carabiner (N) as needed.
1
2
4
3
5
6
7
8
NOTE: Use the knobs that
attach parts B & C to adjust the
height of the stand.
x4
x2
x2
x2
x2
x4
x2