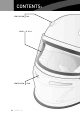
CONTENTS: VENTILATION VISOR VENTILATION 01 J 12 F1 - K1 P 09 P 10-11 P 09
BACK SPOILER P 12 SPARE PARTS P 06 TEAR-OFF LENS P 13 HANS DEVICE P 12 D-RING P 07-08 J 12 F1 - K1 02
ENGLISH WARNINGS Thank you for choosing Suomy Designed and produced according to the highest quality standards, J12 is cer tified by the leading approval bodies. Before using the helmet, read this manual carefully and keep it for future consultation. For clarification or further information, contact your local dealer or Suomy directly You should always use your helmet in accordance with the instruction of this manual.
SPECIFICATIONS ENGLISH Composite fiberglass construction shell with flame resistant surface treatment (F1 version only). Internal comfort lining, chin strap and trim made of flame resistant certified materials. The J12 ventilation system together with the particular configuration of the internal polystirene liner improves air flows (supplied by four air intakes) inside and outside the helmet. This guarantees the more uniform and continuous diffusion of the internal air flow.
ENGLISH GENERAL INSTRUCTIONS To ensure adequate protection, the J12 helmet must fit perfectly and be correctly and firmly fastened in such a way that it cannot be removed by pulling or rotating it on the head. If it is too large, it may slip down over the eyes or twist while you are riding preventing the correct visibility. Only the fire resistant balaclava can be worn under the helmet, do not use scarves or neck bands as these could cause the chinstrap to slip and the helmet to roll off in case of crash.
ENGLISH Painting must not contain diluent because it could damage the structure of the helmet or the layer of the original coating. The paintings used must dry at room temperature. In any case the helmet and its components must not be submitted to high temperature to dry. The surface of the helmet is covered by an anti-fire coating and the use of not suitable painting can compromise the flame-resistant properties of the helmet itself.
ENGLISH ASSEMBLING INSTRUCTIONS "D-RING" Thread the free edge of the chin strap into the rings (1). Pull the end until the chinstrap presses firmly against the jaw. Once this has been done, it should no longer be possible to pull the helmet off. Grip at the back and roll the helmet forwards to make sure the helmet does not come off, but remains firmly on the head (2).
ITALIANO 3 When the chinstrap is tightened correctly, fix the free end in place using the press stud on the release tab (3). The press stud fixes the free end of the chinstrap, avoiding it flapping while riding. Fastening the stud does not guarantee that the helmet is worn and attached correctly. The correct tightness of the chinstrap must be verified exclusively through the operations described in the previous paragraphs.
ENGLISH ASSEMBLING INSTRUCTIONS AIR VENTILATIONS The upper ventilations can be twisted of 360° in such a way to adjust the air flow while using. In any position the vent is completely open and the air flow is adjusted and regulated only by the direction of the movement.
ENGLISH VISOR To open the visor slightly push on the lever A towards the outside to release the pivot B from the C position and move to the upright position. To lock the visor lower it so that the pivot B is inserted inside the C position. C A B REMOVAL OF THE VISOR 1 To remove the visor, pull it up. Use an hexagonal key of 6 mm to remove the pivot B and the rings C.
ENGLISH ASSEMBLING INSTRUCTIONS HOW TO ASSEMBLE THE VISOR 1 C 2 A B D E To ensure the good operation of the rotation system of the visor, before proceeding to the assembling of the visor , make sure that all the parts (pivots, components for fixing and accessories) are removed and perfectly clean. Put the visor on the helmet in such a way that the center 1 fits to the disc 2. Make sure that the rubber trim A is placed on the fixing ring B.
ENGLISH BACK SPOLIER The function of the back spoiler is only aerodynamics, the application or not of this one does not modify the structural characteristics of the helmet. The fixing is done with a bi-tape, the surface of application must be perfectly cleaned and dry to guarantee the effective fixing of the part. To verify the positioning of the spoiler on the helmet remove the protection film from the bi-adesive tape, eventually use a pencil to mark the position before defining the correct position.
ENGLISH ASSEMBLING INSTRUCTIONS "TEAR-OFF" LENS D A B A Before putting the tear-off lens remove the film of protection on one side to be placed on the visor. Put the part A in the part B. Pull the the film so that you can insert the part C in part D and press the film on the visor to remove the air. It is possible to put more than one film over the other following the same operations.
WARRANTY ENGLISH TERMS The guarantee enters into force from the date of the purchase, which must be proved by the receipt (invoice, tax receipt or other document unambiguously proving the date of purchase issued by the seller of the product). Any job undertaken in fulfilment of the guarantee does not extend the guarantee, which remains in any case valid for two years from the date of the purchase. The product must not have been modified and / or altered.