
User`s manual

Chapter 2: Installation
2-27
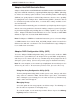
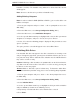
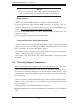
7. Read the warning message as shown on the screen below.
8. Make sure that you have selected the correct disk drives to initialize. If cor-
rect, type Y to continue.
Rebuilding Arrays
Note 1: Rebuilding applies to Fault Tolerant arrays (RAID 1) only.
If an array build process (or initialization) is interrupted or critical with one member
missing, you must perform a rebuild to optimized its functionality. For a critical
array rebuild operation, the optimal drive is the source drive.
Note 2: If no spare array exists and a hard disk drive fails, you need to create
a spare before you can rebuild an array.
1. From the Main Menu, select Manage Arrays. From the list of arrays, select
the array you want to rebuild.
2. Press <Ctrl> + <R> to rebuild.
Using the Disk Utilities
The Disk Utilities enable you to format or verify the media of your SATA hard
disks.
To access the disk utilities:
1. Turn on your computer and press <Ctrl> + <A> when prompted to access
the ARC utility.
2. From the ARC menu, select Disk Utilities.
3. Select the desired disk and press <Enter>.
You can choose from the following options
1. Format Disk - Simulates a low-level format of the hard drive by writing zeros
to the entire disk. Serial ATA drives are low-level formatted at the factory and do
not need to be low-level formatted again.
Caution: Formatting destroys all data on the drive. Be sure to back up your data
before performing this operation.
2. Verify Disk Media - Scans the media of a disk drive for defects.
To Exit the Adaptec RAID Confi guration Utility
Once you have completed RAID array confi gurations, press <Esc> to exit. On
the following screen, select "Yes" to exit the utility.