
User's Manual (1.0)

5-1
Chapter 5: Rack Installation
Chapter 5
Rack Installation
5-1 Overview
This chapter provides instructions for installing the chassis into a rack. Follow the
instructions in the order given to ensure that the system is mounted correctly.
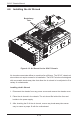
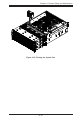
5-2 Unpacking the System
You should inspect the box which the chassis was shipped in and note if it was
damaged in any way. If the chassis itself shows damage, you should le a damage
claim with the carrier who delivered it.
Decide on a suitable location for the rack unit that will hold your chassis. It should
be situated in a clean, dust-free area that is well ventilated. Avoid areas where
heat, electrical noise and electromagnetic elds are generated. The system needs
to be placed near a grounded power outlet. Be sure to read the Rack and Server
Precautions in the next section.
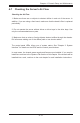
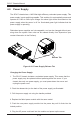
5-3 Preparing for Setup
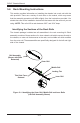
The box your chassis was shipped in should include two sets of rail assemblies
and the mounting screws required to install the system into a rack. Also included
is an optional square hole to round hole converter bracket, for use in racks with
round mounting holes. Please read this section in its entirety before beginning the
installation procedures outlined in the following sections.
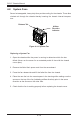
Choosing a Setup Location
Leave enough clearance in front of the rack to enable you to open the front •
door completely (~25 inches).
Leave approximately 30 inches of clearance in the back of the rack to allow for •
sufcient airow and ease in servicing.
This product is for installation only in a Restricted Access Location (dedicated •
equipment rooms, service closets and similar environments).