FOUR BURNER GRILL HEAD AND ACCESS DOOR Assembly/Installation Instructions and Use & Care Guide For questions about features, operation/performance, parts call: 1-800-229-5647 or visit www.sureheat.com Table of Contents..............................................................................................................................2 IMPORTANT: Save for local inspector’s use. Installer: Leave installation instructions with the homeowner.
TABLE OF CONTENTS OUTDOOR GRILL SAFETY..............................3 UNPACKING INSTRUCTIONS..........................4 ASSEMBLY REQUIREMENTS..........................4 Parts Supplied.............................................................5 ASSEMBLY INSTRUCTIONS............................6 INSTALLATION REQUIREMENTS...................8 Location Requirements................................................8 Gas Supply Requirements...........................................9 Gas Connection Requirements..
OUTDOOR GRILL SAFETY Your safety and the safety of others are very important. We have provided many important safety messages in this manual and on your appliance. Always read and obey all safety messages. This is the safety alert symbol. This symbol alerts you to potential hazards that can kill or hurt you and others. All safety messages will follow the safety alert symbol and either the word “DANGER” or “WARNING.
IMPORTANT: This grill is manufactured for outdoor use only. For grills that are to be used at elevations above 2000 ft (609.6 m) orifice conversion is required. See “Gas Supply Requirements” section. It is the responsibility of the installer to comply with the minimum installation clearances specified on the model/serial rating plate. The model/serial rating plate for this model is located inside the Access Door.
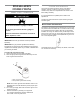
UNPACKING INSTRUCTIONS 1. Using a utility knife, cut the tape to open the top flaps of the carton. . 2. Remove the Assembly/ Installation Instructions and Use and Care Guide. Excessive Weight Hazard 3. Remove the cardboard panel on the top. Remove the corner supports on the top of the inside of the carton. Remove the foam from the two sides. Use two or more people to move and install grill. Failure to do so can result in back or other injury. 4. Remove the bread warmer and the rotisserie spit 5.
Assembly Hardware Supplied Assembled Grill View ■■ 8 - Self-tapping Screws A B G C ■■ 1 - “AA” battery D NOTE: O ther hardware required is attached to the grill where needed. H Tools Needed ■■ ■■ ■■ ■■ ■■ ■■ ■■ I E # 2 Phillips screwdriver Tape Measure Adjustable wrench Level 1/2” wrench or socket 1/4” nut driver or socket Non-corrosive leak detection solution F J Parts Supplied ■■ Gas pressure regulator/hose assembly set for 11” WCP LP gas (attached to manifold). A. B. C. D. E.
Assemble hood and door to masonry base Assemble igniter assembly 1. Place the grill hood in the masonry base. 1. Install “AA” battery, negative end (-) first. 2. Install spring and cap assembly and tighten securely. Built-in dimesions a 30 1/2” f 2” b 16 1/8” g 1 1/8” c 11 h 18 3/4” d 8” i 18 1/2” e 8” j 1 1/2” A A. Igniter Complete grill assembly 3. Insert the flavor grids into the cutouts with triangle ridges facing up. 4.
INSTALLATION REQUIREMENTS Location Requirements Gas Supply Requirements Observe all governing codes and ordinances. IMPORTANT: This installation must conform with all local codes and ordinances. In the absence of local codes, installation must conform with American National Standards Institute, National Fuel Gas Code ANSI Z223.1 - latest edition. IMPORTANT: Grill must be connected to a regulated gas supply. Gas Pressure Regulator Explosion Hazard Do not store food tank in a garage or indoors.
INSTALLATION INSTRUCTIONS Make Gas Connection Check the Burners The burners are tested and factory-set for most efficient operation. However, variations in gas supply and other conditions may make minor adjustments to air shutter or low flame setting necessary. It is recommended that a qualified person make burner adjustments. Checking the grill burner flames requires removing the grate and flavor grids. Explosion Hazard Do not store fuel tank in a garage or indoors.
6. 5. Pull out the knobs (one small knob and four large knobs)and set them aside. Natual Gas Conversion Instructions 1. Loosen the self-tapping screws of the grill head assembly on the right and left sides of the front face assembly. 2. Remove the four (4) Phillips pan head screws on both sides of the front control panel. 6. Replace the new bezels (four large bezels) with the stop 7. stem provided in the NG conversion kit.
OUTDOOR GRILL USE This manual covers several different models. The grill you have purchased may have some or all of the features listed. The locations and appearances of the features shown here may not match those of your model. Control Panel A B C A. B. C. D. E. Igniter button Control knob 1 Control knob 2 Control knob 3 Control knob 4 E D Using Your Outdoor Grill Inspect the LP Gas Fuel Tank Supply Hose Inspect the gas pressure regulator/hose assembly before each use.
Turn the Gas Supply On 1. For outdoor grills using a 20 lb. LP gas fuel tank: Slowly open the tank valve. IMPORTANT: If burner does not light immediately, turn the burner knob to OFF and wait 5 minutes before relighting. If any burners do not light after attempting to light them manually, contact customer service. See the “Assistance” section. NOTE: If flow limiting device activates, your grill may not light. If your grill does not light, the flames will be low and will not heat properly.
TIPS FOR OUTDOOR GRILLING Food Poisoning Hazard Do not let food sit for more than one hour before or after cooking. Doing so can result in food poisoning or sickness. Before Grilling ■■ Thaw food items before grilling. ■■ Preheat grill on HIGH (use all grill burners) 10 minutes. The hood must be closed during preheating. Preheating provides the high heat needed to brown and seal the juices. ■■ Shorten the preheat time when grilling high-fat cuts of meat or poultry, such as chicken thighs.
OUTDOOR GRILL CARE Replacing the Igniter Battery If igniters stop sparking, the battery should be replaced. 1. Unscrew igniter button cap counter-clockwise to remove. GRILL GRATES IMPORTANT: Do not use a steel or fiber scraper on grill grates. Immediately after you are finished cooking, loosen food soil with a brass bristle brush. Turn all burners to HI for 10-15 minutes with the hood closed to burn off food soil. Turn off all burners, raise the hood and let grates cool.
BURNERS Cleaning Method: ■■ Clean the exterior of the burner with a wire brush. ■■ Clear any clogged burner ports with a straightened paper clip. Do not use a toothpick as it may break off and clog the port. ■■ Check and clean burner/venturi tubes. DRIP PAN IMPORTANT: The drip pan should be removed only when grill is completely cool. The drip pan collects grease that runs out through the grill. Clean often to avoid grease buildup. Cleaning Method: ■■ Remove drip pan. Wipe excess grease with paper towels.
REPLACEMENT PARTS Hood Assembly SASAA00194B 1 set Front Face Assembly SWLAA00192A 1 set Hood Handle Assembly SASQG00001A 1 set Large Bezel RCOAG00003C 1 piece Temperature Gauge RCOZZ00029A 1 piece Large Knob RCOFE00006B 1 piece Bread Warming Rack RCORC00010A 1 piece 16 Igniter Right with 4 Poles RCOZZ00147A 1 piece Main Cooking Grate RCOLC00039A 1 piece Regulator RCOZZ00125A 1 set Flavor Grid SBNMC00376A 1 piece Drip Pan SBNBB00075A 1 piece Main Burner Tube RCOQG00004A 1 piece Door Frame SBNBA
REPLACEMENT PARTS Not Shown: Left trim SBNAA00190A 1 set Right trim SBNAA00190B 1 set RCOZZ00312A Main Burner Igniter w/ wire 330mm RCOZZ00213A Main Burner Igniter w/ wire 540mm RCOZZ00214A Main Burner Igniter w/ wire 740mm RCOZZ00310A Main Burner Igniter w/ wire 820mm RCOZZ00316A “Surefire” Logo Back trim SBNAA00191A 1 set 17 17 17
LIMITED WARRANTY Sure Heat Manufacturing warrants that for 2 years from the date of purchase, the stainless panels will not break due to defects in material or workmanship. All other components of this grill are warranted free from defects in material and workmanship for one year from the date of purchase. Sure Heat Manufacturing at its option, will repair or replace this product or any component of the product found to be defective during the warranty period.