2.0 mm ENGLISH SERVICE STATION INFORMATION Fuel recommendation: See page 5-2 Brake and clutch fluid: DOT3 Engine oil recommendation: Engine oil with “Starburst” symbol Standard: GM6094M Viscosity: SAE 5W-30 Tire cold pressure: See the “Tire Information Label” located on the driver’s door lock pillar. 2007 For further details, see “Engine Oil” in the “SERVICE AND APPEARANCE CARE” section. XL7 99011-78J00-03E Printed in U.S.A.
Prepared by September, 2006 Part No. 99011-78J00-03E Printed in U.S.A.
This owner’s manual applies to the XL7 series: NOTE: The illustrated model is one of the XL7 series.
INTRODUCTION Thank you for choosing SUZUKI and welcome to our growing family. Your choice was a wise one; SUZUKI products are a great value that will give you years of driving pleasure. This Owner’s Manual was prepared to help you have a safe, enjoyable, and trouble-free experience with your SUZUKI. In it you will learn about the vehicle’s operation, its safety features and maintenance requirements. Please read it carefully before operating your vehicle.
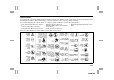
SERVICE STATION GUIDE 1. 2. 3. 4. 5. 6. 7. 8. 9. Fuel (see section 5) Engine hood (see section 5) Tire changing tools (see section 5) Engine oil dipstick (see section 5) Engine coolant (see section 5) Windshield washer fluid (see section 5) Battery (see section 5) Tire pressure (see tire information label on driver’s door lock pillar) Spare tire (see section 5) 1 3 4 2 7 6 9 5 2 8 Litho in U.S.A. Part NO.
TABLE OF CONTENTS California Proposition 65 Warning WARNING Engine exhaust, some of its constituents, and certain product components contain or emit chemicals known to the State of California to cause cancer and birth defects or other reproductive harm.
LOCATION OF WARNING MESSAGES 9 Read and follow all of the warnings (labels etc.) on your vehicle. Make sure you understand all of them. Keep them on the vehicle. Do not remove the messages for any reason. If a label comes off or the messages become difficult to read, have it corrected by your SUZUKI dealer. 1. Airbag warning labels (on both sunvisors) 2. Jacking warning label 3. Brake fluid cap message 4. Surge tank cap message 5. Dynamo meter warning label 6. Air conditioner warning label 7.
FOREWORD All information in this manual is based on the latest product information available at the time of publication. Due to improvements or other changes, there may be discrepancies between information in this manual and your vehicle. SUZUKI MOTOR CORPORATION reserves the right to make production changes at any time, without notice and without incurring any obligation to make the same or similar changes to vehicles previously built or sold.
IMPORTANT MODIFICATION WARNING WARNING/CAUTION/NOTE Please read this manual and follow its instructions carefully. To emphasize special information, the symbol and the words WARNING, CAUTION and NOTE have special meanings. Pay special attention to the messages highlighted by these signal words: WARNING Do not modify this vehicle. Modification could adversely affect safety, handling, performance or durability and may violate governmental regulations.
Vehicle Symbols Your vehicle has components and labels that use symbols instead of text. Symbols, used on your vehicle, are shown along with the text describing the operation or information relating to a specific component, control, message, gauge or indicator.
0-4 78J00-03E
SEATS AND RESTRAINT SYSTEMS SEATS AND RESTRAINT SYSTEMS 1 Front Seats .......................................................................... 1-1 Rear Seats ............................................................................ 1-6 Safety Belts .......................................................................... 1-9 Child Restraints ................................................................... 1-18 Airbag System .....................................................................
SEATS AND RESTRAINT SYSTEMS Front Seats Driver Seat Height Adjuster Power Seat Manual Seats WARNING You can lose control of the vehicle if you try to adjust a manual driver’s seat while the vehicle is moving. The sudden movement could startle and confuse you, or make you push a pedal when you do not want to. Adjust the driver’s seat only when the vehicle is not moving.
SEATS AND RESTRAINT SYSTEMS Manual Lumbar Heated Seats Manual Reclining Seatbacks WARNING You can lose control of the vehicle if you try to adjust a manual driver’s seat while the vehicle is moving. The sudden movement could startle and confuse you, or make you push a pedal when you do not want to. Adjust the driver’s seat only when the vehicle is not moving. WARNING 1211985 1761660 If your vehicle has this feature, the knob is located on the front of the driver seat lower cushion on the inboard side.
SEATS AND RESTRAINT SYSTEMS Driver’s seat with manual recline and manual height adjuster shown Passenger seat with folding seatback option shown 806881 1618868 1618866 To adjust the seatback on the driver’s seat, lift the lever on the rear outboard side of the seat and move the seatback to the desired position. Then release the lever to lock the seatback in place.
SEATS AND RESTRAINT SYSTEMS WARNING (Continued) For proper protection when the vehicle is in motion, have the seatback upright. Then sit well back in the seat and wear your safety belt properly. Do not have a seatback reclined if your vehicle is moving. Head Restraints 1525254 1811484 Pull the head restraint up to raise it. To lower the head restraint, press the button, located on the top of the seatback, and push the restraint down. The third row seat head rests can be removed from the seatback.
SEATS AND RESTRAINT SYSTEMS Passenger Folding Seatback The front passenger’s seatback may fold flat. WARNING If you fold the seatback forward to carry longer objects, such as skis, be sure any such cargo is not near an airbag. In a crash, an inflating airbag might force that object toward a person. This could cause severe injury or even death. Secure objects away from the area in which an airbag would inflate.
SEATS AND RESTRAINT SYSTEMS To raise the seatback, do the following: Rear Seats 1) Lift the recliner lever, located on the outboard side of the seat, up fully and push up on the seatback. 2) Continue raising the seatback until the seatback re-engages. Split Folding the Second Row Seat WARNING If the seatback is not locked, it could move forward in a sudden stop or crash. That could cause injury to the person sitting there. Always push and pull on the seatback to be sure it is locked.
SEATS AND RESTRAINT SYSTEMS 5) Push and pull on the seatback to make sure it is locked. To recline the seatback, do the following: 1) Lift and hold the lever located on top of the seatback. 2) Tilt the seatback rearward, then release the lever when the seatback is in the desired position. 3) Push and pull on the seatback to make sure it is locked. Folding and Tumbling the Seat(s) WARNING CAUTION Folding a rear seat with the safety belts still fastened may cause damage to the seat or the safety belts.
SEATS AND RESTRAINT SYSTEMS Third Row Seat Unfolding the Seatback(s) To return the seatback to the upright position, do the following: WARNING 1) Open the liftgate to access the pullstrap for the seat. 2) Use the pullstrap on the seatback to pull the seatback up until it locks into the upright position. Be sure to return the seat to the passenger seating position when finished. Push and pull on the seat to make sure it is locked into place.
SEATS AND RESTRAINT SYSTEMS Safety Belts Safety Belts: They Are for Everyone This part of the manual tells you how to use safety belts properly. It also tells you some things you should not do with safety belts. WARNING Do not let anyone ride where he or she cannot wear a safety belt properly. If you are in a crash and you are not wearing a safety belt, your injuries can be much worse. You can hit things inside the vehicle or be ejected from it. You can be seriously injured or killed.
SEATS AND RESTRAINT SYSTEMS strongest bones take the forces. That is why safety belts make such good sense. Questions and Answers About Safety Belts Question: Will I be trapped in the vehicle after an accident if I am wearing a safety belt? 805928 Get it up to speed. Then stop the vehicle. The rider does not stop. 809245 or the instrument panel... Answer: You could be – whether you are wearing a safety belt or not. But you can unbuckle a safety belt, even if you are upside down.
SEATS AND RESTRAINT SYSTEMS Question: If I am a good driver, and I never drive far from home, why should I wear safety belts? Answer: You may be an excellent driver, but if you are in an accident – even one that is not your fault – you and your passengers can be hurt. Being a good driver does not protect you from things beyond your control, such as bad drivers. Driver Position Lap-Shoulder Belt The driver has a lap-shoulder belt. Here is how to wear it properly. 1) Close and lock the door.
SEATS AND RESTRAINT SYSTEMS It may be necessary to pull stitching on the safety belt through the latch plate to fully tighten the lap belt on smaller occupants. 809246 The lap part of the belt should be worn low and snug on the hips, just touching the thighs. In a crash, this applies force to the strong pelvic bones. And you would be less likely to slide under the lap belt. If you slid under it, the belt would apply force at your abdomen. This could cause serious or even fatal injuries.
SEATS AND RESTRAINT SYSTEMS Question: What is wrong with this? Question: What is wrong with this? Question: What is wrong with this? 805942 Answer: The belt is buckled in the wrong place. WARNING You can be seriously injured if your belt is buckled in the wrong place like this. In a crash, the belt would go up over your abdomen. The belt forces would be there, not at the pelvic bones. This could cause serious internal injuries. Always buckle your belt into the buckle nearest you.
SEATS AND RESTRAINT SYSTEMS 1378915 1507374 1379057 To unlatch the belt, push the button on the buckle. The belt should go back out of the way. To move it up or down, squeeze the release buttons (A) together and move the height adjuster to the desired position. Before you close the door, be sure the belt is out of the way. If you slam the door on it, you can damage both the belt and your vehicle.
SEATS AND RESTRAINT SYSTEMS Right Front Passenger Position To learn how to wear the right front passenger’s safety belt properly, refer to “Driver Position” in this section. The right front passenger’s safety belt works the same way as the driver’s safety belt – except for the following. If you ever pull the shoulder portion of the belt out all the way, you will engage the child restraint locking feature. If this happens, just let the belt go back all the way and start again.
SEATS AND RESTRAINT SYSTEMS strong pelvic bones. And you would be less likely to slide under the lap belt. If you slid under it, the belt would apply force at your abdomen. This could cause serious or even fatal injuries. The shoulder belt should go over the shoulder and across the chest. These parts of the body are best able to take belt restraining forces. Question: What is wrong with this? The safety belt locks if there is a sudden stop or a crash.
SEATS AND RESTRAINT SYSTEMS 1379299 1397291 1400065 2) Slide the guide under and past the belt. The elastic cord must be under the belt. Then, place the guide over the belt, and insert the two edges of the belt into the slots of the guide. 3) Be sure that the belt is not twisted and it lies flat. The elastic cord must be under the belt and the guide on top. 4) Buckle, position, and release the safety belt as described in “Rear Seat Passengers” in this section.
SEATS AND RESTRAINT SYSTEMS Safety Belt Pretensioners Your vehicle has safety belt pretensioners for the driver and right front passenger. Although you cannot see them, they are part of the safety belt assembly. They help tighten the safety belts during the early stages of a moderate to severe frontal, near frontal, rear or side crash, or a rollover if the threshold conditions for pretensioner activation are met.
SEATS AND RESTRAINT SYSTEMS Infants and Young Children WARNING Never do this. Here a child is sitting in a seat that has a lap-shoulder belt, but the shoulder part is behind the child. If the child wears the belt in this way, in a crash the child might slide under the belt. The belt’s force would then be applied right on the child’s abdomen. That could cause serious or fatal injuries.
SEATS AND RESTRAINT SYSTEMS WARNING People should never hold a baby in their arms while riding in a vehicle. A baby does not weigh much – until a crash. During a crash a baby will become so heavy it is not possible to hold it. For example, in a crash at only 25 mph (40 km/h), a 12 lb (5.5 kg) baby will suddenly become a 240 lb (110 kg) force on a person’s arms. A baby should be secured in an appropriate restraint.
SEATS AND RESTRAINT SYSTEMS The restraint manufacturer’s instructions that come with the restraint state the weight and height limitations for a particular child restraint. In addition, there are many kinds of restraints available for children with special needs. WARNING Newborn infants need complete support, including support for the head and neck. This is necessary because a newborn infant’s neck is weak and its head weighs so much compared with the rest of its body.
SEATS AND RESTRAINT SYSTEMS 1383218 1395252 1395258 A rear-facing infant seat (B) provides restraint with the seating surface against the back of the infant. The harness system holds the infant in place and, in a crash, acts to keep the infant positioned in the restraint. A forward-facing child seat (C–E) provides restraint for the child’s body with the harness and also sometimes with surfaces such as T-shaped or shelf-like shields.
SEATS AND RESTRAINT SYSTEMS Question: How Should I Use a Child Restraint? Answer: A child restraint system is any device designed for use in a motor vehicle to restrain, seat, or position children. A builtin child restraint system is a permanent part of the motor vehicle. An add-on child restraint system is a portable one, which is purchased by the vehicle’s owner. To help reduce injuries, an add-on child restraint must be secured in the vehicle.
SEATS AND RESTRAINT SYSTEMS endangered in a crash if the child is not properly secured in the child restraint. Where to Put the Restraint Accident statistics show that children are safer if they are restrained in the rear rather than the front seat. We recommend that child restraints be secured in a rear seat, including an infant riding in a rearfacing infant seat, a child riding in a forward-facing child seat and an older child riding in a booster seat.
SEATS AND RESTRAINT SYSTEMS Configurations for Use of Three Child Restraints 1507697 A. Occupant prohibited B. Child restraint using LATCH 1507698 A. Child restraint using LATCH B. No occupant recommended C. Child restraint or occupant using safety belt 1507710 A.
SEATS AND RESTRAINT SYSTEMS the child restraint that are made for use with the LATCH system. 1507704 A. Child restraint or occupant using safety belt B. Child restraint using LATCH Wherever you install a child restraint, be sure to secure the child restraint properly. Keep in mind that an unsecured child restraint can move around in a collision or sudden stop and injure people in the vehicle. Be sure to properly secure any child restraint in your vehicle – even when no child is in it.
SEATS AND RESTRAINT SYSTEMS States, some child restraints also have a top tether. Be sure to read and follow the instructions for your child restraint. Top Tether Anchor crease between the seatback and the seat cushion. If the child restraint does not have a top tether, one can be obtained, in kit form, for many child restraints. Ask the child restraint manufacturer whether or not a kit is available.
SEATS AND RESTRAINT SYSTEMS to Put the Restraint” in this section for additional information. Securing a Child Restraint Designed for the LATCH System WARNING If a LATCH-type child restraint is not attached to anchors, the restraint will not be able to protect the child correctly. In a crash, the child could be seriously injured or killed.
SEATS AND RESTRAINT SYSTEMS There are no top tether anchors in the third row seating positions. Do not secure a child restraint in the third row if a national or local law requires that a top tether be anchored or if the instructions that come with the restraint say that the top tether must be anchored. the child restraint with the top tether and the safety belts. Refer to your child restraint manufacturer instructions and the instructions in this manual. 1.
SEATS AND RESTRAINT SYSTEMS 1379321 1379324 3) Buckle the belt. Make sure the release button is positioned so you would be able to unbuckle the safety belt quickly if you ever had to. 4) Pull the rest of the shoulder belt all the way out of the retractor to set the lock. the belt, and feed the shoulder belt back into the retractor. If you are using a forward-facing child restraint, you may find it helpful to use your knee to push down on the child restraint as you tighten the belt.
SEATS AND RESTRAINT SYSTEMS Securing a Child Restraint in the Right Front Seat Position Your vehicle has a right front passenger's airbag. A rear seat is a safer place to secure a forward-facing child restraint. Refer to “Where to Put the Restraint” in this section. In addition, your vehicle has a passenger sensing system.
SEATS AND RESTRAINT SYSTEMS restraint. Refer to “Manual Seats” in this section. If your child restraint has the LATCH system, refer to “Lower Anchors and Tethers for Children (LATCH)” in this section. There is no top tether anchor at the right front seating position. Do not secure a child seat in this position if a national or local law requires that the top tether be anchored or if the instructions that come with the child restraint say that the top tether must be anchored.
SEATS AND RESTRAINT SYSTEMS the belt, and feed the shoulder belt back into the retractor. If you are using a forward-facing child restraint, you may find it helpful to use your knee to push down on the child restraint as you tighten the belt. You should not be able to pull more of the belt from the retractor once the lock has been set. 7) Push and pull the child restraint in different directions to be sure it is secure.
SEATS AND RESTRAINT SYSTEMS WARNING You can be severely injured or killed in a crash if you are not wearing your safety belt – even if you have airbags. Wearing your safety belt during a crash helps reduce your chance of hitting things inside the vehicle or being ejected from it. Airbags are “supplemental restraints” to the safety belts. All airbags are designed to work with safety belts but do not replace them.
SEATS AND RESTRAINT SYSTEMS Where Are the Airbags? WARNING Anyone who is up against, or very close to, any airbag when it inflates can be seriously injured or killed. Airbags plus lap-shoulder belts offer the best protection for adults, but not for young children and infants. Neither the vehicle’s safety belt system nor its airbag system is designed for them. Young children and infants need the protection that a child restraint system can provide. Always secure children properly in your vehicle.
SEATS AND RESTRAINT SYSTEMS 1177533 1197154 1700418 The roof-mounted rollover airbag for the driver and the person seated directly behind the driver is located in the ceiling above the side windows. The roof-mounted rollover airbag for the right front passenger and the person directly behind that passenger is located in the ceiling above the side windows.
SEATS AND RESTRAINT SYSTEMS WARNING If something is between an occupant and an airbag, the bag might not inflate properly or it might force the object into that person causing severe injury or even death. The path of an inflating airbag must be kept clear. Do not put anything between an occupant and an airbag, and do not attach or put anything on the steering wheel hub or on or near any other airbag covering.
SEATS AND RESTRAINT SYSTEMS impact, and how quickly the vehicle slows down. For roof-mounted rollover airbags, inflation is determined by the location and severity of the impact or a rollover event. What Makes an Airbag Inflate? In an impact of sufficient severity, the airbag sensing system detects that the vehicle is in a crash. In the case of a roofmounted rollover airbag, the sensing system detects that the vehicle is about to roll over or has been in a severe frontal or side impact.
SEATS AND RESTRAINT SYSTEMS In many crashes severe enough to inflate the airbag, windshields are broken by vehicle deformation. Additional windshield breakage may also occur from the right front passenger airbag. • Airbags are designed to inflate only once. After an airbag inflates, you will need some new parts for your airbag system. If you do not get them, the airbag system will not be there to help protect you in another crash. A new system will include airbag modules and possibly other parts.
SEATS AND RESTRAINT SYSTEMS WARNING A child in a rear-facing child restraint can be seriously injured or killed if the right front passenger’s airbag inflates. This is because the back of the rear-facing child restraint would be very close to the inflating airbag.
SEATS AND RESTRAINT SYSTEMS If, after reinstalling the child restraint and restarting the vehicle, the on indicator is still lit, check to make sure that the vehicle’s seatback is not pressing the child restraint into the seat cushion. If this happens, slightly recline the vehicle’s seatback and adjust the seat cushion if possible. Also make sure the child restraint is not trapped under the vehicle head restraint. If this happens, adjust the head restraint.
SEATS AND RESTRAINT SYSTEMS WARNING Stowing of articles under the passenger’s seat or between the passenger’s seat cushion and seatback may interfere with the proper operation of the passenger sensing system. Servicing Your Airbag-Equipped Vehicle Airbags affect how your vehicle should be serviced. There are parts of the airbag system in several places around your vehicle. You do not want the system to inflate while someone is working on your vehicle.
SEATS AND RESTRAINT SYSTEMS CAUTION If you damage the covering for the driver’s or the right front passenger’s airbag, or the side impact airbag covering on the ceiling near the side windows, the airbag may not work properly. You may have to replace the airbag module in the steering wheel, both the airbag module and the instrument panel for the right front passenger’s airbag, or side impact airbag module and ceiling covering for roof-mounted rollover airbags. Do not open or break the airbag coverings.
FEATURES AND CONTROLS FEATURES AND CONTROLS Keys ...................................................................................... 2-1 Doors and Locks ................................................................. 2-5 Windows .............................................................................. 2-8 Theft-Deterrent Systems .................................................... 2-9 Daily Inspection Checklist ..................................................
FEATURES AND CONTROLS Keys WARNING Leaving children in a vehicle with the ignition key is dangerous for many reasons, children or others could be badly injured or even killed. They could operate the power windows or other controls or even make the vehicle move. The windows will function with the keys in the ignition and they could be seriously injured or killed if caught in the path of a closing window. Do not leave the keys in a vehicle with children. Key code information can be obtained by your dealer.
FEATURES AND CONTROLS Remote Keyless Entry (RKE) System Operation Remote Keyless Entry with Remote Start (Remote Vehicle Start): If your vehicle has this feature, it may be started from outside the vehicle using the RKE transmitter. See “Remote Vehicle Start” following, for more detailed information. The vehicle’s doors can be locked and unlocked from about 3 feet (1 m) up to 65 feet (20 m) away with the Remote Keyless Entry (RKE) transmitter.
FEATURES AND CONTROLS transmitter will disarm the content theftdeterrent system. Refer to “Content TheftDeterrent” in this section. (Vehicle Locator/Panic Alarm): Press and release this button to locate your vehicle. The turn signal lamps will flash and the horn will sound three times. Press and hold this button for more than two seconds to activate the panic alarm. The turn signal lamps will flash and the horn will sound repeatedly for 30 seconds.
FEATURES AND CONTROLS Remote Vehicle Start Your vehicle may have the remote start feature. This feature allows you to start the engine from outside the vehicle. Refer to “REMOTE START” under “DIC Vehicle Personalization” in “Driver Information Center (DIC)” in the “Instrument Panel” section for instructions on how to enable and disable this feature.
FEATURES AND CONTROLS The remote vehicle start feature will not operate if: • The vehicle’s key is in the ignition. • The vehicle’s hood, liftgate or doors are not closed. • The hazard warning flashers are on. • There is an emission control system malfunction. • The engine coolant temperature is too high. • The oil pressure is low. • Two remote vehicle starts have already been used. The maximum number of remote starts or remote start attempts between ignition cycles with the key is two.
FEATURES AND CONTROLS Delayed Locking To cancel the rear door security lock, do the following: A chime will sound three times to indicate a door or liftgate is open when you try to lock the doors with the remote keyless entry (RKE) transmitter or the power door lock switch. The doors will not lock, and the theft-deterrent system will not arm until all the doors are closed and ten seconds have passed. The delayed locking feature can be programmed through the Driver Information Center (DIC).
FEATURES AND CONTROLS Liftgate WARNING It can be dangerous to drive with the liftgate or liftglass open because carbon monoxide (CO) gas can come into your vehicle. You cannot see or smell CO. It can cause unconsciousness and even death. If you must drive with the liftgate open or if electrical wiring or other cable connections must pass through the seal between the body and the liftgate or liftglass: • Make sure all other windows are shut.
FEATURES AND CONTROLS Windows Power Windows WARNING WARNING Leaving children, helpless adults, or pets in a vehicle with the windows closed is dangerous. They can be overcome by the extreme heat and suffer permanent injuries or even death from heat stroke. Never leave a child, a helpless adult, or a pet alone in a vehicle, especially with the windows closed in warm or hot weather. Leaving children, helpless adults, or pets in a vehicle with the windows closed is dangerous.
FEATURES AND CONTROLS will go all the way down. To stop the window from lowering, lift the switch all the way up and release it. Window Lockout The driver’s window switches also include a lockout switch. Press the left side of the switch to prevent rear passengers from using their window switches. The driver can still control all the windows with the lockout on. Press the right side of the window lockout switch to return to normal window operation. Sun Visors To block out glare, swing the sun visor down.
FEATURES AND CONTROLS PASS-Key® III+ The PASS-Key® III+ system operates on a radio frequency subject to Federal Communications Commission (FCC) Rules and with Industry Canada. This device complies with Part 15 of the FCC Rules. Operation is subject to the following two conditions: 1) This device may not cause harmful interference. 2) This device must accept any interference received, including interference that may cause undesired operation. This device complies with RSS-210 of Industry Canada.
FEATURES AND CONTROLS If you are driving and the security light comes on and stays on, you may be able to restart your engine. Your PASS-Key® III+ system, however, may not be working properly and must be serviced by your dealer. If you lose or damage your PASS-Key® III+ key, see your dealer or a locksmith who can service PASS-Key® III+ to have a new key made. Daily Inspection Checklist Before Driving 1) Make sure that windows, mirrors, lights and reflectors are clean and unobstructed.
FEATURES AND CONTROLS Starting and Operating Your Vehicle Ignition Positions (LOCK): You will only be able to remove your key when the ignition is turned to LOCK. The ignition switch cannot be turned to LOCK unless the shift lever is in PARK (P). New Vehicle Break-In CAUTION Your vehicle does not need an elaborate break-in. But it will perform better in the long run if you follow these guidelines: • Do not drive at any one constant speed, fast or slow, for the first 500 miles (805 km).
FEATURES AND CONTROLS tion and park your vehicle, a chime will sound, when you open the driver’s door. Always remember to remove your key from the ignition and take it with you. This will lock your ignition and transaxle. Also, always remember to lock the doors. The battery could be drained if you leave the key in the ignition while your vehicle is parked. You may not be able to start your vehicle after it has been parked for an extended period of time.
FEATURES AND CONTROLS the oil warms up and lubricates all moving parts. CAUTION Your engine is designed to work with the electronics in your vehicle. If you add electrical parts or accessories, you could change the way the engine operates. Before adding electrical equipment, check with your dealer. If you do not, your engine might not perform properly. Any resulting damage would not be covered by your vehicle’s warranty.
FEATURES AND CONTROLS started because the vehicle cannot move easily. WARNING It is dangerous to get out of your vehicle if the shift lever is not fully in PARK (P) with the parking brake firmly set. Your vehicle can roll. Do not leave your vehicle when the engine is running unless you have to. If you have left the engine running, the vehicle can move suddenly. You or others could be injured.
FEATURES AND CONTROLS Downshifting the transaxle in slippery road conditions could result in skidding, refer to “Loss of Control” in “Your Driving, the Road, and Your Vehicle” in the “Driving Your Vehicle” section. Manual Shift Mode (MSM) (Automatic Transaxle) A box with the current gear will display in the middle of the telltale line below the gear selection. While using the Manual Shift Mode (MSM) feature the vehicle will have firmer shifting and increased performance.
FEATURES AND CONTROLS SECOND (2) Gear Start Feature Parking Brake CAUTION CAUTION Driving with the parking brake on can overheat the brake system and cause premature wear or damage to brake system parts. Verify that the parking brake is fully released and the brake warning light is off before driving. If you attempt a third gear start while trailering or towing a heavy load, you will notice reduced engine power. This could overheat and damage your transaxle.
FEATURES AND CONTROLS 4) Remove the key and take it with you. If you can leave your vehicle with the ignition key in your hand, your vehicle is in PARK (P). Leaving Your Vehicle With the Engine Running WARNING It can be dangerous to leave your vehicle with the engine running. Your vehicle could move suddenly if the shift lever is not fully in PARK (P) with the parking brake firmly set. And, if you leave the vehicle with the engine running, it could overheat and even catch fire.
FEATURES AND CONTROLS Engine Exhaust WARNING Engine exhaust can kill. It contains the gas carbon monoxide (CO), which you cannot see or smell. It can cause unconsciousness and death. You might have exhaust coming in if: • The exhaust system sounds strange or different. • Your vehicle gets rusty underneath. • Your vehicle was damaged in a collision. • Your vehicle was damaged when driving over high points on the road or over road debris. • Repairs were not done correctly.
FEATURES AND CONTROLS Mirrors Manual Rearview Mirror To adjust the angle of the mirror, move the mirror to a position that allows you see to out of the back window. To adjust the height of the mirror, adjust the arm that connects the mirror to the windshield. To reduce glare from lights behind you, move the lever toward you to the night position.
FEATURES AND CONTROLS ZONE is displayed. The number shown is the current zone number. 3) Scroll through the zone numbers that appear in the compass/temperature window on the mirror by pressing the on/off button. Once you find your zone number, release the button. 2) Press the corresponding edges of the round control pad to move each mirror to the desired direction. After about four seconds, the mirror will return to the compass display, and the new zone number will be set.
FEATURES AND CONTROLS Center Console Storage Area Your vehicle has a center console armrest with storage area. Use the top lever on the front of the console to open it. There is an additional storage area underneath the center console. To access, use the bottom lever and pull the console up. Assist Handles There are assist handles with garment hooks located above the rear passenger doors.
FEATURES AND CONTROLS Do not stand on the plastic lower body panel when loading cargo on the luggage carrier. Loading cargo on the luggage carrier will make the center of vehicle gravity higher. Avoid high speeds, sudden starts, sharp turns, sudden braking or abrupt maneuvers. This could result in loss of control of the vehicle. 1767348 To reposition the crossrail, pull up on the end levers on each side of the crossrail to the upright position. This will release the locking mechanism from the siderail.
FEATURES AND CONTROLS Sunroof If your vehicle has this feature, the sunroof switch is located on the headliner above the rearview mirror. The ignition must be in RUN or ACC, or Retained Accessory Power (RAP) must be active, to operate the sunroof. Refer to “Retained Accessory Power (RAP)” in this section for more information. Press forward on the switch again to make sure the sunroof is fully closed. To put the sunroof in the vent position, pull down on the front of the switch.
FEATURES AND CONTROLS MEMO 2-25 78J00-03E
INSTRUMENT PANEL INSTRUMENT PANEL Instrument Panel Overview ................................................ 3-1 Climate Controls ................................................................. 3-10 Warning Lights, Gages, and Indicators ............................ 3-15 Driver Information Center (DIC) ......................................... 3-27 Audio System(s) ..................................................................
INSTRUMENT PANEL Instrument Panel Overview 1732990 3-1 78J00-03E
INSTRUMENT PANEL The main components of your instrument panel are the following: A. Air Outlets. Refer to “Outlet Adjustment” in this section. B. Turn Signal/Multifunction Lever. Refer to “Turn Signal/Multifunction Lever” in this section. C. Cruise Controls. Refer to “Cruise Control” in this section. D. Instrument Panel Cluster. Refer to “Instrument Panel Cluster” in this section. E. Audio Steering Wheel Controls. Refer to “Audio Steering Wheel Controls” in this section. F. Windshield Wiper/Washer Lever.
INSTRUMENT PANEL Hazard Warning Flashers Tilt Wheel The hazard warning flashers let you warn the police and others that you have a problem. The front and rear turn signal lamps will flash on and off. Your vehicle has a tilt wheel that allows you to adjust the steering wheel. Turn Signal/Multifunction Lever 1223926 The hazard warning flasher button is located in the center of the instrument panel.
INSTRUMENT PANEL To signal a turn, move the lever all the way up or down. When the turn is finished, the lever will return automatically. Headlamp High/Low-Beam Changer To change the headlamps from low beam to high, push the turn signal lever away from you. To change from high beam to low beam, pull the turn signal lever towards you. To flash the high beams from low beam, pull the turn signal lever all the way towards you. Then release it. Blade Replacement” in the “Service and Appearance Care” section.
INSTRUMENT PANEL (Delay Adjustment): Move the lever to the delay position to choose a delayed wiping cycle. Turn the intermittent adjust band down for a longer delay or up for a shorter delay. (Off): Move the lever to this position to turn off the windshield wipers. (Mist): Move the lever all the way down to mist and release for a single wiping cycle. The windshield wipers will stop after one wipe and then return to the original position. If more wipes are needed, hold the lever on mist longer.
INSTRUMENT PANEL Setting Cruise Control The cruise control light on the instrument panel cluster will come on after the cruise control has been set to the desired speed. 1) Press the on/off button to turn cruise control on. 2) Get up to the speed you want. 3) Press the SET– button and release it. 4) Take your foot off the accelerator pedal. When the brakes are applied, the cruise control shuts off. 1541871 The cruise control buttons are located on the left side of the steering wheel.
INSTRUMENT PANEL the vehicle’s speed for approximately 60 seconds, cruise control will disengage. Using Cruise Control on Hills How well your cruise control will work on hills depends upon your speed, load, and the steepness of the hills. When going up steep hills, you may have to step on the accelerator pedal to maintain your vehicle’s speed. When going downhill, you may have to brake or shift to a lower gear to limit the vehicle’s speed. Of course, applying the brakes ends cruise control.
INSTRUMENT PANEL When it is bright enough outside, the headlamps will go off and the DRL will come on. As with any vehicle, you should turn on the regular headlamp system when you need it. Automatic Headlamp System When it is dark enough outside and the exterior lamps control is in the automatic position, the headlamps will come on automatically. Refer to “Headlamps” in this section.
INSTRUMENT PANEL your vehicle will come on when any door is opened. In addition, the light will come on when the remote keyless entry unlock button is pressed. It will stay on for 20 seconds or until a door is opened. After the door is opened the light will remain on and stay on for 20 seconds after the doors are closed, or until you put the key in the ignition and turn the key to RUN. Map Lamps Cargo Lamp The cargo lamp is located over the rear compartment, and is controlled by the dome lamp.
INSTRUMENT PANEL Power (RAP)” in “Starting and Operating Your Vehicle” in the “Features and Controls” section. Accessory Power Outlet(s) The accessory power outlets can be used to connect electrical equipment such as a cellular phone or CB radio. Your vehicle may have four accessory power outlets. They are located on the instrument panel below the climate controls, inside the front center console storage bin under the cupholders, at the rear of the center console, and in the rear cargo area.
INSTRUMENT PANEL Automatic Climate Control System with Rear Air Conditioning and Heating System 1732674 Automatic Operation AUTO (Automatic Fan): When this position is selected on the fan control, the system automatically adjusts the fan speed. Temperature Setting: The system uses the outside temperature, passenger compartment air temperature, and solar load sensors to maintain the chosen temperature setting. AUTO (Automatic Mode): 1) Turn the fan and mode control to the AUTO position.
INSTRUMENT PANEL The modes can also be selected by pressing the following buttons: AUX (Auxiliary): This button is on a vehicle that has the Rear Climate Control System. Press it to turn on the rear heating and air conditioning. Refer to “Rear Air Conditioning and Heating System” in this section for more information. (Outside Air): Press this button to turn on the outside air mode. While this mode is on, outside air circulates throughout the vehicle.
INSTRUMENT PANEL (Rear): Press this button to turn the rear window defogger on or off. An indicator light on the button comes on to let you know that the rear window defogger is activated. The rear window defogger only works when the ignition is in RUN. The rear window defogger stays on for approximately 15 minutes after the button is pressed, unless the ignition is turned to ACC or LOCK. If turned on again, the defogger only runs for about five minutes before turning off.
INSTRUMENT PANEL Mode Knob The right knob on the control panel lets you to choose the direction of air delivery. (Vent): This setting directs the air through the headliner outlets. (Bi-Level): This setting directs the air through the floor outlets, as well as the headliner outlets. The rear system floor outlets are located near third row seats. The flow can be divided between vent and floor outlets depending upon where the knob is placed between the settings.
INSTRUMENT PANEL Warning Lights, Gages, and Indicators get to know your warning lights and gages. They are a big help. This part describes the warning lights and gages that may be on your vehicle. The pictures will help you locate them. Instrument Panel Cluster Warning lights and gages can signal that something is wrong before it becomes serious enough to cause an expensive repair or replacement. Paying attention to your warning lights and gages could also save you or others from injury.
INSTRUMENT PANEL Tachometer The tachometer shows your engine speed in revolutions per minute (rpm). CAUTION If you operate the engine with the tachometer in the solid red area, your vehicle could be damaged. The damages would not be covered by your warranty. Do not operate the engine in the solid red area.
INSTRUMENT PANEL United States WARNING If the airbag readiness light stays on after you start your vehicle, it means the airbag system may not be working properly. The airbags in your vehicle may not inflate in a crash, or they could even inflate without a crash. To help avoid injury to yourself or others, have your vehicle serviced right away if the airbag readiness light stays on after you start your vehicle. The airbag readiness light should flash for a few seconds when you turn the ignition key to RUN.
INSTRUMENT PANEL WARNING Even though the passenger sensing system is designed to turn off the passenger’s frontal airbag if the system detects a rear-facing child restraint, no system is fail-safe, and no one can guarantee that an airbag will not deploy under some unusual circumstance, even though it is turned off. We recommend that rearfacing child restraints be transported in vehicles with a rear seat that will accommodate a rear-facing child restraint, whenever possible.
INSTRUMENT PANEL Battery Warning Light Brake System Warning Light Your vehicle’s hydraulic brake system is divided into two parts. If one part is not working, the other part can still work and stop you. For good braking, though, you need both parts working well. 812700 If the brake system warning light comes on, there is a brake problem. Have your brake system inspected right away. The brake light will also come on to indicate a low brake fluid level.
INSTRUMENT PANEL Anti-Lock Brake System Warning Light lem with your regular brakes. Refer to “Brake System Warning Light” in this section for more information. The ABS warning light should come on briefly when you turn the ignition key to RUN. If the light does not come on then, have it fixed so it will be ready to warn you if there is a problem. 807057 With the Anti-Lock Brake System (ABS), the light will come on when your engine is started and stay on for several seconds. This is normal.
INSTRUMENT PANEL This light will also come on when starting your vehicle. If it does not, have your vehicle serviced. Tire Pressure Light Malfunction Indicator Lamp Check Engine Light Engine Coolant Temperature Gage 1198521 This light will come on briefly when you turn the ignition to RUN. This light will also come on when one or more of your tires are significantly underinflated. A CHECK TIRE PRESSURE DIC message will accompany the light. 1716501 This gage shows the engine coolant temperature.
INSTRUMENT PANEL CAUTION If you keep driving your vehicle with this light on, after awhile, the emission controls might not work as well, your vehicle’s fuel economy might not be as good, and the engine might not run as smoothly. This could lead to costly repairs that might not be covered by your warranty.
INSTRUMENT PANEL acceleration, or stumbling on acceleration. (These conditions may go away once the engine is warmed up.) This will be detected by the system and cause the light to turn on. If you experience one or more of these conditions, change the fuel brand you use. It will require at least one full tank of the proper fuel to turn the light off. If none of the above steps have made the light turn off, your dealer can check the vehicle.
INSTRUMENT PANEL Change Engine Oil Light This light will come on briefly when the vehicle is turned on. For more information, refer to “PASS-Key® III+ Operation” in “Theft-Deterrent Systems” in the “Features and Controls” section. The light goes out when the cruise control is turned off. Refer to “Cruise Control” in this section for more information. Reduced Engine Power Light Fog Lamp Light 806876 If this light comes on and stays on for 30 seconds, it means that service is required for your vehicle.
INSTRUMENT PANEL Highbeam On Light and “DIC Warnings and Messages” in this section for more information. Gate Ajar Light All-Wheel Drive Disabled Light 808597 1326999 This light comes on when the high-beam headlamps are in use. If this light comes on, your liftgate is not completely closed. Driving with the liftgate open can cause carbon monoxide (CO) to enter the vehicle. Refer to “Headlamp Changer” in this section.
INSTRUMENT PANEL Service Vehicle Soon Light When the indicator nears empty, the low fuel light will come on. You still have a little fuel left, but you should get more soon. Refer to “Low Fuel Warning Light” in this section for more information. Low Fuel Warning Light Here are four things that some owners ask about. None of these show a problem with your fuel gage: 1254434 This light will come on if a condition exists that may require the vehicle to be taken in for service.
INSTRUMENT PANEL Driver Information Center (DIC) Your vehicle has a Driver Information Center (DIC). All messages will appear in the DIC display located in the center of the instrument panel cluster. The DIC buttons are located on the center of the instrument panel. The DIC comes on when the ignition is on. After a short delay, the DIC will display the information that was last displayed before the engine was turned off. The DIC also allows some features to be personalized.
INSTRUMENT PANEL Trip/Fuel Menu Items Trip/Fuel (1): Press this button to scroll through the following displays: ODOMETER Press the trip/fuel button until ODOMETER displays. This display shows the distance the vehicle has been driven in either miles (mi) or kilometers (km). This display will also show the outside air temperature in either degrees Fahrenheit (°F) or degrees Celsius (°C). To change the DIC display to English or metric units, refer to “UNITS” later in this section.
INSTRUMENT PANEL Vehicle Information Menu Items Vehicle Information (2): Press this button to scroll through the following displays: OIL LIFE Press the vehicle information button until OIL LIFE REMAINING displays. This display shows an estimate of the oil’s remaining useful life. If you see 99% OIL LIFE REMAINING on the display, that means 99% of the current oil life remains. The engine oil life system will alert you to change your oil on a schedule consistent with your driving conditions.
INSTRUMENT PANEL RELEARN REMOTE KEY This display allows you to match the Remote Keyless Entry (RKE) transmitter to your vehicle. To match a RKE transmitter to your vehicle, do the following: 1) Make sure the vehicle is in PARK (P). 2) Press the vehicle information button until PRESS TO RELEARN REMOTE KEY displays. 3) Press the set/reset button. The message REMOTE KEY LEARNING ACTIVE will display. 4) Press and hold the lock and unlock buttons on the first transmitter at the same time for about 15 seconds.
INSTRUMENT PANEL enabled. If the passenger’s safety belt is already buckled, this message and chime will not come on. BUCKLE SEATBELT This message reminds you to buckle the driver’s safety belt. This message displays and a chime sounds when the ignition is on, the driver’s safety belt is unbuckled, and the vehicle is in motion. You should buckle your safety belt. If the driver remains unbuckled when the ignition is on and the vehicle is in motion, the reminder will be repeated.
INSTRUMENT PANEL ENGINE OVERHEATD STOP ENGINE (Overheated) NOTE: If you drive your vehicle while the engine is overheating, severe engine damage may occur. If an overheat warning appears on the instrument panel cluster and/or DIC, stop the vehicle as soon as possible. Refer to “Engine Overheating” in “Checking Things Under the Hood” in the “Service and Appearance Care” section for more information. This message displays along with a continuous chime when the engine has overheated.
INSTRUMENT PANEL REMOTE KEY LEARNING ACTIVE This message displays while you are matching a Remote Keyless Entry (RKE) transmitter to your vehicle. Refer to “LEARN REMOTE KEY” under “DIC Operation and Displays” in this section for more information. SERVICE A/C (Air Conditioning) SYSTEM This message displays when there is a problem detected in the air conditioning system. Have the vehicle serviced by your dealer. SERVICE AIR BAG This message displays when there is a problem with the airbag system.
INSTRUMENT PANEL stays on, there may be a problem with the TPM. See your dealer. SERVICE TRACTION CONTROL This message displays when the Traction Control System (TCS) is not functioning properly. A warning light also appears on the instrument panel cluster. Refer to “Traction Control System (TCS) Warning Light” in this section and “Traction Control System (TCS)” in “Your Driving, the Road, and Your Vehicle” in the “Driving Your Vehicle” section for more information.
INSTRUMENT PANEL • The TCS is turned off by pressing the traction control button. Refer to “Traction Control System (TCS)” in “Your Driving, the Road, and Your Vehicle” in the “Driving Your Vehicle” section for more information. • The battery is low. • There is a TCS failure. See your dealer for service. DIC Vehicle Personalization TRACTION CONTROL ON This message displays when the Traction Control System (TCS) turns on.
INSTRUMENT PANEL • NO CHANGE: No change will be made to this feature. The current setting will remain. Choose one of the available settings and press the set/reset button while it is displayed on the DIC to select it. AUTO LOCK This feature allows you to select when the vehicle’s doors will automatically lock. Refer to “Programmable Automatic Door Locks” in “Doors and Locks” in the “Features and Controls” section for more information.
INSTRUMENT PANEL press the lock button on the RKE transmitter, and the horn will sound when the lock button is pressed again within five seconds of the previous command. • NO CHANGE: No change will be made to this feature. The current setting will remain. Choose one of the available settings and press the set/reset button while it is displayed on the DIC to select it. REMOTE UNLOCK This feature allows you to select the type of feedback you will receive when unlocking the vehicle with the RKE transmitter.
INSTRUMENT PANEL Choose one of the available settings and press the set/reset button while it is displayed on the DIC to select it. Choose one of the available settings and press the set/reset button while it is displayed on the DIC to select it. APPROACH LIGHTING This feature allows you to select whether or not to have the exterior lights turn on briefly during low light periods after unlocking the vehicle using the RKE transmitter.
INSTRUMENT PANEL • DO NOT RESTORE: The personalization features will not be set to their factory default settings. Choose one of the available settings and press the set/reset button while it is displayed on the DIC to select it. EXIT FEATURE SETTINGS This feature allows you to exit the feature settings menu. Press the vehicle information button until FEATURE SETTINGS PRESS TO EXIT appears in the DIC display. Press the set/reset button to exit the menu.
INSTRUMENT PANEL Your vehicle has a feature called Retained Accessory Power (RAP). With RAP, the audio system can be played even after the ignition is turned off. Refer to “Retained Accessory Power (RAP)” in “Starting and Operating Your Vehicle” in the “Features and Controls” section for more information. Setting the Time (without date display) If your vehicle has an AM/FM base radio with a single CD player and preset buttons numbered one through six, the radio will have a clock button for setting the time.
INSTRUMENT PANEL Radio with CD (Base) (Tune): Turn this knob to select radio stations. SEEK : Press the right or left SEEK arrow to go to the next or to the previous station and stay there. To scan stations, press and hold either SEEK arrow for a few seconds until a beep sounds. The radio goes to a station, plays for a few seconds, then goes to the next station. Press either SEEK arrow again to stop scanning. 1546915 Playing the Radio (Power/Volume): Press this knob to turn the system on and off.
INSTRUMENT PANEL Adjusting the Speakers (Balance/Fade) BAL/FADE (Balance/Fade): To adjust the balance or fade, press this button or the tune knob until the desired speaker control label appears on the display. Turn the tune knob clockwise or counterclockwise to adjust the setting. You can also adjust the setting by pressing either the SEEK, FWD, or REV buttons. Radio Messages Calibration Error: The audio system has been calibrated for your vehicle from the factory.
INSTRUMENT PANEL arrow is held or pressed multiple times, the player continues moving backward or forward through the CD. Press RPT again to turn off repeat play. When repeat is off, the arrow symbol is no longer displayed. REV (Reverse): Press and hold this button to reverse playback quickly within a track. You will hear sound at a reduced volume. Release this pushbutton to resume playing the track. The elapsed time of the track appears on the display.
INSTRUMENT PANEL nected, press the radio CD/AUX button to begin playing audio from the device over the vehicle speakers. Radio with CD (MP3) (Power/Volume): Turn this knob clockwise or counterclockwise to increase or decrease the volume of the portable player. You may need to do additional volume adjustments from the portable device if the volume does not go loud or soft enough. BAND: Press this button to listen to the radio when a portable audio device is playing.
INSTRUMENT PANEL 2) Press the MENU button to display the radio setup menu. 3) Press the pushbutton under the AUTO VOLUM label on the radio display. 4) Press the pushbutton under the desired Speed Compensated Volume setting (OFF, Low, Med, or High) to select the level of radio volume compensation. The display times out after approximately 10 seconds. Each higher setting allows for more radio volume compensation at faster vehicle speeds.
INSTRUMENT PANEL Setting the Tone (Bass/Midrange/Treble) manually adjust the bass, midrange, or treble by pressing the tune knob. BASS/MID/TREB (Bass, Midrange, or Treble): To adjust bass, midrange, or treble, press the tune knob until the tone control labels appear on the display. Continue pressing to highlight the desired label, or press the pushbutton positioned under the desired label. Turn the tune knob clockwise or counterclockwise to adjust the highlighted setting.
INSTRUMENT PANEL Removed categories can be restored by pressing the pushbutton under the Add label when a removed category is displayed or by pressing the pushbutton under the Restore All label. The radio does not allow you to remove or add categories while the vehicle is moving faster than 5 mph (8 km/h). Radio Messages Calibration Error: The audio system has been calibrated for your vehicle from the factory.
INSTRUMENT PANEL SEEK : Press the left SEEK arrow to go to the start of the current track, if more than ten seconds have played. Press the right SEEK arrow to go to the next track. If either SEEK arrow is held, or pressed multiple times, the player continues moving backward or forward through the tracks on the CD. REV (Reverse): Press and hold this button to reverse playback quickly within a track. You will hear sound at a reduced volume. Release this pushbutton to resume playing the track.
INSTRUMENT PANEL To use a portable audio player, connect a 3.5 mm (1/8 inch) cable to the radio’s front auxiliary input jack. When a device is connected, press the radio CD/AUX button to begin playing audio from the device over the vehicle speakers. Radio with CD and DVD (MP3) Radio Data System (RDS) The audio system has a Radio Data System (RDS). The RDS feature is available for use only on FM stations that broadcast RDS information.
INSTRUMENT PANEL Playing the Radio Finding a Station (Power/Volume): Press this knob to turn the system on and off. BAND: Press this button to switch between AM, FM, or XMTM (if equipped). The display shows the selection. Turn this knob clockwise or counterclockwise to increase or decrease the volume. Speed Compensated Volume (SCV): The radio has Speed Compensated Volume (SCV). While SCV is on, the radio volume automatically adjusts to compensate for road and wind noise as driving speed changes.
INSTRUMENT PANEL 4) Repeat the steps for each pushbutton radio station you want stored as a favorite. The number of favorites pages can be setup using the MENU button. To setup the number of favorites pages, perform the following steps: 1) Press the MENU button to display the radio setup menu. 2) Press the pushbutton located below the FAV 1-6 label. 3) Select the desired number of favorites pages by pressing the pushbutton located below the displayed page numbers.
INSTRUMENT PANEL Finding a Category (CAT) Station CAT (Category): The CAT button is used to find XMTM stations when the radio is in the XMTM mode. To find XMTM channels within a desired category, perform the following: 1) Press the BAND button until the XM™ frequency displays. Press the CAT button to display the category labels on the radio display. Continue pressing the CAT button until the desired category name is displayed.
INSTRUMENT PANEL of recording, the quality of the music that has been recorded, and the way the CD-R has been handled. There can be an increase in skipping, difficulty in finding tracks, and/or difficulty in loading and ejecting. If these problems occur, check the bottom surface of the CD. If the surface of the CD is damaged, such as cracked, broken, or scratched, the CD will not play properly. If the surface of the CD is soiled, refer to “Care of Your CDs and DVDs” in this section for more information.
INSTRUMENT PANEL BAND: Press this button to listen to the radio when a CD or DVD is playing. The CD or DVD remains inside the radio for future listening or for viewing entertainment. DVD/CD AUX (Auxiliary): Press this button to cycle through DVD, CD, or Auxiliary when listening to the radio. The DVD/CD text label and a message showing the track or chapter number displays when a disc is in either slot.
INSTRUMENT PANEL Using the DVD Player The DVD player is controlled by the buttons on the remote control or by the buttons on the radio faceplate. Refer to “Remote Control”, under “Rear Seat Entertainment System” in this section for more information. The DVD player is only compatible with DVDs of the appropriate region code that is printed on the jacket of most DVDs.
INSTRUMENT PANEL (Eject): Press this button to eject a CD or DVD. If a CD or DVD is ejected, but not removed, the player automatically pulls it back in after 15 seconds. If loading and reading of a CD cannot be completed, because of an unknown format, etc., and the disc fails to eject, press and hold the CD eject button for more than five seconds to force the disc to eject. DVD-V (Video) Display Buttons Once a DVD-V is inserted, the radio display menu shows several tag options for DVD playing.
INSTRUMENT PANEL There is not any type of notification for the customer to see through the radio display, but VSM has a text field that shows audio stream changing. Inserting a Disc To play a disc, gently insert the disc, with the label side up, into the loading slot. The DVD player might not accept some paper labeled media. The player starts loading the disc into the system and show “Loading Disc” on the radio display. At the same time, the radio displays a softkey menu of option(s).
INSTRUMENT PANEL To listen to a device through the rear auxiliary input over the speakers, cycle the DVD/CD Aux button on the radio faceplate until “Rear Aux Input” displays on the radio. The RSA or DVD Screen must be on in order for the radio to source to rear auxiliary. (Power/Volume): Turn this knob clockwise or counterclockwise to increase or decrease the volume of the portable player. Additional volume adjustments might be needed from the portable device if the volume is not loud or soft enough.
INSTRUMENT PANEL You can change playlists by using the previous and next folder buttons, the tuner knob, or the seek buttons. You can also play an MP3 CD-R that was recorded using no file folders. If a CD-R contains more than the maximum of 50 folders, 15 playlists, and 512 folders and files, the player lets you access and navigate up to the maximum, but all items over the maximum are not accessible. Root Directory The root directory of the CD-R is treated as a folder.
INSTRUMENT PANEL If playing a CD-R, the sound quality may be reduced due to CD-R quality, the method of recording, the quality of the music that has been recorded, and the way the CD-R has been handled. There may be an increase in skipping, difficulty in finding tracks, and/or difficulty in loading and ejecting. If these problems occur, check the bottom surface of the CD. If the surface of the CD is damaged, such as cracked, broken, or scratched, the CD will not play properly.
INSTRUMENT PANEL depending on the number of MP3 files recorded to the CD-R. The radio may begin playing while it is scanning the disc in the background. When the scan is finished, the CD-R begins playing again. Once the disc has been scanned, the player defaults to playing MP3 files in order by artist. The current artist playing is shown on the second line of the display between the arrows.
INSTRUMENT PANEL length of the file, folder, or playlist name. Long names also take up more space on the display, potentially getting cut off. • Finalize the audio disc before you burn it. Trying to add music to an existing disc may cause the disc not to function in the player. Root Directory The root directory of the CD-R is treated as a folder. If the root directory has compressed audio files, the directory is displayed as F1 ROOT.
INSTRUMENT PANEL As each new track starts to play, the track number and song title displays. The CD player can play the smaller 3 inch (8 cm) single CD-Rs with an adapter ring. Full-size CD-Rs and the smaller CD-Rs are loaded in the same manner. If playing a CD-R, the sound quality can be reduced due to CD-R quality, the method of recording, the quality of the music that has been recorded, and the way the CD-R has been handled.
INSTRUMENT PANEL button to resume playing the file. The elapsed time of the file displays. RDM (Random): With the random setting, MP3 files on the CD-R can be listened to in random, rather than sequential order. To play MP3 files from the CD-R you are listening to in random order, press the pushbutton positioned under the RDM label until Random Current Disc displays. Press the same pushbutton again to turn off random play.
INSTRUMENT PANEL XM Radio Messages Radio Display Message Condition Action Required XL (Explicit Language Channels) XL on the radio display, after the channel name, indicates content with explicit language. These channels, or any others, can be blocked at a customer’s request, by calling 1-800-852-XMXM (9696). XM Updating Updating encryption code The encryption code in the receiver is being updated, and no action is required. This process should take no longer than 30 seconds.
INSTRUMENT PANEL Radio Display Message Condition Action Required CAT Not Found No channel available for the chosen category There are no channels available for the selected category. The system is working properly. XM Theft Locked Theft lock active The XMTM receiver in the vehicle could have previously been in another vehicle. For security purposes, XMTM receivers cannot be swapped between vehicles. If this message appears after having your vehicle serviced, check with your dealer.
INSTRUMENT PANEL Navigation/Radio System Your vehicle may have a navigation radio system. The navigation radio system has built-in features intended to minimize driver distraction. Technology alone, no matter how advanced, can never replace your own judgment. For complete information on your navigation radio system, including tips on helping to reduce distractions while driving, see the Navigation System Manual.
INSTRUMENT PANEL Push the power button to turn on the headphones. An indicator light located on the headphones will illuminate. If the light does not illuminate, the batteries may need to be replaced. See “Battery Replacement” later in this section for more information. Switch the headphones to Off when not in use. The infrared transmitters are located at the rear of the RSE overhead console.
INSTRUMENT PANEL Power for auxiliary devices is not supplied by the radio system. To use the auxiliary inputs of the RSE system, connect an external auxiliary device to the color-coded A/V jacks and turn both the auxiliary device and the video screen power on. If the video screen is in the DVD player mode, pressing the AUX button on the remote control will switch the video screen from the DVD player mode to the auxiliary device.
INSTRUMENT PANEL Remote Control To use the remote control, aim it at the transmitter window at the rear of the RSE overhead console and press the desired button. Direct sunlight or very bright light may affect the ability of the RSE transmitter to receive signals from the remote control. If the remote control does not seem to be working, the batteries may need to be replaced. See “Battery Replacement” later in this section.
INSTRUMENT PANEL tinue playing in a slow play mode. You may also, depending on the radio, perform reverse slow play by pressing the pause button and then pressing the fast reverse button. To cancel slow play mode, press the play/pause button. (Previous Track/Chapter): Press this button to return to the start of the current track or chapter. Press this button again to go to the previous track or chapter. This button may not work when the DVD is playing the copyright information or the previews.
INSTRUMENT PANEL Problem Recommended Action No power. The ignition might not be turned on or in accessory. The picture does not fill the screen. There are black borders on the top and bottom or on both sides or it looks stretched out. Check the display mode settings in the setup menu by pressing the display menu button on the remote control. In auxiliary mode, the picture moves or scrolls. Check the auxiliary input connections at both devices. The remote control does not work.
INSTRUMENT PANEL DVD Display Error Messages The DVD display error message depends on which radio you have. The video screen may display one of the following: Disc Load/Eject Error: This message is displayed when there are disc load or eject problems. Disc Format Error: This message will be displayed, if the disc is inserted with the disc label wrong side up, or if the disc is damaged. Disc Region Error: This message will be displayed, if the disc is not from a correct region.
INSTRUMENT PANEL (Seek): Press the seek arrow to go to the next radio station while in AM, FM, or XM (if equipped). Press this button to go to the next track or chapter while sourced to the CD/DVD slot. FM FM stereo will give the best sound, but FM signals will reach only about 10 to 40 miles (16 to 65 km). Tall buildings or hills can interfere with FM signals, causing the sound to fade in and out.
INSTRUMENT PANEL MEMO 3-75 78J00-03E
DRIVING YOUR VEHICLE DRIVING YOUR VEHICLE Your Driving, the Road, and Your Vehicle ........................ 4-1 Towing ..................................................................................
DRIVING YOUR VEHICLE Your Driving, the Road, and Your Vehicle Defensive Driving The best advice anyone can give about driving is: Drive defensively. Please start with a very important safety device in your vehicle: Buckle up. Refer to “Safety Belts: They Are for Everyone” in “Safety Belts” in the “Seats and Restraint Systems” section. Drunken Driving WARNING Defensive driving really means “Be ready for anything.” On city streets, rural roads, or expressways, it means “Always expect the unexpected.
DRIVING YOUR VEHICLE many might think. Although it depends on each person and situation, here is some general information on the problem. in both France and Germany. The BAC limit for all commercial drivers in the United States is 0.04 percent. The Blood Alcohol Concentration (BAC) of someone who is drinking depends upon four things: The BAC will be over 0.10 percent after three to six drinks (in one hour).
DRIVING YOUR VEHICLE There is something else about drinking and driving that many people do not know. Medical research shows that alcohol in a person’s system can make crash injuries worse, especially injuries to the brain, spinal cord, or heart. This means that when anyone who has been drinking – driver or passenger – is in a crash, that person’s chance of being killed or permanently disabled is higher than if the person had not been drinking. WARNING Drinking and then driving is very dangerous.
DRIVING YOUR VEHICLE Anti-Lock Brake System (ABS) Your vehicle has the Anti-Lock Brake System (ABS), an advanced electronic braking system that will help prevent a braking skid. When you start the engine and begin to drive away, ABS will check itself. You may hear a momentary motor or clicking noise while this test is going on, and you may even notice that the brake pedal moves a little. This is normal. 807057 If there is a problem with ABS, this warning light will stay on.
DRIVING YOUR VEHICLE Braking in Emergencies With ABS, you can steer and brake at the same time. In many emergencies, steering can help you more than even the very best braking. Traction Control System (TCS) Your vehicle has a traction control system that limits wheel spin. This is especially useful in slippery road conditions. The system operates only if it senses that one or both of the front wheels are spinning or beginning to lose traction.
DRIVING YOUR VEHICLE All-Wheel Drive (AWD) System If your vehicle has all-wheel drive (AWD), the AWD system operates automatically without any action required by the driver. If the front drive wheels begin to slip, the rear wheels will automatically begin to drive the vehicle as required. Torque is also applied to the rear wheels during launches. There may be a slight engagement noise during hard use but this is normal.
DRIVING YOUR VEHICLE favorable conditions you will want to go slower. If you need to reduce your speed as you approach a curve, do it before you enter the curve, while your front wheels are straight ahead. from a possible collision. Then steer around the problem, to the left or right depending on the space available. Off-Road Recovery You may find that your vehicle’s right wheels have dropped off the edge of a road onto the shoulder while you are driving.
DRIVING YOUR VEHICLE into the right lane again. A simple maneuver? Not necessarily! Passing another vehicle on a two-lane highway is a potentially dangerous move, since the passing vehicle occupies the same lane as oncoming traffic for several seconds. A miscalculation, an error in judgment, or a brief surrender to frustration or anger can suddenly put the passing driver face to face with the worst of all traffic accidents – the head-on collision. So here are some tips for passing: • Drive ahead.
DRIVING YOUR VEHICLE acceleration skid, too much throttle causes the driving wheels to spin. A cornering skid is best handled by easing your foot off the accelerator pedal. Remember: Any traction control system helps avoid only the acceleration skid. If your traction system is off, then an acceleration skid is also best handled by easing your foot off the accelerator pedal. Refer to “Traction Control System (TCS)” and “Electronic Stability Control” in this section.
DRIVING YOUR VEHICLE build up a film caused by dust. Dirty glass makes lights dazzle and flash more than clean glass would, making the pupils of your eyes contract repeatedly. Remember that the headlamps light up far less of a roadway when you are in a turn or curve. Keep your eyes moving; that way, it is easier to pick out dimly lighted objects. Just as the headlamps should be checked regularly for proper aim, so should your eyes be examined regularly.
DRIVING YOUR VEHICLE Driving Through Deep Standing Water CAUTION If you drive too quickly through deep puddles or standing water, water can come in through the engine’s air intake and badly damage the engine. Never drive through water that is slightly lower than the underbody of your vehicle. If you cannot avoid deep puddles or standing water, drive through them very slowly. • Besides slowing down, allow some extra following distance. And be especially careful when you pass another vehicle.
DRIVING YOUR VEHICLE The most important advice on freeway driving is: Keep up with traffic and keep to the right. Drive at the same speed most of the other drivers are driving. Too-fast or too-slow driving breaks a smooth traffic flow. Treat the left lane on a freeway as a passing lane. At the entrance, there is usually a ramp that leads to the freeway. If you have a clear view of the freeway as you drive along the entrance ramp, you should begin to check traffic.
DRIVING YOUR VEHICLE does, your vehicle can leave the road in less than a second, and you could crash and be injured. Hill and Mountain Roads WARNING If you do not shift down, the brakes could get so hot that they would not work well. You would then have poor braking or even none going down a hill. You could crash. Shift down to let the engine assist the brakes on a steep downhill slope. What can you do about highway hypnosis? First, be aware that it can happen.
DRIVING YOUR VEHICLE of the road. Drive at speeds that let you stay in your own lane. • As you go over the top of a hill, be alert. There could be something in your lane, like a stalled car or an accident. • You may see highway signs on mountains that warn of special problems. Examples are long grades, passing or no-passing zones, a falling rocks area, or winding roads. Be alert to these and take appropriate action. Winter Driving Also refer to “Tires” in the “Service and Appearance Care” section.
DRIVING YOUR VEHICLE vehicle has a traction system, you will want to slow down and adjust your driving to the road conditions. Under certain conditions, you may want to turn the traction system off, such as when driving through deep snow and loose gravel, to help maintain vehicle motion at lower speeds. Refer to “Traction Control System (TCS)” and “Electronic Stability Control” in this section. The Anti-Lock Brake System (ABS) improves your vehicle’s stability when you make a hard stop on a slippery road.
DRIVING YOUR VEHICLE able from the cold. But do it as little as possible. Preserve the fuel as long as you can. To help keep warm, you can get out of the vehicle and do some fairly vigorous exercises every half hour or so until help comes. If Your Vehicle is Stuck in Sand, Mud, Ice, or Snow In order to free your vehicle when it is stuck, you will need to spin the wheels, but you do not want to spin your wheels too fast.
DRIVING YOUR VEHICLE Tire and Loading Information Label Label Example tion and “Inflation - Tire Pressure” in “Tires” in the “Service and Appearance Care” section. There is also important loading information on the Certification/Tire label. It tells you the Gross Vehicle Weight Rating (GVWR) and the Gross Axle Weight Rating (GAWR) for the front and rear axles. See “Certification/Tire Label” later in this section.
DRIVING YOUR VEHICLE Example 1 Example 2 Example 3 1273153 1273154 1273155 Item Descripion Total Item Descripion Total Item Descripion Total A Maximum Vehicle Capacity Weight for Example 1 = 1000 lbs (453 kg) A Maximum Vehicle Capacity Weight for Example 2 = 1000 lbs (453 kg) A Maximum Vehicle Capacity Weight for Example 3 = 1000 lbs (453 kg) B Subtract Occupant Weight 150 lbs (68 kg) x 2 = 300 lbs (136 kg) B Subtract Occupant Weight 150 lbs (68 kg) x 2 = 750 lbs (340 kg) B Su
DRIVING YOUR VEHICLE Never exceed the GVWR for your vehicle or the GAWR for either the front or rear axle. Certification Label WARNING 52D059 A vehicle specific Certification/Tire label is found on the rear edge of the driver’s door. The label shows the size of your original tires and the inflation pressures needed to obtain the gross weight capacity of your vehicle. This is called the Gross Vehicle Weight Rating (GVWR). The GVWR includes the weight of the vehicle, all occupants, fuel, and cargo.
DRIVING YOUR VEHICLE Towing Towing Your Vehicle Consult your dealer or a professional towing service if you need to have your disabled vehicle towed. If you want to tow your vehicle behind another vehicle for recreational purposes (such as behind a motorhome), refer to “Recreational Vehicle Towing” following. Recreational Vehicle Towing Recreational vehicle towing means towing your vehicle behind another vehicle – such as behind a motorhome.
DRIVING YOUR VEHICLE the ground. It can be towed with car carrier equipment. Level Control Your vehicle may have this feature. This self-adjusting type of level control is fully automatic and will provide a better leveled riding position as well as better handling under a variety of passenger and loading conditions. The system is activated when sufficient weight is added to the vehicle, and will automatically adjust vehicle height thereafter.
DRIVING YOUR VEHICLE Three important considerations have to do with weight: • Weight of the trailer • Weight of the trailer tongue • Weight on your vehicle’s tires Weight of the Trailer How heavy can a trailer safely be? Your vehicle can tow up to 2,900 lbs (1300 kg) with up to five occupants or up to 3,500 lbs (1575 kg) with up to two occupants. But even that can be too heavy. It depends on how you plan to use your rig.
DRIVING YOUR VEHICLE • Will you have to make any holes in the body of your vehicle when you install a trailer hitch? If you do, remember to seal the holes when you remove the hitch. If you do not seal them, deadly carbon monoxide (CO) from your exhaust can get into your vehicle. Refer to “Engine Exhaust” in “Starting and Operating Your Vehicle” in the “Features and Controls” section. Dirt and water can, too. Safety Chains You should always attach chains between your vehicle and your trailer.
DRIVING YOUR VEHICLE your rig. Acquaint yourself with the feel of handling and braking with the added weight of the trailer. And always keep in mind that the vehicle you are driving is now a good deal longer and not nearly as responsive as your vehicle is by itself. Before you start, check all trailer hitch parts and attachments, safety chains, electrical connector, lamps, tires and mirror adjustment.
DRIVING YOUR VEHICLE 4) Reapply the regular brakes. Then apply your parking brake, and then shift to PARK (P). 5) Release the regular brakes. When You Are Ready to Leave After Parking on a Hill 1) Apply your regular brakes and hold the pedal down while you do the following: 1. Start your engine. 2. Shift into a gear. 3. Release the parking brake. 2) Let up on the brake pedal. 3) Drive slowly until the trailer is clear of the chocks. 4) Stop and have someone pick up and store the chocks.
SERVICE AND APPEARANCE CARE SERVICE AND APPEARANCE CARE Service ................................................................................. 5-1 Fuel ....................................................................................... 5-2 Checking Things Under the Hood ..................................... 5-5 All-Wheel Drive .................................................................... 5-22 Bulb Replacement ...............................................................
SERVICE AND APPEARANCE CARE Service Your dealer knows your vehicle best and wants you to be happy with it. We hope you will go to your dealer for all your service and parts needs.
SERVICE AND APPEARANCE CARE Fuel Use of the recommended fuel is an important part of the proper maintenance of your vehicle. To help keep the engine clean and maintain optimum vehicle performance, we recommend the use of gasoline advertised as TOP TIER Detergent Gasoline. Gasoline Octane Use regular unleaded gasoline with a posted octane rating of 87 or higher. If the octane rating is less than 87, you may notice an audible knocking noise when you drive, commonly referred to as spark knock.
SERVICE AND APPEARANCE CARE Fuels in Foreign Countries CAUTION Your vehicle was not designed for fuel that contains methanol. Do not use fuel containing methanol. It can corrode metal parts in the fuel system and also damage plastic and rubber parts. That damage would not be covered under your warranty.
SERVICE AND APPEARANCE CARE Be careful not to spill fuel. Do not top off or overfill the tank and wait a few seconds after you have finished pumping before removing the nozzle. Clean fuel from painted surfaces as soon as possible. Refer to “Washing Your Vehicle” in this section. When replacing the fuel cap, turn it clockwise until it clicks. Make sure the cap is fully installed. The diagnostic system can determine if the fuel cap has been left off or improperly installed.
SERVICE AND APPEARANCE CARE Checking Things Under the Hood Hood Release Before closing the hood, be sure all the filler caps are on properly. Then pull the hood down and close it firmly. To open the hood, do the following: WARNING An electric fan under the hood can start up and injure you even when the engine is not running. Keep hands, clothing, and tools away from any underhood electric fan. WARNING 1617949 1) Pull the handle with this symbol on it.
SERVICE AND APPEARANCE CARE Engine Compartment Overview When you open the hood, here is what you will see: 1708418 A. Engine Air Cleaner/Filter. Refer to “Engine Air Cleaner/Filter” in this section. B. Power Steering Fluid Reservoir (Out of View). Refer to “Power Steering Fluid” in this section. C. Engine Oil Fill Cap (Out of View). Refer to “When to Add Engine Oil” under “Engine Oil” in this section. D. Engine Oil Dipstick. Refer to “Checking Engine Oil” under “Engine Oil” in this section. E.
SERVICE AND APPEARANCE CARE Engine Oil When to Add Engine Oil Checking Engine Oil It is a good idea to check your engine oil every time you get fuel. In order to get an accurate reading, the oil must be warm and the vehicle must be on level ground. The engine oil dipstick handle is a yellow loop. Refer to “Engine Compartment Overview” in this section for the location of the engine oil dipstick. 1) Turn off the engine and give the oil several minutes to drain back into the oil pan.
SERVICE AND APPEARANCE CARE What Kind of Engine Oil to Use CAUTION Recommended SAE viscosity grade engine oils Use only engine oil identified as meeting standard GM6094M and showing the American Petroleum Institute Certified For Gasoline Engines starburst symbol. Failure to use the recommended oil can result in engine damage not covered by your warranty.
SERVICE AND APPEARANCE CARE system to work properly, you must reset the system every time the oil is changed. When the system has calculated that oil life has been diminished, it will indicate that an oil change is necessary. A change engine oil light and a CHANGE ENGINE OIL SOON message will come on.
SERVICE AND APPEARANCE CARE To inspect or replace the engine air cleaner/filter, do the following: 1) Turn off the engine. WARNING Operating the engine with the air cleaner/filter off can cause you or others to be burned. The air cleaner not only cleans the air; it helps to stop flames if the engine backfires. If it is not there and the engine backfires, you could be burned. Do not drive with it off, and be careful working on the engine with the air cleaner/ filter off.
SERVICE AND APPEARANCE CARE Fluids and Lubricants” in “Maintenance Schedule” in the “Maintenance Schedule” section. • Help keep the proper engine temperature. • Let the warning lights and gages work as they should. CAUTION Use of the incorrect automatic transaxle fluid may damage your vehicle, and the damages may not be covered by your warranty. Always use the automatic transaxle fluid listed in “Recommended Fluids and Lubricants” in “Maintenance Schedule” in the “Maintenance Schedule” section.
SERVICE AND APPEARANCE CARE If you have to add coolant more than four times a year, have your dealer check your cooling system. “Engine Compartment Overview” in this section for more information on location. WARNING CAUTION If you use extra inhibitors and/or additives in your vehicle’s cooling system, you could damage your vehicle. Use only the proper mixture of the engine coolant listed in this manual for the cooling system.
SERVICE AND APPEARANCE CARE CAUTION If your engine catches fire because you keep driving with no coolant, your vehicle can be badly damaged. The costly repairs would not be covered by your warranty. Refer to “Overheated Engine Protection Operating Mode” in this section for information on driving to a safe place in an emergency. If No Steam Is Coming From Your Engine If you get an engine overheat warning, but see or hear no steam, the problem may not be too serious.
SERVICE AND APPEARANCE CARE C. Pressure Cap WARNING An electric engine cooling fan under the hood can start up even when the engine is not running and can injure you. Keep hands, clothing, and tools away from any underhood electric fan. If the coolant inside the coolant recovery tank is boiling, do not do anything else until it cools down. The vehicle should be parked on a level surface. When the engine is cold, the coolant level should be at or above the cold fill line on the coolant recovery tank.
SERVICE AND APPEARANCE CARE WARNING You can be burned if you spill coolant on hot engine parts. Coolant contains ethylene glycol and it will burn if the engine parts are hot enough. Do not spill coolant on a hot engine. When the coolant level in the coolant recovery tank is at the cold fill line, start the vehicle. How to Add Coolant to the Cooling System CAUTION WARNING Your engine has a specific cooling system drain and fill procedure.
SERVICE AND APPEARANCE CARE 6) Reinstall the coolant recovery tank cap and the pressure cap. 7) If the coolant in the recovery tank is constantly low, you should have your dealership service department inspect the vehicle for leaks. Power Steering Fluid How to Check Power Steering Fluid To check the power steering fluid, do the following: 1) Turn the key off and let the engine compartment cool down. 2) Wipe the cap and the top of the reservoir clean.
SERVICE AND APPEARANCE CARE Brakes CAUTION • When using concentrated washer fluid, follow the manufacturer’s instructions for adding water. • Do not mix water with ready-to-use washer fluid. Water can cause the solution to freeze and damage your washer fluid tank and other parts of the washer system. Also, water does not clean as well as washer fluid. • Fill your washer fluid tank only three-quarters full when it is very cold.
SERVICE AND APPEARANCE CARE WARNING With the wrong kind of fluid in the brake system, the brakes may not work well, or they may not even work at all. This could cause a crash. Always use the proper brake fluid. CAUTION • Using the wrong fluid can badly damage brake system parts. For example, just a few drops of mineral-based oil, such as engine oil, in the brake system can damage brake system parts so badly that they will have to be replaced. Do not let someone put in the wrong kind of fluid.
SERVICE AND APPEARANCE CARE For battery replacement, see your dealer or the service manual. WARNING Battery posts, terminals, and related accessories contain lead and lead compounds, chemicals known to the State of California to cause cancer and reproductive harm. Wash hands after handling. Vehicle Storage If you are not going to drive your vehicle for 25 days or more, remove the black, negative (–) cable from the battery. This will help keep your battery from running down.
SERVICE AND APPEARANCE CARE 3) Turn off the ignition on both vehicles. Unplug unnecessary accessories plugged into the cigarette lighter or the accessory power outlets. Turn off the radio and all lamps that are not needed. This will avoid sparks and help save both batteries. And it could save the radio! 4) Open the hood on the other vehicle and locate the positive (+) and negative (–) terminal locations on that vehicle. You will not use your vehicle’s battery for jump starting.
SERVICE AND APPEARANCE CARE Do not connect positive (+) to negative (–), or you will get a short that would damage the battery and maybe other parts too. And do not connect the negative (–) cable to the negative (–) terminal on the dead battery because this can cause sparks. if the vehicle has one. Do not let the other end touch anything until the next step. The other end of the negative (–) cable does not go to the dead battery.
SERVICE AND APPEARANCE CARE To disconnect the jumper cables from both vehicles, do the following: 1) Disconnect the black negative (–) cable from the vehicle that had the dead battery. 2) Disconnect the black negative (–) cable from the vehicle with the good battery. 3) Disconnect the red positive (+) cable from the vehicle with the good battery. 4) Disconnect the red positive (+) cable from the other vehicle. 5) Return the fuse block cover to its originalposition.
SERVICE AND APPEARANCE CARE How to Check Lubricant Bulb Replacement AWD Differential Case For the proper type of replacement bulbs, refer to “Replacement Bulbs” in this section. Taillamps, Turn Signal, Stoplamps and Back-up Lamps For any bulb changing procedure not listed in this section, contact your dealer. Halogen Bulbs WARNING 1716440 A. Fill Plug B. Drain Plug To get an accurate reading, the vehicle should be on a level surface.
SERVICE AND APPEARANCE CARE License Plate Lamp Replacement Bulbs To replace one of these bulbs, do the following: 1) Push tabs to remove the license plate lamp from the liftgate. Exterior Lamp Bulb Number Back-up Lamp 921 License Plate Lamp 168 Rear Turn Signal/ Stoplamp/Sidemarker/Taillamp 3057K For replacement bulbs not listed here, contact your dealer. 1802297 2) 3) 4) 5) 6) 7) 8) 9) Remove the taillamp screw covers. Remove the taillamp screws. Pull the taillamp assembly towards you.
SERVICE AND APPEARANCE CARE Windshield Wiper Blade Replacement Rear Window Wiper Blade Replacement To replace the rear window wiper blade, do the following: Windshield wiper blades should be inspected for wear or cracking. Refer to “Scheduled Maintenance” in “Maintenance Schedule” in the “Maintenance Schedule” section for more information. Replacement blades come in different types and are removed in different ways.
SERVICE AND APPEARANCE CARE Tires Your new vehicle comes with high-quality tires made by a leading tire manufacturer. If you ever have questions about your tire warranty and where to obtain service, see your Suzuki Warranty booklet for details. For additional information refer to the tire manufacturer’s booklet included with your vehicle. WARNING • Poorly maintained and improperly used tires are dangerous. • Overloading your tires can cause overheating as a result of too much friction.
SERVICE AND APPEARANCE CARE grade tires based on three performance factors: treadwear, traction, and temperature resistance. For more information refer to “Uniform Tire Quality Grading” in this section. G. Maximum Cold Inflation Load Limit: Maximum load that can be carried and the maximum pressure needed to support that load. B. C. Compact Spare Tire Example D. E. 1376093 A.
SERVICE AND APPEARANCE CARE C. Aspect Ratio: A two-digit number that indicates the tire height-to-width measurements. For example, if the tire size aspect ratio is 60, as shown in item C of the illustration, it would mean that the tire’s sidewall is 60 percent as high as it is wide. D. Construction Code: A letter code is used to indicate the type of ply construction in the tire.
SERVICE AND APPEARANCE CARE Driving, the Road, and Your Vehicle” in the “Driving Your Vehicle” section. Occupant Distribution: Designated seating positions. Intended Outboard Sidewall: The side of an asymmetrical tire, that must always face outward when mounted on a vehicle. Outward Facing Sidewall: The side of an asymmetrical tire that has a particular side that faces outward when mounted on a vehicle.
SERVICE AND APPEARANCE CARE Vehicle Maximum Load on the Tire: Load on an individual tire due to curb weight, accessory weight, occupant weight, and cargo weight. Vehicle Placard: A label permanently attached to a vehicle showing the vehicle’s capacity weight and the original equipment tire size and recommended inflation pressure. Refer to “Tire and Loading Information Label” under “Loading Your Vehicle” in “Your Driving, the Road, and Your Vehicle” in the “Driving Your Vehicle” section.
SERVICE AND APPEARANCE CARE If you overfill the tire, release air by pushing on the metal stem in the center of the tire valve. Re-check the tire pressure with the tire gage. Be sure to put the valve caps back on the valve stems. They help prevent leaks by keeping out dirt and moisture. Tire Pressure Monitor System Your vehicle has a Tire Pressure Monitor System (TPMS). This system uses radio and sensor technology to check tire pressure levels.
SERVICE AND APPEARANCE CARE allow the TPMS to continue to function properly. When a low tire pressure condition is detected, the TPMS will illuminate the low tire pressure warning symbol on the instrument panel cluster, and at the same time a message to check the pressure in a specific tire will appear on the Driver Information Center (DIC) display.
SERVICE AND APPEARANCE CARE The TPMS system is ready for the sensor matching process to begin. 5) Start with the driver side front tire. 6) Remove the valve cap from the tire’s valve stem. Activate the TPMS sensor by increasing or decreasing the tire’s air pressure for five seconds, or until a horn chirp sounds. The horn chirp, which may take up to 30 seconds to sound, confirms that the sensor identification code has been matched to the tire/wheel position.
SERVICE AND APPEARANCE CARE Reset the Tire Pressure Monitor System. Refer to “TPMS Sensor Matching Process” under “Tire Pressure Monitor System” in this section. When It Is Time for New Tires because of the size or location of the damage. Buying New Tires The original equipment tires installed on your vehicle, when it was new, were designed to meet the Tire Performance Criteria Specification (TPC spec) system rating.
SERVICE AND APPEARANCE CARE WARNING Mixing tires could cause you to lose control while driving. If you mix tires of different sizes, brands, or types (radial and bias-belted tires), the vehicle may not handle properly, and you could have a crash. Using tires of different sizes, brands, or types may also cause damage to your vehicle. Be sure to use the correct size, brand, and type of tires on all wheels.
SERVICE AND APPEARANCE CARE deep tread, winter-type snow tires, spacesaver, or temporary use spare tires, tires with nominal rim diameters of 10 to 12 inches (25 to 30 cm), or, to some limitedproduction tires. While the tires available may vary with respect to these grades, they must also conform to federal safety requirements. Treadwear The treadwear grade is a comparative rating based on the wear rate of the tire when tested under controlled conditions on a specified government test course.
SERVICE AND APPEARANCE CARE Wheel Replacement Replace any wheel that is bent, cracked, or badly rusted or corroded. If wheel nuts keep coming loose, the wheel, wheel bolts, and wheel nuts should be replaced. If the wheel leaks air, replace it (except some aluminum wheels, which can sometimes be repaired). See your dealer if any of these conditions exist. Your dealer will know the kind of wheel you need.
SERVICE AND APPEARANCE CARE If a front tire fails, the flat tire will create a drag that pulls the vehicle toward that side. Take your foot off the accelerator pedal and grip the steering wheel firmly. Steer to maintain lane position, and then gently brake to a stop well out of the traffic lane. A rear blowout, particularly on a curve, acts much like a skid and may require the same correction you would use in a skid. In any rear blowout remove your foot from the accelerator pedal.
SERVICE AND APPEARANCE CARE 1) Open the liftgate. Refer to “Liftgate” in “Doors and Locks” in the “Features and Controls” section for more information. 1399885 1306942 2) Remove the wing-bolt on the jack and then remove it. 3) Remove the hook and loop fastener straps holding the bag containing the wheel wrench. Remove the wheel wrench from the bag. 4) Tilt the retainer at the end of the cable when the tire has been completely lowered, and pull it through the wheel opening.
SERVICE AND APPEARANCE CARE Removing the Flat Tire and Installing the Spare Tire 809981 1) Use the wheel wrench to loosen all the wheel nuts. Do not remove them yet. 2) Attach the wheel wrench to the jack bolt head and rotate the wheel wrench clockwise. That will raise the lift head a little. 3) Place the jack near the flat tire. 1399879 1587905 4) Find the arrow on the plastic lower body panel. Position the jack head under the metal jacking flange and not the plastic lower body panel.
SERVICE AND APPEARANCE CARE 5) Put the compact spare tire near the flat tire. WARNING Getting under a vehicle when it is jacked up is dangerous. If the vehicle slips off the jack you could be badly injured or killed. Never get under a vehicle when it is supported only by a jack. WARNING Raising your vehicle with the jack improperly positioned can damage the vehicle and even make the vehicle fall.
SERVICE AND APPEARANCE CARE CAUTION Improperly tightened wheel nuts can lead to brake pulsation and rotor damage. To avoid expensive brake repairs, evenly tighten the wheel nuts in the proper sequence and to the proper torque specification. Refer to “Capacities and Specifications” in this section for the wheel nut torque specification. 811105 1152288 9) Remove any rust or dirt from the wheel bolts, mounting surfaces, and spare wheel. 10)Place the compact spare tire on the wheel-mounting surface.
SERVICE AND APPEARANCE CARE Secondary Latch System Your vehicle has an underbody mounted tire hoist assembly equipped with a secondary latch system. It is designed to stop the compact spare tire from suddenly falling off your vehicle if the cable holding the spare tire is damaged. For the secondary latch to work, the tire must be stowed with the valve stem pointing down. Refer to “Storing a Flat or Spare Tire and Tools” in this section for instructions on storing the spare tire correctly.
SERVICE AND APPEARANCE CARE Storing a Compact Spare Tire WARNING Storing a jack, a tire, or other equipment in the passenger compartment of the vehicle could cause injury. In a sudden stop or collision, loose equipment could strike someone. Store all these in the proper place. WARNING 806548 1613524 8) Grasp the spare tire with both hands and pull it out from under the vehicle. 9) Reach under the vehicle and remove the wheel wrench and jack.
SERVICE AND APPEARANCE CARE Follow this diagram to store the underbody-mounted spare tire. 1218662 A. B. C. D. Wheel Wrench Hoist Shaft Secondary Retainer Spare Tire (Valve Stem Pointed Down) 1) Put the tire (D) on the ground at the rear of the vehicle. 2) Ensure the valve stem is pointed down and to the rear. Then pull the retainer (C) through the wheel. 3) Pull the secondary retainer (C) through the wheel.
SERVICE AND APPEARANCE CARE Storing a Full-Sized Flat Tire To store the tools, do the following: 1) Place the wheel wrench into the bag. 2) Use the hook and loop fastener straps to secure the bag to the fully collapsed jack. 1399885 3) Install the jack in the right side panel of cargo area and secure with the wing bolt. 4) Reinstall the access door. To store a full-sized flat tire do the following: 1) Remove the tire storage bag and cable package from the jack storage area.
SERVICE AND APPEARANCE CARE 7) Pull on the cable to make sure it is secure. 1829968 8) Make sure the metal tube is center at the striker. Push the tube towards the front of the vehicle. 9) Close the liftgate. 10)If your vehicle has Third Row Seating, return the third row seat to their upright position. Refer to “Third Row Seat” in “Rear Seats” in the “Seats and Restraint Systems” section.
SERVICE AND APPEARANCE CARE Appearance Care Cleaning the Inside of Your Vehicle Your vehicle’s interior will continue to look its best if it is cleaned often. Although not always visible, dust and dirt can accumulate on your upholstery. Dirt can damage carpet, fabric, leather, and plastic surfaces. Regular vacuuming is recommended to remove particles from your upholstery. It is important to keep your upholstery from becoming and remaining heavily soiled. Soils should be removed as quickly as possible.
SERVICE AND APPEARANCE CARE • For solid dry soils: remove as much as possible and then vacuum. To clean, use the following instructions: 1) Saturate a lint-free, clean white cloth with water or club soda. 2) Wring the cloth to remove excess moisture. 3) Start on the outside edge of the soil and gently rub toward the center. Continue cleaning, using a clean area of the cloth each time it becomes soiled. 4) Continue to gently rub the soiled area until the cleaning cloth remains clean.
SERVICE AND APPEARANCE CARE The best way to preserve the vehicle’s finish is to keep it clean by washing it often with lukewarm or cold water. Do not wash the vehicle in the direct rays of the sun. Use a car washing soap. Do not use strong soaps or chemical detergents. Be sure to rinse the vehicle well, removing all soap residue completely. Approved cleaning products can be obtained from your dealer. Refer to “Vehicle Care/ Appearance Materials” in this section.
SERVICE AND APPEARANCE CARE clean water. After rinsing thoroughly, dry with a soft clean towel. A wax may then be applied. Do not take the vehicle through an automatic car wash that has silicone carbide tire cleaning brushes. These brushes can also damage the surface of these wheels. CAUTION Using chrome polish on aluminum wheels could damage the wheels. The repairs would not be covered by your warranty. Use chrome polish on chrome wheels only.
SERVICE AND APPEARANCE CARE Vehicle Care/Appearance Materials Description Description Usage Usage Polishing Cloth Wax-Treated Interior and exterior polishing cloth. Cleaner Wax Removes light scratches and protects finish. Tar and Road Oil Remover Removes tar, road oil, and asphalt. Chrome Cleaner and Polish Foaming Tire Shine Low Gloss Cleans, shines, and protects in one step. No wiping necessary. Use on chrome or stainless steel.
SERVICE AND APPEARANCE CARE Service Parts Identification Label This label is on the inside of the glove box. It is very helpful if you ever need to order parts. The label has the following information: • • • • Vehicle Identification Number (VIN) Model designation Paint information Production options and special equipment Do not remove this label from the vehicle. Electrical System Add-On Electrical Equipment CAUTION Do not add anything electrical to your vehicle unless you check with your dealer first.
SERVICE AND APPEARANCE CARE Instrument Panel Fuse Block The instrument panel fuse block is located on the passenger’s side of the center console, to the left of the glove box near the floor. Fuses 1808062 Fuses 1708445 Remove the console cover to access the fuse block.
SERVICE AND APPEARANCE CARE Engine Compartment Fuse Block Relays RAP RLY REAR DEFOG RLY Usage PWR SEATS EMPTY Misc.
SERVICE AND APPEARANCE CARE Fuses Usage 18 Even Coils, Injectors 19 Odd Coils, Injectors 20 Emission Device 2 21 Spare 22 Powertrain Control Module, Ignition 23 Transmission 24 Mass Airflow Sensor Fuses 37 Usage Driver’s Side Trailer Stoplamp, Turn Signal Relays Usage 31 Ignition Main 46 Air Conditioning Compressor Clutch Powertrain 38 Spare 39 Fuel Pump 47 40 Rear Accessory Power Outlet 51 Spare 55 Crank 56 Fan 1 58 Passenger’s Side Trailer Stoplamp, Turn Signal 59 D
SERVICE AND APPEARANCE CARE Capacities and Specifications The following approximate capacities are given in English and metric conversions. Refer to “Recommended Fluids and Lubricants” in “Maintenance Schedule” in the “Maintenance Schedule” section for more information. Capacities Application English Metric For the air conditioning system refrigerant charge amount, see the refrigerant caution label located under the hood. See your dealer for more information.
MAINTENANCE SCHEDULE MAINTENANCE SCHEDULE Maintenance Schedule ....................................................... 6-1 Scheduled Maintenance except CANADA ........................ 6-3 For CANADA Scheduled Maintenance .............................. 6-8 Owner Checks and Services ..............................................
MAINTENANCE SCHEDULE Maintenance Schedule Introduction Important: Keep engine oil at the proper level and change as recommended. Maintenance Requirements CAUTION Maintenance intervals, checks, inspections, replacement parts, and recommended fluids and lubricants as prescribed in this manual are necessary to keep your vehicle in good working condition. Any damage caused by failure to follow scheduled maintenance might not be covered by warranty.
MAINTENANCE SCHEDULE Some maintenance services can be complex. So, unless you are technically qualified and have the necessary equipment, you should have your dealer do these jobs. When you go to your dealer for your service needs, you will know that trained and supported service technicians will perform the work using genuine parts. “Owner Checks and Services” in this section tells you what should be checked, when to check it, and what you can easily do to help keep your vehicle in good condition.
MAINTENANCE SCHEDULE Scheduled Maintenance except CANADA Service Instruction Maintenance I Maintenance II • Change engine oil and filter if the light/message has not come on at all for one year. Change engine oil and filter. • Refer to “Engine Oil” in “Checking Things Under the Hood” in the “Service and Appearance Care” section. • • • If the system is ever reset accidentally, perform the maintenance Reset oil life system. service within 3000 miles (5000 km) since your last service.
MAINTENANCE SCHEDULE Service • Inspect engine air cleaner filter. If necessary, replace filter. • • Inspect suspension and steer• ing components. • Inspect engine cooling system. Inspect wiper blades. • • • • • Inspect restraint system components. • • • • • Instruction Maintenance I Maintenance II Refer to “Engine Air Cleaner/Filter” in “Checking Things Under the Hood” in the “Service and Appearance Care” section.
MAINTENANCE SCHEDULE Service • Lubricate body components. • • Inspect passenger compartment air filter. • • • Inspect throttle system. • • Instruction Maintenance I Maintenance II Lubricate all key lock cylinders, hood latch assemblies, secondary latches, pivots, spring anchor and release pawl, hood and door hinges, rear folding seats, and liftgate hinges. • More frequent lubrication may be required when exposed to a corrosive environment such as winter road salt.
MAINTENANCE SCHEDULE Additional Required Services except CANADA The following services should be performed at the first maintenance service (I or II) after the indicated miles (kilometers) shown for each item. Additional required services Service Instruction Inspect fuel system for damage or leaks. Inspect exhaust system for loose or damaged components. Replace engine air cleaner filter. Change automatic transaxle fluid (severe service). Change automatic transaxle fluid (normal service).
MAINTENANCE SCHEDULE Service Instruction • Drain, flush, and refill cooling system. • This service can be complex; you should have your dealer perform this service. • Refer to “Engine Coolant” in Engine cooling system service (or “Checking Things Under the every five years, whichever occurs Hood” in the “Service and first). An Emission Control SerAppearance Care” section for vice. what to use. • Inspect hoses. • Clean radiator, condenser, pressure cap, and filler neck.
MAINTENANCE SCHEDULE For CANADA Scheduled Maintenance Service Instruction • Change engine oil and filter if the light/message has not come on at all for 10 months. Change engine oil and filter. • Refer to “Engine Oil” in “Checking Things Under the Hood” in the “Service and Appearance Care” section. • If the system is ever reset accidentally, perform the maintenance service within Reset oil life system. 5000 km since your last service. An Emission Control Service.
MAINTENANCE SCHEDULE Service • Inspect engine air cleaner filter. If necessary, replace filter. • • Inspect suspension and steer• ing components. • Inspect engine cooling system. • • Inspect wiper blades. • • • Inspect restraint system components. • • • • • Instruction Refer to “Engine Air Cleaner/Filter” in “Checking Things Under the Hood” in the “Service and Appearance Care” section. If you drive regularly under dusty conditions, inspect the filter at each engine oil change.
MAINTENANCE SCHEDULE Service • Lubricate body components. • • Inspect passenger compartment air filter. Inspect throttle system. • • • • • Instruction Lubricate all key lock cylinders, hood latch assemblies, secondary latches, pivots, spring anchor and release pawl, hood and door hinges, rear folding seats, and liftgate hinges. More frequent lubrication may be required when exposed to a corrosive environment such as winter road salt.
MAINTENANCE SCHEDULE Additional Required Services (For CANADA) The following services should be performed at the first maintenance service after the indicated kilometers shown for each item. Additional required services Service Instruction Inspect fuel system for damage or leaks. Inspect exhaust system for loose or damaged components. Replace engine air cleaner filter. Change automatic transaxle fluid. Replace spark plugs. An Emission Control Service.
MAINTENANCE SCHEDULE Service Instruction • Drain, flush, and refill cooling system. • This service can be complex; you should have your dealer perform this service. • Refer to “Engine Coolant” in Engine cooling system service (or “Checking Things Under the every five years, whichever occurs Hood” in the “Service and first). An Emission Control SerAppearance Care” section for vice. what to use. • Inspect hoses. • Clean radiator, condenser, pressure cap, and filler neck.
MAINTENANCE SCHEDULE Owner Checks and Services These owner checks and services should be performed at the intervals specified to help ensure the safety, dependability, and emission control performance of your vehicle. Your dealer can assist you with these checks and services. Be sure any necessary repairs are completed at once. Whenever any fluids or lubricants are added to your vehicle, make sure they are the proper ones, as shown in “Recommended Fluids and Lubricants” in this section.
MAINTENANCE SCHEDULE At Each Fuel Fill It is important to perform these underhood checks at each fuel fill. Engine Oil Level Check Check the engine oil level and add the proper oil if necessary. Refer to “Engine Oil” in “Checking Things Under the Hood” in the “Service and Appearance Care” section for further details. CAUTION It is important to check the engine oil regularly and keep it at the proper level.
MAINTENANCE SCHEDULE Automatic Transaxle Shift Lock Control System Check WARNING When you are doing this inspection, the vehicle could move suddenly. If the vehicle moves, you or others could be injured. 1) Before you start, be sure you have enough room around the vehicle. It should be parked on a level surface. 2) Firmly apply the parking brake. Refer to “Parking Brake” in “Starting and Operating Your Vehicle” in the “Features and Controls” section.
MAINTENANCE SCHEDULE Recommended Fluids and Lubricants Fluids and lubricants identified below by name, part number, or specification can be obtained from your dealer. Usage Fluid/Lubricant Engine Oil Engine oil which meets Standard GM6094M and displays the American Petroleum Institute Certified for Gasoline Engines starburst symbol. The proper viscosity for your vehicle’s engine is an SAE 5W-30 synthetic oil or an SAE 0W-30 oil.
MAINTENANCE SCHEDULE Normal Maintenance Replacement Parts Replacement parts identified below by name, part number, or specification can be obtained from your dealer. Part SUZUKI Part No. Engine Air Cleaner/Filter 13780–78J00 Engine Oil Filter 16510–78J00 Passenger Compartment Air Filter Element 95861–78J00 Replacement Battery 33610–78J00 Spark Plugs 1119A–78J00 Windshield Wiper Blades Driver’s Side – 24 inches (60.0 cm) 38340–78J00 Passenger’s Side – 19 inches (47.
MAINTENANCE SCHEDULE Maintenance Record except CANADA After the scheduled services are performed, record the date, odometer reading, who performed the service, and the type of services performed in the boxes provided. Refer to “Maintenance Requirements” in this section. Any additional information from “Owner Checks and Services” in this section can be added on the following record pages. You should retain all maintenance receipts.
MAINTENANCE SCHEDULE MEMO 6-19 78J00-03E
GENERAL INFORMATION GENERAL INFORMATION Identification Numbers ....................................................... 7-1 Safety Certification Label ................................................... 7-1 Emission Compliance Label (for U.S.A.) ........................... 7-2 Warranties ............................................................................ 7-2 On-Board Vehicle Computers and Event Data Recorders ............................................................................
GENERAL INFORMATION Identification Numbers Safety Certification Label Engine Serial Number Vehicle Identification Number EXAMPLE (for some vehicles) 60G128 60G152 The Vehicle Identification Number (VIN) may be found in the location shown in the above illustrations. This number is used to register the vehicle. It is also used to assist your dealer when ordering parts or referring to special service information.
GENERAL INFORMATION Emission Compliance Label (for U.S.A.) Warranties The warranties covering your vehicle are explained in a separate New Vehicle Warranty Information booklet given to you at the time of sale. Please read this booklet carefully so you can understand your rights and responsibilities. For U.S.A.
GENERAL INFORMATION and may be used to improve crash performance of future vehicles and driving safety. Unlike the data recorders on many airplanes, these on-board systems do not record sounds, such as conversation of vehicle occupants. To read this information, special equipment is needed and access to the vehicle or the device that stores the data is required.
GENERAL INFORMATION To contact American Suzuki, owners in the continental United States can call toll-free 1-800-934-0934, or write to: American Suzuki Motor Corporation Automotive Customer Relations 3251 East Imperial Highway Brea, CA 92821-6795 For owners outside the continental United States, please refer to the distributor’s address listed in your Warranty Information booklet. For vehicles registered for use and principally operated in Canada please contact Suzuki Canada Inc.
GENERAL INFORMATION MEMO 7-5 78J00-03E
INDEX INDEX A Automatic Transaxle Operation ......................................... 2-14 Accessories and Modifications ..........................................5-1 Accessory Power Outlet(s) .................................................3-10 Adding Equipment to the Outside of Your Vehicle ..........5-1 Adding Equipment to Your Airbag-Equipped Vehicle .....1-42 Additional Required Services .............................................6-11 Additional Required Services except CANADA ................
INDEX Child Restraints ...................................................................1-18 City Driving ..........................................................................4-11 Cleaning Exterior Lamps/Lenses .......................................5-50 Cleaning the Inside of Your Vehicle ..................................5-48 Climate Controls ..................................................................3-10 Compact Spare Tire .............................................................
INDEX Fuses and Circuit Breakers ................................................5-53 J G Jump Starting ...................................................................... 5-19 Gasoline Octane ..................................................................5-2 Gasoline Specifications ......................................................5-2 Gate Ajar Light .....................................................................3-25 Glove Box ............................................................
INDEX N National Highway Traffic Safety Administration (NHTSA) ................................................................................7-3 Navigation/Radio System ...................................................3-67 New Vehicle Break-In ..........................................................2-12 Normal Maintenance Replacement Parts ..........................6-17 O Off-Road Recovery ..............................................................4-7 Oil Pressure Light ...........................
INDEX S Safety Belt Extender ............................................................1-18 Safety Belt Pretensioners ...................................................1-18 Safety Belt Reminder Light .................................................3-16 Safety Belts: They Are for Everyone .................................1-9 Safety Certification Label ...................................................7-1 Scheduled Maintenance ......................................................
INDEX Vehicle Identification ...........................................................5-52 Vehicle Identification Number ............................................7-1 Vehicle Identification Number (VIN) ...................................5-52 W Warning Lights, Gages, and Indicators .............................3-15 Warranties ............................................................................7-2 Washing Your Vehicle .........................................................5-49 Weatherstrips ..
12.0 mm ENGLISH SERVICE STATION INFORMATION Fuel recommendation: See page 5-2 Brake and clutch fluid: DOT3 Engine oil recommendation: Engine oil with “Starburst” symbol Standard: GM6094M Viscosity: SAE 5W-30 Tire cold pressure: See the “Tire Information Label” located on the driver’s door lock pillar. 2007 For further details, see “Engine Oil” in the “SERVICE AND APPEARANCE CARE” section. XL7 99011-78J00-03E Printed in U.S.A.