O WNER’ S GUIDE SVS Family of Speakers: SBS-01, SCS-01 and MTS-01 Contents: Chapter 1 - Welcome Chapter 2 - Safety Chapter 3 - About your SVS speakers Chapter 4 - Speaker placement Chapter 5 - Room diagrams: 5.1 and 7.
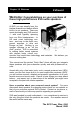
Chapter 1-2 Welcome SVSound Welcome: Congratulations on your purchase of these high-performance SVS audio speakers. At SVS, you can actually hear the tireless research and design efforts built in to our speakers. Years are spent developing any SVS product — with work typically spanning from our Ohio headquarters… to US west coast technology centers… and over to the finest component suppliers in Asia and Europe as well. Nothing in our speaker offerings is an ―off the shelf‖ product.
Chapter 2-1 Safety SVSound IMPORTANT SAFETY INSTRUCTIONS 1. Read these instructions. 2. Keep these instructions. 3. Heed all warnings. 4. Follow all instructions. 5. Do not use this apparatus near water. 6. Clean only with dry cloth. 7. Do not block any ventilation openings. Install in accordance with the manufacturer's instructions. 8. Do not install near any heat sources such as radiators, heat registers, stoves, or other apparatus (including amplifiers) that produce heat. 9.
SVSound Chapter 2-2 Safety 13. Unplug this apparatus during lightning storms or when unused for long periods of time. 14. Refer all servicing to qualified service personnel. Servicing is required when the apparatus has been damaged in any way, such as power-supply cord or plug is damaged, liquid has been spilled or objects have fallen into the apparatus, the apparatus has been exposed to rain or moisture, does not operate normally, or has been dropped. 15.
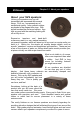
SV Subwoofers SVSound Chapter 3-1 About your speakers About your SVS speakers: Un-box your speakers and you will immediately be impressed with several things. First, our components are of exceptional quality: from synthetic rubber surrounds to the elegant trim rings. With stylish touches like real wood veneer, they look as good with the matching fabric grills off as they do on.
Chapter Page 6 4-1 Speaker Placement SV Sound Location, location, location: Properly set up in a typical home, your SVS speaker package, backed by a high quality subwoofer, will provide startlingly realistic reproduction of any sort of music or movie soundtrack. Take time to carefully unpack everything. Look thoroughly in each box. Locate all the items you’ll need to proceed to installing your speakers (tools, wire, wall brackets, SPL meter, etc.).
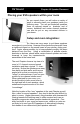
SV Sound Chapter 4-2 Speaker Placement Placing your SVS speakers within your room As you unpack them, you will notice a variety of ways to securely place your speakers inside you listening room. You can put bookshelf speakers them on optional stands or brackets, and of course, bookshelf and center channel speakers can also be put on any convenient shelves in your home. Setup and room integration: So, there are many ways to put these speakers someplace in your home.
Chapter 4-3 Speaker Placement SV Sound Speaker placement: 5.1 versus 7.1 channel 5.1 channel surround-sound systems employ Right, Center, Left, and Left Surround and Right Surround speakers, plus a Subwoofer. This basic ―theater‖ configuration is depicted in the next Chapter. Such systems are being supplanted by 7.1 channel systems shown in the second room diagram. The differences in sound between 5.1 and 7.
Chapter 5-1 Room diagram SV Sound Speaker placement: 5.1 Channel Surround Sound System Left Front Center Right Front Typical 5.1 Channel Speaker Placement Left Surround Subwoofer Right Surround Figure 4.
SV Sound Chapter 5-2 Room diagram Speaker placement: 7.1 Channel Surround Sound System Left Front Right Front Center Typical7.1 6.1channel or 7.
Chapter 6-1 Wiring SV Sound Speaker wiring: Exceptional care must be used at this stage to ensure details are not overlooked. Check everything closely as you wire things up, then ―double check‖ each aspect of your connections before you move on. First, review the printed Quick Start Guide and note the simplified wiring diagram which should allow you to visualize your system’s connections. The diagram in the guide shows a 5.
SV Sound Chapter 6-2 Wiring Connections, phase, wire and more Regardless of the sort of wire you use, keep a consistent approach to your wiring so you do not inadvertently mismatch your Plus (+) or Negative (-) terminals on any speaker and its run to the receiver’s speaker outputs. After tightening down your speaker terminals it’s important to periodically check on them. If you are using bare, stripped wire you may notice it will tend to flatten over time.
SVSound Chapter 7-1 Speaker orientation Speakers with “mirrored” tweeter: MTS-01 and SCS-01 In any audio system, your room’s shape and the position of any speaker in that room, plus your own position, all affect the way sound which reaches your ears. Sound bounces off of walls, or it can be absorbed by nearby furniture or floor coverings. Moving a speaker or subwoofer a few feet, sometimes only inches can have subtle or even significant audible consequences, so experimentation is recommended.
Chapter 8-1 Tweeter attenuation (MTS-01 Only) SVSound Tweeter Attenuation Control: Placed inside your binding post cup in the back of your speaker, the standard tweeter switch setting (0dB) is best for medium to large rooms with typical levels of acoustic damping (curtains, upholstered furniture, carpeting), or for small rooms which are acoustically treated with panels and diffusers.
SVSound Chapter 9-1 Port tuning MTS-01 Speaker family port tuning Your MTS-01 speaker family (including the MCS-01 and MBS-01) can be run in either their efficient and deep ―vented‖ configuration (using no foam port plugs). Or ―sealed‖ with their rear-located ports filled by the included plugs. For most applications, we recommend the vented mode with the speakers set to ―Small‖ in your AVR’s setup menu, along with an 80 Hz bass management setting as well.
Chapter 10-1 Audio system configuration SVSound Audio/Video System Configuration: The most important things to know about your speakers are in this document, but find your AVR and your DVD or CD player manuals too. We recommend you reacquaint yourself with the setup menu options in each of these important pieces of audio gear. Even speakers as fine these from SVS will not sound correct if poor choices are made during system configuration.
Chapter 10-2 Audio system configuration SVSound On your receiver: There are often confusing and even conflicting settings in a modern AVR. The basics of proper audio setup are quite simple however. First, make sure all speakers actually installed in your system are also selected in the receiver setup menu. Of course if you do not have any particular speaker (say surround ―back‖ speakers in a 7.1 system), then these should be set to ―Off‖ or ―No‖ … so your sound is processed properly.
SVSound Chapter 11-1 Channel level calibration Speaker “Level Calibration”: In home audio, ―calibration‖ is simply a method to ensure ―all speakers play back the same volume when the same volume signal is fed to each. Correct speaker playback levels are critical to reproducing the ―soundstage‖ intended by the musical artist or movie director. This calibration section is common with SVS subwoofer manuals.
Chapter 11-2 Channel level calibration SV Sound Getting ready to start: Make sure your receiver/processor master volume is set at ―00 dB‖ or some other easy to remember reference level. Set your subwoofer’s volume/gain control to no more than 1/3rd up for now (it can be turned up later). Check the subwoofer level control of your AVR before you begin the test tones.
Chapter 11-3 Channel level calibration SV Sound But what’s “too high” for your subwoofer?? Tastes vary, and so do movie soundtracks, but if you purchased an SVS subwoofer, it’s capable of tremendous levels of low distortion, low frequency bass — often much more than most subwoofers. Take advantage of this, especially if you like action movies with lots of bass action. You can do so by allowing your subwoofer levels to rise a couple dB’s louder than your other speakers during your level calibration.
SV Sound Chapter 12-1 Specifications Specifications Model Name MBS-01 Configuration Mid-sized Bookshelf Speaker Design Bass-reflex (with port plugs for sealed mode) Dimensions 16" x 10" x 13" HxW xD 406mm x 254mm x 330mm Weight 27lbs (12kg) Drivers Tweeter: 1" (25mm) ScanSpeak ® ―AirCirc‖ Woofer: 6.
Chapter 12-2 Specifications SV Sound Specifications Model Name MCS-01 Configuration Mid-sized Center Speaker Design Bass-reflex with sealed mode Dimensions 10" x 24" x 13" HxW xD 254mm x 610mm x 330mm Weight 39lbs (17kg) Drivers Tweeter: 1" (25mm) ScanSpeak ® ―AirCirc‖ Woofer: Twin 6.
SV Sound Chapter 12-3 Specifications Specifications Model Name MTS-01 Configuration Mid-size Tower Speaker 2 ½ way bass-reflex with sealed mode Design Dimensions (Grills included) 41" x 10" x 13" HxW xD 1041mm x 254mm x 330mm Weight 60lbs (27.3kg) Drivers Tweeter: 1" (25mm) ScanSpeak ® ―AirCirc‖ Woofer: Twin 6.
SV Sound Chapter 13 Terms and Conditions Terms and Conditions: Details are available on request, please contact your Dealer for more. Note that these terms and conditions do not affect your statutory rights. Shipping: When you receive your new subwoofer, please check to ensure there is no damage.