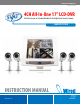
SVAT ELECTRONICS now you can see 4CH All-In-One 17" LCD-DVR Ultra Slim System w/ 4 Indoor/Outdoor Hi-Res Night Vision Security Cameras COMPLETE SYSTEM INSTRUCTION MANUAL www.svat.com V1.
SVAT ELECTRONICS now you can see NEED HELP? PLEASE DO NOT RETURN THIS PRODUCT TO THE STORE Please contact a SVAT customer support representative first regarding any additional information on product features, specifications or assistance with set-up. You can contact us via one of the methods below: Email: support@svat.com Toll free telephone: 1.866.946.7828 Online live web chat: www.svat.com/support Toll free fax: 1.888.771.1701 Note: This is manual version 1.0 for this product.
SVAT ELECTRONICS now you can see PRODUCT WARRANTY INFORMATION Please visit our website at www.svat.com for information about your product’s warranty. We take quality very seriously. This is why all of our products come with a one year warranty from the original purchase date against defects in workmanship and materials. If you have warranty or support issues please contact us using any of the following methods: Phone: 1.866.946.7828 Fax: 1.888.771.1701 Email: support@svat.com Website: www.svat.
TABLE OF CONTENTS SVAT ELECTRONICS now you can see INTRODUCTION 8 WHAT IS INCLUDED .....................................................................8 FEATURES...................................................................................8 OPTIONAL ACCESSORY..................................................................9 BUTTONS & CONNECTIONS ......................................................... 10 16" LCD DVR..................................................................................
SVAT ELECTRONICS now you can see Accessing The Search Menu.........................................................................21 Searching By Time......................................................................................21 Searching By Event.....................................................................................22 MAIN MENU.............................................................................. 23 General Menu............................................................
SVAT ELECTRONICS now you can see Disk Manage Menu.....................................................................................52 Changing To The Disk Manage Menu ...........................................................52 Formatting The DVR’s Hard Drive.................................................................53 RECORD MENU.......................................................................... 55 Recording Operations Menu...............................................................
SVAT ELECTRONICS now you can see Sending A Test Email...................................................................................84 Understanding The Notification E-Mails.......................................................84 Configuring Mail Settings..................................................................85 DVR Settings Through The Remote Viewer..........................................85 Entering Setup...................................................................................
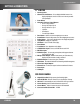
SVAT ELECTRONICS WHAT IS INCLUDED now you can see FEATURES Record up to 240 Days This DVR utilizes the advanced Seagate SV35 hard drive. The 160GB hard drive was designed by Seagate for optimization with DVRs to ensure secure and consistent recording for years. Stylishly Integrated 17” LCD The LCD profile is amazingly slim. View crisp clean video on the 17” screen. The CLEARVU9 instantly transforms your viewing space into a vibrant, clutter-free, security base station.
SVAT ELECTRONICS now you can see Advanced Motion Activated Recording You can set the DVR to record only when motion is detected and alert you with an audible alarm. You can even set individual cameras to detect motion, and only video from those cameras will be recorded. Motion Mask allows you to block areas with constant motion, ensuring that only suspicious activity is recorded. Covert Mode This system offers a covert way of recording so you have the option to keep your camera locations discreet.
SVAT ELECTRONICS now you can see BUTTONS & CONNECTIONS 17" LCD DVR 1. Monitor Speaker 2. Channel Selection Buttons - Select to display individual cameras in live display and playback. Can also be used to enter numeric passwords (when prompted) 3. Pause Button 4. Navigation / Reviews / Control Buttons • Review / Playback Button • Changes the Playback Speed • Changes the Reverse Speed • Up Button • Down Button • Forward Playback Button 5.
SVAT ELECTRONICS THINGS TO CONSIDER BEFORE INSTALLATION now you can see For best performance, follow these simple guidelines: • • • • • Camera(s) should be installed between 8 and 13 feet above the area to be monitored. To maximize viewing area, ensure there are no obstructions in the camera’s view. Ensure that the sunshade is positioned to avoid glare and position cameras away from direct sunlight. Each camera comes with 60 feet of extension wire.
SVAT ELECTRONICS now you can see 5. Connect the 60ft. video/power wire’s male RCA plug to one of the VIDEO IN ports for channel 1-4. NOTE: For detailled instructions and information on the cameras incluced with this system, please refer to the Camera Manual on pg.103. CONNECTING ADDITIONAL DEVICES TO THE DVR This DVR has other ports which allow you to connect additional SVAT or third party devices to the system.
SVAT ELECTRONICS now you can see CONNECTING A USB CD/DVD WRITER, EXTERNAL HARD DRIVE, OR USB FLASH DRIVE (NOT INCLUDED) FOR ARCHIVING RECORDED FOOTAGE You can connect a plug and play CD/DVD Writer to this CLEARVU9 to back up and archive recorded footage that is on the DVR. Simply plug your external device into the DVR and follow the instructions on pg. 62 to back up your footage to the drive.
SVAT ELECTRONICS CONNECTING A MICROPHONE (NOT INCLUDED) FOR 2 WAY COMMUNICATION now you can see If you connect a microphone to one of the AUDIO IN jacks, you can communicate with computers that are remotely connected to the DVR. After connecting the microphone, simply enable live audio and the channel which it is connected to (see pg.35 for more information on audio settings). Audio will be transmitted to the connected PC until the LIVE AUDIO setting is turned to OFF, or the microphone is disconnected.
SVAT ELECTRONICS USING THE REMOTE CONTROL FOR ONSCREEN NAVIGATION 1 POWER BUTTON Turns the LCD screen or DVR system ON or OFF 2 SETUP BUTTON Enters the setup screen 3 CHANNEL SELECTION BUTTONS Select to display individual cameras in live display and playback.
SVAT ELECTRONICS now you can see CONNECTING AND POWERING ON 1. Insert the power supply wire into the rear DC 12V port on the DVR Insert the power cord into the power supply. 2. Plug the power cord from power supply into the power outlet. We recommend using a surge protected power bar and/or Uninterrupted Power Supply (UPS) backup to prevent damage to your DVR system. 3. The DVR will power on and you will see a startup screen that detects and checks the status of hard drives. 4.
SVAT ELECTRONICS SHUTTING DOWN now you can see With this DVR you have the option to shut down the entire unit and stop the DVR from recording, or to turn off the LCD screen but continue recording. For security reasons, you must enter your password to power off the system and halt recording. In either of these situations, pressing the button again will turn the DVR or LCD screen back on. NOTE: Only users with ADMIN permission levels can turn the unit OFF.
SVAT ELECTRONICS now you can see MULTI-SCREENS The CLEARVU9 gives you several different viewing options for your cameras. You can choose between Sequence Mode, Single camera, and Quad (4 camera). TO CHANGE YOUR CAMERA DISPLAY 1. To change your camera display, click the right mouse button on the Live Display screen. 2. Click the DISPLAY icon. 3. To choose a different Display mode, repeat steps 1 and 2. This time, Single Display mode will be activated. 4.
SVAT ELECTRONICS now you can see LOCKING THE SCREEN 1. To lock the screen and disable settings, click the right mouse button on the Live Display screen. 2. Click the Key Lock icon. 3. Enter your password (the default password is ‘1234’) and select OK. 4. The status bar at the bottom of the screen will disappear, and the word LOCK will be in the middle of the screen. 5. Key Lock is now activated.
SVAT ELECTRONICS you can Continuous Record Mode is the simplest of recording modes. When you power on the DVR, recording will start automatically and now the DVR willsee continue recording until you choose to stop it. The beside each camera title indicates that the camera is in continuous recording mode. Schedule Mode allows you to create a daily or weekly schedule for the system to record. This schedule is customizable for each camera, each day of the week.
SVAT ELECTRONICS ADVANCED SEARCH now you can see The advanced search mode displays a calendar, allowing you to easily search by either time or event for specific days or periods of time. Once the desired footage is found, it can easily be played back and reviewed. ACCESSING THE SEARCH MENU 1. Access the SEARCH menu by clicking the right mouse button on the Live Display screen. 2. Click the SEARCH icon 3. Enter your password (the default password is 1234) and select OK. SEARCHING BY TIME 1.
SVAT ELECTRONICS now you can see 4. To move to a specific time period, click and drag the arrow along the timeline to the specific time period you are looking for. As you drag the arrow you will see the time indicator (next to the play button) change accordingly. 5. When you reach the desired time, press PLAY. NOTE: Pressing PLAY puts the DVR into playback mode. For information and detailed instructions on navigating through Playback mode, please see PLAYBACK MODE, pg. 20. SEARCHING BY EVENT 1.
SVAT ELECTRONICS now you can see MAIN MENU This section will outline all the settings within each of the system menus. With these menus you can customize the DVR to meet your viewing needs. The three main menus are GENERAL, RECORD, and ARCHIVING. Within these menus are many different submenus which allow you to customize your DVR to meet your needs. GENERAL MENU The main system menus within the General menu are DISPLAY, CAMERA, SOUND, SYSTEM, EVENT/SENSOR, and DISK MANAGEMENT.
SVAT ELECTRONICS now you can see DISPLAY MENU Within the DISPLAY menu are the following submenus: OSD, MONITOR, and SCREENSAVER. The OSD (Onscreen Display) menu allows you to control general screen settings such as camera titles and transparencies. The MONITOR menu allows you to control alarm and event settings. In the SCREENSAVER menu you are able to set the LCD screen to turn off after a certain period of inactivity or to turn off for a specific period of time.
SVAT ELECTRONICS now you can see MENU TRANSPARENCY: When accessing a menu, you have the ability to still be able to see the cameras behind the menu window. Changing the value determines whether the menu is more transparent (making it easier to see the cameras while the menu is open) or less transparent (more difficult to see the cameras while the menu is open). You can adjust the transparency level between 0 and 100, with 0 being completely solid and 100 being fully transparent.
SVAT ELECTRONICS now you can see MAKING CHANGES TO THE SCREEN SAVER MENU: 1. After saving any desired changes to other menus, click the SCREEN SAVER title on the left hand side of the window. 2. To navigate through the SCREEN SAVER menu, use the mouse to click the status (OFF, ON, etc) of the setting you wish to change. You will see the outline of the status turn green. 3. Use the buttons to choose the preferred setting. 4. When you have made all the desired changes to the SCREEN SAVER menu, click APPLY.
SVAT ELECTRONICS CAMERA MENU now you can see The camera menu allows you to make changes to the following: CAMERA TITLE, COLOR SETUP, PTZ SETUP, and MOTION SENSOR. The CAMERA TITLE menu allows you to personalize the on-screen title of each camera as well as whether the camera will be displayed in covert mode. The COLOR SETUP menu is where you to make specific changes to the brightness, contrast, tint, and color of each camera individually. PTZ SETUP configures settings for PTZ cameras (not included).
SVAT ELECTRONICS now you can see COVERT: Covert mode can be turned ON or OFF for each camera. Covert cameras will record according to the camera’s specific schedule, but its monitoring area will NOT be displayed onscreen (a blue screen will appear in its place). This allows you to keep your camera locations discreet. CAMERA TITLE: Allows you to name each camera individually for easy reference. Example: Front door, back door, warehouse. CHANGING THE CAMERA TITLE 1. Double click the camera title.
SVAT ELECTRONICS 8. Under COLOR, click the buttons to adjust the brightness between 1 and 100 (the default is 50). 9. When you have completed changing settings for that particular camera, you can use the 10. When you have made all desired adjustments, click now you can see buttons to select another camera channel. to exit the setup screen. 11. You will return to the list of cameras, and any changes you made to the numbers will appear in the proper columns. 12.
SVAT ELECTRONICS CONFIGURING THE PTZ MENU OPTIONS now you can see 1. To get to the PTZ Menu, access the GENERAL menu by clicking the right mouse button on the Live Display screen. 2. Click the SETUP icon. 3. Enter your password (the default password is ‘1234’) and select OK. 4. Click the GENERAL button. 5. Click the CAMERA button. 6. Choose PTZ SETUP on the left hand side of the window. 7.
SVAT ELECTRONICS now you can see NOTE: You can access additional settings by through the Advanced Options menu. Simply click the to access this menu. AUTO FOCUS: Allows you to turns the automatic focus ON or OFF SPEED CONTROLS: Sets the Pitch, Zoom, Focus, and Iris speeds between 1 and 10 CONTROLLING THE PTZ CAMERA THROUGH THE DVR 1. While in Live Display, click the right mouse button on the Live Display screen to access the screen that allows you to control the PTZ camera. 2.
SVAT ELECTRONICS now you can see 5. To manually control the PTZ, use the mouse to click the buttons next to the P, T, and Z. You will see the camera move or zoom accordingly. To exit out of the PTZ screen, click RETURN. 6. If your camera is capable of swing capabilities, you can set the camera to repeatedly pan back and forth from one end of the camera’s viewing range to the other. Click SWING and then press ENTER.
SVAT ELECTRONICS ADJUSTING AREA SETUP 1. Click the AREA SETUP button of the camera you wish to change. 2. The camera will be displayed full screen and will be orange in color with a light blue grid covering the entire frame. 3. By default the entire frame is set to detect motion (indicated by orange shading). To change this, you can deselect specific areas. 4. To deselect areas, click a square on the grid that is in the area you want to deselect.
SVAT ELECTRONICS now you can see 6. Continue to click and drag until all desired areas are within blue areas on the grid. 7. To exit this screen, right click the mouse anywhere on the screen. A menu will pop up with the options SELECT ALL, DELETE ALL, CANCEL, and SAVE & EXIT. 8. SELECT ALL will cover the entire screen with orange squares, completely enabling motion activated recording.
SVAT ELECTRONICS SOUND MENU now you can see The Sound menu contains the AUDIO and BUZZER submenus. This menu allows you to make changes to audio settings on the microphone as well as turn the beeping sounds of the monitor and remote ON or OFF. MAKING CHANGES TO THE AUDIO MENU 1. From the GENERAL menu, Click the SOUND button. 2. Click the AUDIO title on the left hand side of the window. 3.
SVAT ELECTRONICS now you can see NETWORK AUDIO TX: Turning this option ON enables network audio transmission and sends live and playback audio to a connected remote PC. Turning this option OFF disables audio from being sent. NETWORK AUDIO RX: Turning this option ON allows a remote PC connection to send audio to the DVR and have it played through the unit’s speaker. Turning this option OFF disables the DVR from receiving audio from a remote PC. MAKING CHANGES TO THE BUZZER MENU 1.
SVAT ELECTRONICS SYSTEM MENU now you can see The SYSTEM menu is where you make advanced changes to the accessibility of the DVR. The submenus within the SYSTEM menu are DATE/ TIME, NETWORK, MAIL, USER MANAGEMENT, SYSTEM MANAGEMENT, and CONTROL DEVICE. The DATE/TIME menu allows you to change the date and time and sync the DVR to the official time when connected to the Internet. The NETWORK menu displays your personal settings that make it possible to view your DVR over the Internet.
SVAT ELECTRONICS now you can see DATE/TIME: Allows you to manually set the date and time. Click the number which you wish to change. You will see it become outlined in green. Then, click the arrows to change the year, month, day, hour or minute to the desired time. NOTE: If your DVR is connected to the internet, you can set the DVR to automatically sync to the official time. For more information on this option, please see “Auto Time Sync”, below.
SVAT ELECTRONICS MAKING CHANGES TO THE MAIL MENU now you can see NOTE: The settings in this menu relate directly to setting up the DVR to connect to a network for remote and online viewing. If the DVR is not correctly set up to the network, the settings in this menu may be inaccurate or incomplete. It is recommended to only adjust these settings while setting up your DVR for networking.
SVAT ELECTRONICS ADDING A NEW USER now you can see 1. After saving any desired changes to other menus, click the USER MANAGEMENT title on the left hand side of the window. The window will display the list of users. 2. To add a new user, click the ADD button at the bottom of the screen. 3. A new window will pop up asking you to enter a user ID, password. 4. Double click box next to USER ID and the onscreen keyboard will pop up. 5. Enter a user ID by clicking each letter individually.
SVAT ELECTRONICS now you can see NOTE: In order to receive email alerts, a valid email address must be assigned to a USER ID and the email notification option for that user must be set to ON. The MAIL settings must also be properly configured in order for the DVR to successfully send e-mail alerts. If the DVR is not correctly set up to the network, you will NOT receive email alerts.
SVAT ELECTRONICS now you can see 5. Enter a password by clicking each letter individually. The title can be up to 8 characters and can include both numbers and letters. When you have finished selecting your password, click to exit the onscreen keyboard. 6. The 7. When you have finished selecting your password, click button allows you to move between capital letters and lowercase, and can be used to delete letters. to exit the onscreen keyboard. NOTE: All USER IDs and passwords are case sensitive.
SVAT ELECTRONICS now you can see DELETING USERS 1. Double click the user which you wish to delete. 2. The EDIT Screen will pop up. 3. Click DELETE at the bottom of the EDIT window. 4. The user is now deleted. NOTE: Users can not be restored once they are deleted. LOGGING ON TO THE SYSTEM WITH A USER ID 1. When you power on the DVR you will see a startup screen that detects and checks the status of hard drives. You must then log on to the system. 2. Use the 3.
SVAT ELECTRONICS now you can see UPDATING THE SYSTEM MANAGEMENT MENU 1. After saving any desired changes to other menus, click the SYSTEM MANAGEMENT title on the left hand side of the window. The window will display a list of settings. 2. To navigate through the SYSTEM MANAGEMENT menu, use the mouse to click the buttons (PRESS, SAVE, LOAD) of the setting you wish to change. 3. When you have made all the desired changes to the SYSTEM MANAGEMENT menu, click APPLY.
SVAT ELECTRONICS 6. After clicking APPLY, click menu screen. in the top right corner of the window to exit the DISPLAY menu and return to the GENERAL now you can see F/W UPDATE: New firmware may be available to download from the SVAT website at http://www.svat.com. Firmware updates will enhance system performance and upload extra features. After downloading, the firmware can be saved to a USB drive to update the DVR via its USB port. UPDATING THE SYSTEM’S FIRMWARE 1.
SVAT ELECTRONICS now you can see 6. The firmware will be saved to the DVR and a status bar will let you know the progress. 7. When the firmware is completely installed, you will be asked to restart the system. Press OK. After restarting, the new changes will take effect. FACTORY DEFAULT: The DVR can be restored to factory default by clicking the PRESS button and then pressing OK when the warning window pops up.
SVAT ELECTRONICS now you can see SAVING THE SYSTEM DATA 1. Insert your USB drive into the USB port on the side of the DVR. 2. Press the SAVE button next to SYSTEM DATA. 3. A Window that says “Success” will pop up when the settings have completed transferring. LOADING SYSTEM DATA 1. Insert your USB drive into the USB port on the side of the DVR. 2. Press the LOAD button next to SYSTEM DATA. 3. A Window that says “Success” will pop up when the settings have completed transferring.
SVAT ELECTRONICS now you can see NOTE: Each of the settings within the CONTROL DEVICE menu are described in detail below. SYSTEM ID: Must be different from any other DVRs being accessed by the remote. You can choose between 1-254 for an ID. PROTOCOL: Used to select the protocol (refer to the external remote’s user manual). BAUD RATE: Allows you to set up the baud rate (refer to the external remote’s user manual).
SVAT ELECTRONICS now you can see SMART ALARM: Can be turned ON or OFF. This feature sets the DVR to monitor the hard drive to detect any problems or errors that might be developing. If the DVR detects an error, it will sound an alarm. CHECK INTERVAL: Allows you to set a daily schedule for the DVR to enable Smart Disk monitoring. If the SMART ALARM (above) is set to ON, the DVR will scan for errors at the time period indicated. If any are detected, it will generate an alarm.
SVAT ELECTRONICS now you can see 3. The OPERATION option allows you to enable or disable the alarm out setting. Use the buttons to enable or disable this feature. If enabled, you will be able to edit settings for up to 4 alarms. If disabled, alarms will not function if there is an event. 4. Use the mouse to check the alarm, video loss, or motion boxes accordingly. If you select VIDEO LOSS, your alarm will sound if the camera loses power. MOTION will sound the alarm if the camera detects motion.
SVAT ELECTRONICS now you can see 6. If you have chosen LATCHED in step 5, you can use the user logs on to the system (UNTIL KEY-IN) buttons to set the duration of the alarm to be between 5 and 300 seconds or until a 7. When you have made all the desired changes to the BUZZER OUT menu, click APPLY. If you wish to exit without saving changes, click top right corner of the window. in the MAKING CHANGES TO THE EMAIL NOTIFICATION MENU 1.
SVAT ELECTRONICS now you can see DISK MANAGE MENU The Disk Manage menu allows you to set a RECORD[ING] TIME LIMIT, Turn the OVERWRITE option ON or OFF, and FORMAT the DVR’s hard drive. MAKING CHANGES TO THE DISK MANAGE MENU 1. Click the DISK MANAGE button. A window with the RECORD TIME LIMIT, OVERWRITE, and FORMAT options will appear. 2. To navigate through the DISK MANAGE menu, use the mouse to click the status (OFF, ON, etc) of the setting you wish to change.
SVAT ELECTRONICS now you can see NOTE: When a RECORD TIME LIMIT is set, the OVERWRITE feature will automatically become set to ON and can not be changed unless you change the RECORD TIME LIMIT status to OFF. RECORD TIME LIMIT: In accordance with certain local or organizational requirements and data protection laws, it may be necessary to limit the amount of footage being stored on the DVR.
SVAT ELECTRONICS now you can see 2. A warning message stating that all recorded data will be erased. Choose OK. 3. A progress window will pop up to show you the status of the format. 4. Once formatting is complete, the window will disappear and you will return to the DISK MANAGE screen.
SVAT ELECTRONICS now you can see RECORD MENU The RECORD menu is the area to make changes to recording schedules and activation options. The submenus within the RECORD menu are RECORDING OPERATIONS, TIMER/MOTION SETUP, and ALARM SETUP. 1. If you are not already in the RECORD menu, access the RECORD menu by clicking the right mouse button on the Live Display screen. 2. Click the SETUP icon. 3. Enter your password (the default password is ‘1234’) and select OK. 4. Click the RECORD button.
SVAT ELECTRONICS MAKING CHANGES TO THE RECORDING OPERATIONS MENU 1. Click the RECORDING OPERATIONS title on the left hand side of the window. 2. To navigate through the RECORDING OPERATIONS menu, use the mouse to click the status (OFF, ON, etc) of the setting you wish to change. You will see the outline of the status turn green. 3. Use the buttons to choose the preferred setting. 4. When you have made all the desired changes to the RECORDING OPERATIONS menu, click the or cancel your changes.
SVAT ELECTRONICS MAKING CHANGES TO THE TIMER/MOTION SETUP MENU now you can see The TIMER/MOTION menu is separated into two basic sections: SIZE/FPS/QUALITY/AUDIO, and ACTIVATION. Changes made to the SIZE/ FPS/QUALITY/AUDIO window allows you set a schedule and fully customize each camera to record at specific qualities and frame rates of your choice at any time of the day. The ACTIVATION screen allows you to place cameras into Motion Activated Recording mode or disable recording for a preferred schedule.
SVAT ELECTRONICS now you can see 4. Use the mouse to click the first block of the time period you wish to set on the Time Selection bar. The time selection bar is displayed as a 24 hour clock, with the first block (0) representing 12 – 1 AM and the last block (23) representing 11 PM – 12AM . 5. Hold down the mouse and drag along the screen to the last block of the time period you wish to set. The outline around the blocks will be yellow. Everything within this yellow border will have the same setting. 6.
SVAT ELECTRONICS now you can see NOTE: This DVR can record up to 120 Frames Per Second (FPS), which is spread out among all 4 channels. At the bottom of this menu screen you will see a “frames remained” counter. If the number beside “frames remained” is a positive number, this means you may be able to raise the FPS of any of your cameras for smoother recording and playback. If this number is a negative number, it means you have the DVR set to record more than 120FPS, which is not possible.
SVAT ELECTRONICS now you can see 5. Hold down the mouse and drag along the screen to the last block of the time period you wish to set. The outline around the blocks will be yellow. Everything within this yellow border will have the same setting. This outline can be for numerous hours and cameras. 6. When you have decided on the end period, let go of the mouse button. A menu screen will pop up with check boxes next to NONE, TIMER, and MOTION. 7.
SVAT ELECTRONICS now you can see NOTE: This menu has 3 different symbols to show the recording modes Empty Block: No recording during this time (set to NONE) Solid Block: Continuous Recording (set to TIMER) Light Blue Outline: Motion Activated Recording (MOTION) MAKING CHANGES TO THE ALARM SETUP MENU The ALARM SETUP menu is separated into two basic sections: SIZE/FPS/QUALITY/AUDIO, and ACTIVATION.
SVAT ELECTRONICS now you can see ARCHIVE MENU The ARCHIVE menu is the area where you can back up recorded footage to a USB drive or external CD/DVD burner. ARCHIVING VIDEO FOOTAGE TO AN EXTERNAL USB DEVICE 1. Plug your external USB device (jump drive, CD/DVR writer, external hard drive) into one of the USB slots on the side of the DVR . 2. If you are not already in the ARCHIVE menu, access the ARCHIVE menu by clicking the right mouse button on the Live Display screen. 3. Click the ARCHIVING icon. 4.
SVAT ELECTRONICS now you can see 5. Use the arrows to select the date and time in the FROM and TO fields. All video footage within the start and end period will be written to the external device. 6. Under MODE, choose ERASING& WRITING to copy the data to the backup device and then delete the footage from the DVR’s hard drive, or choose WRITING to copy the data to the backup device and leave the footage on the DVR’s hard drive. 7. You can check and uncheck the A/V Channel boxes accordingly.
SVAT ELECTRONICS now you can see 14. Once extracted, the footage is copied to CD or USB. NOTE: Depending on the amount of footage selected for archiving, the extracting and burning process may take several minutes to complete. During this time, the DVR cannot be used. However, archiving does NOT interrupt the normal recording modes and schedules.
SVAT ELECTRONICS CONNECTING THE DVR TO YOUR ROUTER now you can see 1. Power off the DVR by pressing and holding the button on the DVR until the password window pops up. 2. Log off of the system. Using the Channel Selection buttons (or the number pad on the remote control), type in the default password of ‘1234’ and press the ENTER button. 3. The DVR will turn off, disabling recording and remote viewing of your cameras. 4.
SVAT ELECTRONICS now you can see 7. Write down the following information (exactly as it appears on your screen) for the DVR IP ADDRESS, NET CLIENT PORT, and WEB SERVER PORT in the box below. You will write the DDNS SERVER and EXTERNAL IP later. 8. Click the SYSTEM MANAGEMENT title on the left hand side of the screen. Write down the MAC ADDRESS (exactly as it appears on your screen) in the box below.
PREPARING YOUR COMPUTER SVAT ELECTRONICS now you can see Before setting up your network connection, you have to ensure that your computer’s security settings are configured to allow you to view the footage from the DVR. NOTE: You will need to complete the steps below for EVERY computer you wish to view the DVR from. 1. Open Internet Explorer. Go to the drop down menu in the TOOLS area and select INTERNET OPTIONS. A window will open. 2.
SVAT ELECTRONICS INSTALLING THE REMOTE VIEWER SOFTWARE ON YOUR PC now you can see 1. Place the CD that was included with the DVR system into your computer’s CD-ROM drive. If your computer does not automatically start the install process or open the CD folder, go to Start>My Computer and double click the CD-ROM icon. For Vista users: double click the ‘computer’ icon on your desktop and then double click the CD-ROM icon. 2. When the software is launched, you will be greeted with a welcome screen.
SVAT ELECTRONICS now you can see 5. The final install screen will confirm that installation was successful. Click ‘Close’. For Vista users: If you are prompted with the “an unidentified program wants to access your computer” security message, click ALLOW. 6. Two icons are created on your PC’s desktop. “Remote Agent” is the software which allows you to view your DVR from your PC. “Backup Player” allows you to view footage from your DVR that you have archived to a USB drive. 7.
SVAT ELECTRONICS 1 2 3 CHANNEL SELECTION BUTTONS These buttons work in the same way as the DVR’s button panel in Live Display Mode. When in full screen mode, you can click each number to see that camera in full screen. Also, when Sequence mode is selected in the software, the buttons will turn blue when its camera is displayed on screen. DVR DROP DOWN LIST Select the DVR you wish to view from a list of your personal DVR systems.
SVAT ELECTRONICS now you can see CONNECTING TO AND VIEWING THE DVR REMOTELY (WITHIN YOUR NETWORK) After installing the Remote Viewing Software, you will need to enter your DVR’s settings so you can view the DVR through the software. Once the DVR is properly set up, you will be able to conveniently view your security system from any PC that is connected to the same network as your DVR.
SVAT ELECTRONICS now you can see 3. The new group is now created. NOTE: Once you have created a connection group, you can add up to 4 DVRs to this group. ENTERING THE DVR’S INFORMATION 1. After creating a connection group, you will need to refer back to the DVR’s information that you wrote down earlier in the manual (pg.66) and input it accordingly. 2. Click the group you just created so that it is highlighted and enter the following information in the “DVR Information” window.
SVAT ELECTRONICS ADDITIONAL GROUP SETTINGS now you can see 1. To complete the installation you must use the mouse to check or uncheck boxes and select the following custom settings 2. Event: Check the event occurrences that cause the DVR to send entries to the Event Viewer and remote client system log (it is recommended to check all four boxes). This way, if you leave your computer for a certain period of time, you can check the event viewer button to see if you missed anything while you were gone.
SVAT ELECTRONICS now you can see VIDEO OSD: Check or Uncheck the information that is displayed for each channel when a DVR is connected. • Title: When enabled, displays the camera title (i.e. CAM1) in every frame. • Name: Displays the DVR’s name (as it was entered in the “Name” box under “DVR INFORMATION”) in every frame, when enabled. • Date: When enabled, displays the date of the video being displayed. • Time: Displays the time of the video being displayed, when enabled.
SVAT ELECTRONICS CONNECTING VIA A D-LINK ROUTER (EXAMPLE) now you can see You will need to enable the ports by locating the port range forwarding screen. With some D-LINK routers the port forwarding screen is located within the Applications & Games or Filters tab; in others it is located in the Advanced Tools tab. 1. Open your web browser. Enter the ROUTER IP address in the address bar and press ENTER. 2. Enter the user name admin.
SVAT ELECTRONICS FINDING YOUR EXTERNAL IP now you can see Now you will need to find your external IP address. This will be the address you will be entering in order to access the DVR from outside your network (over the internet). There are many ways to find your external IP address. The simplest way is to go to http://www.whatsmyip.org. This site will display your external IP address in the top portion of the screen. If you go to http://www.portforward.com, it will also display this IP address.
SVAT ELECTRONICS now you can see IF SUCCESSFUL The Remote Viewing Software should pop up. 1. If prompted, enter the DVR Information (the same information that you entered when you previously set up a connection group) and press OK 2. Select the group you wish to connect to from the drop down menu and click to your DVR. to connect 3. For more information on the Remote Viewer settings, refer to UNDERSTANDING THE REMOTE DVR VIEWER SOFTWARE, pg. 69.
TROUBLESHOOTING CHECKLIST SVAT ELECTRONICS now you can see NETWORKING REQUIREMENTS I have the following: □_ □_ □_ □ □_ □_ Cable or High Speed Internet Connection Router The DVR, properly connected to power The Ethernet cable provided with the DVR system A Windows based PC that is properly connected to the Internet The most recent version of Internet Explorer Installed on the computer PREPARING THE DVR I have done the following to the DVR in the following order: □ Shut down (turned off) the DVR.
SVAT ELECTRONICS now you can see NOTE: If you were NOT able to view your DVR through your external IP address, contact SVAT’s toll-free number for technical support. If you can not access your external IP you will likely not be able to view your DVR through a DDNS website.
SVAT ELECTRONICS now you can see 7. When you click the link, a window appears that displays “Account Confirmed”. Click the “login” link and enter the username and password you created. 8. Click on the “Services” button located on the top menu bar. 9. Click on the Dynamic DNS link. 10. Click on the “Get Started” link located on the menu on the right side of the screen. 11. Type in a host name (subdomain name).
SVAT ELECTRONICS now you can see 13. In the IP address field, type in your external IP address. You may also have the option to “use detected IP address”, which will fill your IP address in for you. 14. Leave all of the other options as is, and click “Create New Host”. 15. Your dynamic DNS settings have been created. FINALIZING SETUP Now you must set your DVR to be associated with the DynDNS account you just created.
SVAT ELECTRONICS CONFIGURING THE DVR’S DDNS INFORMATION 1. If you are not already in the Network Menu, access GENERAL menu by clicking the right mouse button on the Live Display screen. 2. Click the SETUP icon. 3. Enter your password (the default password is ‘1234’) and select OK. 4. Click the GENERAL button. 5. Click the “SYSTEM” menu. 6. Click the Network menu on the left hand side. 7. You need to change the address next to DDNS SERVER so that it is the same as the DynDNS you just created.
SVAT ELECTRONICS now you can see 9. Enter the DynDNS address (example: myname1234.dyndns.org) by clicking each letter individually. 10. The button allows you to move between capital letters and lowercase and accesses the character menu for periods. The button can be used to delete letters. 11. When you have entering the DynDNS address, click to exit the onscreen keyboard. 12. Make sure that the checkbox next to DDNS at the top of the screen is checked if it is not already. 13.
SVAT ELECTRONICS SENDING A TEST EMAIL now you can see You can have the DVR send a test email to make sure that the DVR is properly connected to the Internet and ensure that the email addresses entered under the USER IDs are correct. 1. If the box next to the DEFAULT SERVER title is not already checked, check the box so that the default server is enabled and press APPLY. 2. Click the PRESS button next to the TEST E-MAIL title. 3. A window will pop up that says “Success”. Press OK. 4.
CONFIGURING MAIL SETTINGS SVAT ELECTRONICS now you can see You can turn OFF the DEFAULT SERVER and adjust the SERVER, PORT, SECURITY, USER, and PASSWORD boxes so email notifications are sent through the mail server of your personal e-mail address. NOTE: It is recommended that you leave the DEFAULT SERVER enabled and do NOT enter alternate mail settings.
SVAT ELECTRONICS MAKING CHANGES TO THE RECORD MENU now you can see The Record Menu allows you to make the same changes to the DVR’s settings that you can make through the DVR’s “Record” menu. You can set the Recording Schedule, Pre and Post Event Recording Times, and Alarm and Continuous/Motion Recording Schedules. NOTE: The settings in this menu and the method of changing these settings are identical to the RECORD menu which is accessed through the DVR.
SVAT ELECTRONICS MAKING CHANGES TO THE CAMERA MENU now you can see The Camera Menu allows you to make the same changes to the DVR’s settings that you can make through the DVR’s “Camera” menu. The Camera menu allows you to change each cameras title, place and remove cameras from covert mode, adjust the color, brightness, contrast, and tint settings for each camera, set up a PTZ camera (not included), and set the motion sensitivity and motion detection areas for each camera.
SVAT ELECTRONICS MAKING CHANGES TO THE SOUND MENU now you can see The Sound Menu allows you to make the same changes to the DVR’s settings that you can make through the DVR’s “Sound” menu. Live Audio can be turned on or off and the Audio Monitoring Channel selected. Also, the audio TX and RX settings can be turned ON or OFF. NOTE: The settings in this menu and the method of changing these settings are identical to the SOUND menu which is accessed through the DVR.
SVAT ELECTRONICS MAKING CHANGES TO THE EVENT/SENSOR MENU now you can see The Event/Sensor Menu allows you to make the same changes to the DVR’s settings that you can make through the DVR’s “Event/Sensor” menu. E-mail alerts can be turned on or off, alarm inputs can be adjusted, and all settings for alarm out/buzzer out can be changed. NOTE: The settings in this menu and the method of changing these settings are identical to the EVENT/SENSOR menu which is accessed through the DVR.
SVAT ELECTRONICS MAKING CHANGES TO THE SYSTEM MENU now you can see The System Menu allows you to make the same changes to the DVR’s settings that you can make through the DVR’s “System “ menu. In this menu the DVR’s system information is displayed. You can also make changes to the User settings, change the SMTP mail settings, adjust the network speed, turn the overwrite option ON or OFF, and set the recording time limit.
SVAT ELECTRONICS REFERRING TO THE EVENT VIEWER FOR EVENTS AND ACTIVITY now you can see 1. The Remote Software will keep a log of all events while the computer is connected to the DVR. To view a list of events click the EVENT VIEWER button . 2. The log will display the name of the DVR, the camera, the date, and a description of the event. 3. Press OK to exit the event viewer. TIP: If you leave the event viewer open, it will continue to update in real time whenever an event is logged.
SVAT ELECTRONICS USING THE REMOTE SOFTWARE’S SEARCH MODE TO PLAY BACK PREVIOUSLY RECORDED FOOTAGE The Search Menu allows you to view, print, and save screen caps of previously recorded footage. Press the now you can see button to access the Search Menu. Any buttons labeled below relate to the Search Menu ONLY. All other buttons serve the same function as they do in the Live View format. For more information on Live View and its settings, please see UNDERSTANDING THE REMOTE DVR VIEWER SOFTWARE,pg.69. 1.
SVAT ELECTRONICS LOG VIEWER BUTTON Allows you to choose a date, time, or condition and then lists any events which match your criteria. BACK UP BUTTON Will launch the backup player software. REFRESH TIMECLOCK BUTTON Loads all video footage up to the point that button was pressed 10. SCROLL UP BUTTON Allows you to move through the camera list. PRINT BUTTON Allows you to send the current screen to your printer. EVENT VIEWER BUTTON Loads a list of all activity since the Remote Session began.
SVAT ELECTRONICS now you can see FINDING PREVIOUSLY RECORDED FOOTAGE 1. Click the SEARCH button in Live Display mode. You will switch to search mode. 2. The time line at the bottom of the display is an overview of all footage recorded over a 24 hour period. 3. If you know both the date and time of the footage you are searching for, you can use the up and down arrows of the quick search (date) and to select and adjust the specific time of the footage you would like to review.
SVAT ELECTRONICS now you can see 2. The archiving screen will pop up. 3. Use the dropdown menus to choose the start and end time of the footage you would like to archive. In the example (see right), footage between 10:44 am and 15:44 (3:44pm) will be archived. 4. Choose which cameras you would like to archive by checking the boxes accordingly. If you would like footage from all cameras to be archived, click “Select All”. “Deselect All” will clear all checked boxes. 5.
SVAT ELECTRONICS SENDING A STILL IMAGE TO YOUR PRINTER 1. During playback, you can print a still image by clicking the PRINT button (an active printer connected to the PC is required). 2. A window displaying your printer settings will pop up . 3. Choose the appropriate printer, and adjust settings as needed. 4. Click OK to print the image. now you can see NOTE: The still shot is saved in the same style as the current screen display. For example, quad screen single screen, etc.
USING THE BACKUP PLAYER TO VIEW ARCHIVED FOOTAGE ON YOUR PC SVAT ELECTRONICS now you can see NOTE: The Backup Player is also used to view footage that was saved directly from the DVR to a USB drive or archived to a DVD or CD (USB Drive, and external CD/DVD writer not included). To view footage backed up to a USB, follow the same steps listed below. For more information on archiving footage directly from the DVR to an external device, please see ARCHIVE MENU, pg.70 for detailed instructions. 1.
SVAT ELECTRONICS now you can see 6. You can use the up and down arrows of the quick search (date) and quick search (time) buttons controls to select and adjust the specific time of the footage you would like to review (for larger files). on the left hand side of the 7. The speed of the footage can be sped up or slowed down as needed by clicking points along the playback speed slider bar. The footage can be played back at 1x, 2x, 3x, 5x, 10x, 15x, 30x, and 60x.
SVAT ELECTRONICS now you can see While archiving video, I receive a “Fail to Archive Data. Retry again” error message. The camera’s image appears on screen, but nothing is recorded. • Your chosen dates/times do not contain any video or data. Choose a larger, or alternate time frame. • The camera is not displayed on the Live Display screen. It is just a blue box with the words NO SIGNAL. • Look in the top right corner of the frame which the camera is displayed.
SVAT ELECTRONICS Can not view the DVR through a Remote • (Internet) Connection • I am not receiving any notification emails from the DVR. Remote control is not working CLEARVU9 Check all your network connections. now you can see Repeat the steps on pg.64 again to make sure a configuration error was not made. • If you still can not view the DVR, use the checklist inserted on pg.78 to help you verify each step as you complete it.
SVAT ELECTRONICS now you can see Compatible PTZ Protocol Company CBC CBC Win4net Saeilo Sensormatic i3DVR i3DVR i3DVR Samsung Fastrax Fastrax BOSCH Samsung Lilyn Honeywell Dongyang Dongyang Honeywell Vicon Protocol Ganz ZC-PT CBC(Ganz) WSD 7425D PTC400C Sensormatic i3DVR-SD i3DVR-Z1200 i3DVR-Z2200 Samsung MRX1000 Fastrax II-2 Fastrax II Philips 8560-700 Samsung SCC641 Lilyn fastdome GC-655N D-MAX Sunin DSC230 Scan Dome II Vicon Panasonic WV-CSR604 Panasonic WV-CSR850 Panasonic Kalatel Honeywell Saeilo H
SVAT ELECTRONICS now you can see Pan/Tilt/Zoom Camera Support..........................................................Yes OSD and System Menu Display............................................................Yes OSD Language Display................................................................. English Time and Date Stamp Display.............................................................Yes Password Protection............................................................................
SVAT ELECTRONICS now you can see Hi-Res Security Camera Indoor/Outdoor CCD Color Camera w/ Night Vision ACCESSORY - CAMERA Model# CV67 www.svat.com INSTRUCTION MANUAL Version 1.
SVAT ELECTRONICS now you can see TABLE OF CONTENTS Table of Contents 1.WHAT IS INCLUDED........................................................................................................................................ 104 2. CAMERA FEATURES AND FUNCTIONS............................................................................................................ 104 3.INSTALLATION.........................................................................................................................
SVAT ELECTRONICS now you can see 3.INSTALLATION THINGS TO CONSIDER BEFORE YOU INSTALL YOUR CAMERA • • • • The camera should be installed between 8 and 13ft above the area to be monitored. Ensure there are no obstructions in the camera’s view, to maximize viewing area. Ensure that the sunshade is positioned to avoid glare and position camera away from direct sunlight. Decide whether the camera will be wall-mounted or sit on a desk/table top. If wall mounting, use the mounting hardware in the package.
SVAT ELECTRONICS now you can see 6. TROUBLESHOOTING Before contacting technical support, please use follow the troubleshooting tips below for solutions to common problems. No picture/signal: Picture is too bright: Picture is too dark: Night Vision is not working: - Make sure your TV/monitor is on the correct video input channel. This is NOT channel 3. Common terms for this channel is INPUT, AV CHANNEL, LINE 1, LINE 2 and AUX. Please use your TV or VCR manual to correctly identify this channel.
SVAT ELECTRONICS now you can see 7. DRILLING TEMPLATE To wall mount the camera, drill three holes using a 3/16" drill bit and the template below. Insert the supplied wall anchors into holes and secure camera to wall with supplied screws.
SVAT ELECTRONICS NOTES AREA now you can see Customer Information Card Contact Name: Company: Address: Postal Code: Phone Number: Email: Model Number of Product: Serial Number of Product: Purchase Date: Place of Purchase: NOTE: We recommend that you keep a record of your purchase receipt with your manual for any future returns or support issues.
SVAT ELECTRONICS now you can see NOTES AREA CLEARVU9 109
SVAT ELECTRONICS now you can see NOTES AREA CLEARVU9 110
SVAT ELECTRONICS now you can see VISIT US ON THE WEB! • Product Information • Specification Sheets • User Manuals • Software Updates • Quick Start Guides • Firmware Upgrades www.svat.