SV Sound, LLC Manual Version 1.3 November 2009 © 2009 SV Sound, LLC • 6420 Belmont Avenue, Girard, OHIO • 703.845.1472 • www.svsound.
SV Sound, LLC AS-EQ1 Operator Manual What’s in the Box * • SVS AS-EQ1 subwoofer EQ with detachable faceplate. • Quick start guide • Installation software CD (Operator Manual, Installation software, CutePDF Writer, SVS desktop pack). • 10’ USB cable. • Matched Audyssey calibration microphone. • Isolated AC/DC power supply 1. • Mono mini-jack pass through cable. • Rubber isolation feet. • Rack ears. FIG. 1 * Optional SVS audio interconnect shown © 2009 SV Sound, LLC • • 1.
SV Sound, LLC AS-EQ1 Operator Manual Table of Contents Safety Instructions 4 Introduction 6 About this Manual 8 Installing the SubEQ GUI and AS-EQ1 Manual on your PC 9 Connecting the AS-EQ1 to your Audio System 11 Calibrating the AS-EQ1 in your Listening Environment 13 Integrate the AS-EQ1 with your Auto EQ Receiver or Pre/Pro 14 Channel Configuration 18 Level Matching 19 Measuring your Subwoofer(
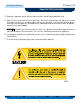
SV Sound, LLC AS-EQ1 Operator Manual Important Safety Instructions 1. Read these instructions. 2. Keep these instructions. 3. Heed all warnings. 4. Follow all instructions. 5. Do not use this apparatus near water. 6. Clean only with dry cloth. 7. Do not block any ventilation openings. Install in accordance with the manufacturer’s instructions. 8. Do not install near any heat sources such as radiators, heat registers, stoves, or other apparatus (including amplifiers) that produce heat. 9.
SV Sound, LLC AS-EQ1 Operator Manual Important Safety Instructions 13. Unplug this apparatus during lightning storms or when unused for long periods of time. 14. Refer all servicing to qualified service personnel. Servicing is required when the apparatus has been damaged in any way, such as power-supply cord or plug is damaged, liquid has been spilled or objects have fallen into the apparatus, the apparatus has been exposed to rain or moisture, does not operate normally, or has been dropped. 15.
SV Sound, LLC AS-EQ1 Operator Manual Introduction Audio lovers, perfect bass is finally possible, easy, and downright fun to achieve. Your AV receiver investment is solidified since the AS-EQ1 is compatible with any sort you have. Your bass needs are covered no matter what your current or future room looks like. Switch one on, run setup, and you won’t ever switch it off. Harness the power and refinement of your system, and take the room out of the equation, finally.
SV Sound, LLC AS-EQ1 Operator Manual Introduction SVS AS-EQ1 Features: FIG. 4 © 2009 SV Sound, LLC • 6420 Belmont Avenue, Girard, OHIO 7 • 703.845.1472 • www.svsound.
SV Sound, LLC AS-EQ1 Operator Manual About This Manual This document is intended to provide you with all the information necessary to properly install and integrate the SVS AS-EQ1 into your audio environment. After installing the Sub EQ GUI on your personal computer and properly attaching the AS-EQ1 to your Audio Video Receiver (AVR) or Preamp/Processor (Pre/Pro), you will be able to quickly step through a small number of tasks designed to equalize your subwoofer(s) in your listening environment.
SV Sound, LLC AS-EQ1 Operator Manual Installing the Sub EQ GUI on your PC To install the Sub EQ GUI on your computer system, insert the CD that came with your AS-EQ1 into your CD drive on the computer you will be using to configure the AS-EQ1. If the drive has been configured for “AutoRun”, the installer should automatically run. If not, browse the drive in which the Sub EQ installation CD resides and double click on Setup.exe FIG. 5 When the installer runs, you will see the following Screen: FIG.
SV Sound, LLC AS-EQ1 Operator Manual Installing the SubEQ GUI and AS-EQ1 Manual on your PC Select the “Install Audyssey SubEQ” option, and follow the steps in the install program as to where to place the program. The SubEQ program will be installed on your system and be available through your Start - > All Programs -> Audyssey Labs folder if the defaults are accepted.
SV Sound, LLC AS-EQ1 Operator Manual Connecting the AS-EQ1 to Your Audio System The AS-EQ1 is designed to connect between your AVR or “Pre/Pro” (Pre-amp/Processor) and your subwoofer(s) so that after calibration, the AS-EQ1 can apply the necessary corrections to “flatten” the response of bass in your listening environment. As shown below, the AS-EQ1 has two subwoofer Inputs labeled A and B and two subwoofer Outputs labeled A and B on the back panel.
SV Sound, LLC AS-EQ1 Operator Manual Connecting the AS-EQ1 to Your Audio System AS-EQ1 Connection for Day-to-Day Operation FIG. 8 © 2009 SV Sound, LLC • 6420 Belmont Avenue, Girard, OHIO 12 • 703.845.1472 • www.svsound.
SV Sound, LLC AS-EQ1 Operator Manual Calibrating the AS-EQ1 in Your Listening Environment Once you have the AS-EQ1 connected to your AVR or Pre/Pro and subwoofer(s), you are ready to step through the calibration tasks to set up your room EQ. Although the AS-EQ1 Calibration process is very straightforward, you should allow yourself an hour or so to comfortably complete the activity for the first time.
SV Sound, LLC AS-EQ1 Operator Manual Calibrating the AS-EQ1 in Your Listening Environment TASK: Integrate the AS-EQ1 with your Auto EQ Receiver or Pre/Pro FIG.
SV Sound, LLC AS-EQ1 Operator Manual Calibrating the AS-EQ1 in Your Listening Environment Your EQ-equipped AVR or Pre/Pro normally handles the full frequency range of your system which includes the subwoofer and main speakers. The AS-EQ1 is designed to handle the lower frequencies where your subwoofer(s) operate, and apply its own, more sophisticated correction filters in the place of that provided by your AVR or Pre/Pro.
SV Sound, LLC AS-EQ1 Operator Manual Calibrating the AS-EQ1 in Your Listening Environment Capturing Subwoofer Calibration Tones The External Calibration task allows the AS-EQ1 to intercept the calibration tones intended for your subwoofer(s) from the AVR or Pre/Pro and pass it directly back to the AVR or Pre/Pro. The AVR or Pre/Pro then interprets the response from the subwoofer as flat, and as a consequence, no correction filters are assigned for the subwoofer(s).
SV Sound, LLC AS-EQ1 Operator Manual Calibrating the AS-EQ1 in Your Listening Environment AS-EQ1 Configuration for Auto EQ Task FIG. 12 © 2009 SV Sound, LLC • 6420 Belmont Avenue, Girard, OHIO 17 • 703.845.1472 • www.svsound.
SV Sound, LLC AS-EQ1 Operator Manual Calibrating the AS-EQ1 in Your Listening Environment TASK: Channel Configuration FIG. 13 As mentioned earlier in this manual when discussing connecting the AS-EQ1 to your audio system, there are three different subwoofer configurations the AS-EQ1 will support when EQing your listening environment. Depending on which configuration you have, click the associated Radio Button on this screen then click the button to continue to the next task “Level Matching”.
SV Sound, LLC AS-EQ1 Operator Manual Calibrating the AS-EQ1 in Your Listening Environment TASK: Level Matching FIG. 14 Before you can take measurements of your listening environment with the AS-EQ1, you need to ensure that your AVR or Pre/Pro and subwoofer(s) are set up properly before the AS-EQ1 measures your room and creates its correction filters. It is important that you read, understand, and follow these instructions to ensure the best possible results during the upcoming Measurement task. 1.
SV Sound, LLC AS-EQ1 Operator Manual Calibrating the AS-EQ1 in Your Listening Environment 4. Attach the Calibration Microphone supplied with the AS-EQ1 to the Cal Mic Input on the front of the AS-EQ1. DO NOT use the microphone supplied with your AVR or Pre/Pro or any other Microphone as it may produce inaccurate results. 5. Connect the SAT Center/Left Output on the back of the AS-EQ1 to the Left or Center Multi Channel Analog Input on your AVR or Pre/Pro.
SV Sound, LLC AS-EQ1 Operator Manual Calibrating the AS-EQ1 in Your Listening Environment Level Matching with an Auto-Set-Up AVR or Pre/Pro Equipped with Audyssey MultEQ NOTE: If your AVR or Pre/Pro is equipped with Audyssey MultEQ technology, follow the instructions contained in this section. If your AVR or Pre/Pro is not equipped with Audyssey MultEQ, then skip to the next section. Please note the Reset button below the SAT and SUB measurement boxes. Because SubEQ 3.
SV Sound, LLC AS-EQ1 Operator Manual Calibrating the AS-EQ1 in Your Listening Environment Level Matching with an AVR or Pre/Pro which is NOT Equipped with Audyssey MultEQ NOTE: If your AVR or Pre/Pro is NOT equipped with Audyssey MultEQ, then follow instructions contained in this section. If your AVR or Pre/Pro has an auto-set-up/EQ system which is NOT based on Audyssey technology, make sure you have completed the Auto EQ Assist task as outlined earlier in this Manual before proceeding.
SV Sound, LLC AS-EQ1 Operator Manual Calibrating the AS-EQ1 in Your Listening Environment NOTE: Some AVRs or Pre/Pros allow the trim levels to be adjusted individually for each input and/or source code (e.g., the same digital coax input can have different speaker channel trim levels for stereo source material and Dolby Digital source material).
SV Sound, LLC AS-EQ1 Operator Manual Calibrating the AS-EQ1 in Your Listening Environment AS-EQ1 Configuration for Level Matching and Measurement Tasks FIG. 15 © 2009 SV Sound, LLC • 6420 Belmont Avenue, Girard, OHIO 24 • 703.845.1472 • www.svsound.
SV Sound, LLC AS-EQ1 Operator Manual Calibrating the AS-EQ1 in Your Listening Environment TASK: Measuring your Subwoofer(s) FIG. 16 You are now ready to begin measuring your subwoofer(s) so the AS-EQ1 can Equalize your listening environment. NOTE: Make the room as quiet as possible as background noise can disrupt the room measurements. Close windows, silence cell phones, televisions, radios, air conditioners, fluorescent lights, home appliances, light dimmers, or any other noisy devices.
SV Sound, LLC AS-EQ1 Operator Manual Calibrating the AS-EQ1 in Your Listening Environment 1. If you have not already done so, attach the Calibration Microphone included with the AS-EQ1 to the jack labeled Cal Mic Input on the front panel (behind the magnetically attached faceplate) of the AS-EQ1. DO NOT use the microphone supplied with your AVR or Pre/Pro or any other microphone as it may produce inaccurate results. 2.
SV Sound, LLC AS-EQ1 Operator Manual Calibrating the AS-EQ1 in Your Listening Environment TASK: Detection Results FIG. 17 If you are calibrating an Audyssey-equipped AVR or Pre/Pro, skip this section by clicking the button to move on to the next task, “Save Results to AS-EQ1” as these values will be determined and set in a subsequent step using MultEQ on your AVR or Pre/Pro.
SV Sound, LLC AS-EQ1 Operator Manual Calibrating the AS-EQ1 in Your Listening Environment If your AVR or Pre/Pro is NOT equipped with Audyssey MultEQ, make note of the Sub Distance and Trim Values as these will need to be entered into your AVR or Pre/Pro in a subsequent step. By clicking on the Distance Heading, Sub EQ will convert to Feet, Meters or Time (Milliseconds) to match the units you are using in your AVR or Pre/Pro so you won’t have to manually compute the conversions before entry.
SV Sound, LLC AS-EQ1 Operator Manual Calibrating the AS-EQ1 in Your Listening Environment TASK: Save Results to AS-EQ1 FIG. 18 WARNING - do not quit the Sub EQ application or disconnect the AS-EQ1 from your PC until the transfer is complete. © 2009 SV Sound, LLC • 6420 Belmont Avenue, Girard, OHIO 29 • 703.845.1472 • www.svsound.
SV Sound, LLC AS-EQ1 Operator Manual Calibrating the AS-EQ1 in Your Listening Environment 1. If you would like to see a preliminary graphical representation of Before and After results of Equalizing your listening environment, press View Results. (note – until you have permanently saved your results you will see a “DRAFT” watermark on the Results screen). 2.
SV Sound, LLC AS-EQ1 Operator Manual Calibrating the AS-EQ1 in Your Listening Environment TASK: Create HTML Certificate Document FIG. 19 This HTML document will show the before and after performance of your subwoofer(s) frequency response using the AS-EQ1. Use your native HTML browser’s print functions to print this document. Your results will have the DRAFT watermark on it until it has been permanently saved to the AS-EQ1 in the previous task.
SV Sound, LLC AS-EQ1 Operator Manual Calibrating the AS-EQ1 in Your Listening Environment TASK: Finish Setting Up your AVR or Pre/Pro If your AVR or Pre/Pro IS equipped with Audyssey MultEQ: Remove the SAT Output connection from your AVR or Pre/Pro, and ensure your AVR or Pre/Pro’s Subwoofer Pre-Out is attached to the appropriate Input of the AS-EQ1.
SV Sound, LLC AS-EQ1 Operator Manual Appendix A - Why EQ? Despite efforts by speaker designers to provide a specific type of frequency response for their products, the environment in which they are tested is typically anechoic (a room designed to absorb sound and eliminate reflective effects) or quasi-anechoic (ground plane).
SV Sound, LLC AS-EQ1 Operator Manual Appendix A - Why EQ? FIG. 21 Subwoofer Response In-Room What we hear in such rooms is not what was intended to be heard when the sound engineer created the mix for the movie or music soundtrack.
SV Sound, LLC AS-EQ1 Operator Manual Appendix A - Why EQ? subwoofer(s), effectively quieting the artificially boosted frequency. In some (but not all) cases, other frequencies that have had their energy decreased due to cancellation will now appear louder due to the reduction of boosted frequencies and will be easier to hear.
SV Sound, LLC AS-EQ1 Operator Manual Appendix A - Why EQ? Especially difficult are the multiple subwoofer cases where an enthusiast would have more than one subwoofer - often in different parts of their listening rooms - in order to attempt to smooth bass response and perhaps overcome some of the acoustical challenges of their environment.
SV Sound, LLC AS-EQ1 Operator Manual Terms & Conditions Terms and Conditions: Details are available on request, please contact your Dealer for more. Note that these terms and conditions do not affect your statutory rights. Shipping: When you receive your new AS-EQ1, please check to ensure there is no damage.