
Installation Guide


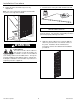

4. Install the back panel, overlapping the corner panels.
Carefully line up any faux grout lines. Press the
back panel firmly to the wall. Use even hand
pressure from top to bottom and side-to-side, to
ensure solid wall contact.
Note: Any gaps between the bottom of the panels and
the tub ledge will be filled in with caulking in a later step.
Refer to the Temporary Bracing section for information on
bracing to hold the panels in place until the silicone
adhesive is completely set (usually 24 hours). This will
allow proper curing of the silicone.
5. Install the temporary bracing to hold the wall panels
in place until the silicone adhesive cures.
6. After the temporary bracing is removed, refer to the
Caulking section for information on applying color
coordinated caulk to joints and seams.
Veritek Wall Kits With Corner Side
Panels - GN-58 and TI-3
Note: Faux tile wall kit installation shown. Smooth
finish wall kit installation is the same.
Corner Side Panels
Many corner side panels are designed to fit a certain
way. Check for identification tags on the back of the
panels. Molded in shelves must be installed with the flat
surface facing up.
1. Select the corner side panel that will be cut out for
the plumping fixture outlets.
2. Measure the openings for faucet(s), bathtub spout,
and/or shower head. Measure the height up from
the ledge of the bathtub or shower floor ledge.
Measure out from the back wall.
A
A
TI-3
GN-58
IMPORTANT NOTICE
The Swan Corporation 18 800-325-7008
Installation Procedure