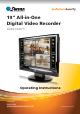
Advanced security made easy™ 19” All-in-One Digital Video Recorder DVR4-5500™ Operating Instructions SW349-DA9 www.swannsecurity.
DVR4-5500™ Operating Instructions CAUTION RISK OF ELECTRIC SHOCK CAUTION: To reduce the risk of electric shock, do not expose this apparatus to rain or moisture. Only operate this apparatus from the type of power source indicated on the label. The company shall not be liable for any damages arising out of any even if we have been advised of the possibility of such damages. improper use, FCC WARNING STATEMENT This device complies with Part 15 of FCC Rules.
DVR4-5500™ Operating Instructions Introduction Congratulations on your purchase of this Swann DVR4-5500™ LCD Digital Video Recorder. This stand-alone unit is highly adaptable, and more than capable of providing a simple security solution for both home and business security needs. A high resolution, in-built LCD display as well as networking features makes this unit entirely self-sufficient, and does not require attachment to a television, external monitor or computer.
DVR4-5500™ Operating Instructions MANUAL CONTENTS Part 1: Setting up the DVR Hardware…………………………………………………………. 5 1.1 Layout of the DVR…………………………………………………………………………………………… 5 1.2 Connecting Cameras to the DVR………………………………………………………………………….. 5 1.3 VGA Connection……………………………………………………………………………………………... 5 1.4 Connecting Power to the DVR…………………………………………………………………………….. 5 Part 2: Configuring the DVR Software……………………………………………………………………….6 2.1 Layout of the IR Remote……………………………………………………………………………………. 6 2.
DVR4-5500™ Operating Instructions Part 1: Setting up the DVR Hardware 1.1 Layout of Digital Video Recorder (DVR) AC POWER: Using the supplied power lead, connect this to a wall socket, using an extension lead if required. Uses IEC13/14 connectors (this is the same plug that most desktop computers use). VGA PORT: For the DVR to be connected to the LCD screen. A small VGA cable runs from the back of the LCD screen, this should be plugged into the VGA connector.
DVR4-5500™ Operating Instructions Part 2: Configuring the DVR Software Before we can start recording video, we need to take a moment to configure some of the settings on the DVR. We need to set the DATE & TIME, and then assign a PASSWORD for you. To do this, we need to use the infrared remote control which came with the DVR – here’s a quick overview of the remote and what the assortment of buttons on it do.
DVR4-5500™ Operating Instructions 2.2 Setting the Date and Time Once you have powered on the DVR for the first time, and it has finished initialising, we can now set the DATE AND TIME. To do this: 1. 2. 3. 4. Press the MENU button. You may be asked for your password. The default password is “0000”. This can be entered by using the four times.
DVR4-5500™ Operating Instructions Part 3: Basic Functions 3.1 Overview of the Interface: The Live Monitoring Layout This section will cover everything you need to start monitoring your cameras and recording footage. It is worth taking some time to experiment with the basic functions of the DVR, so that you understand the features and limitations of your particular setup. First of all: here’s what you’ll see when you first turn your DVR on, and an explanation of what some of the icons you’ll see mean.
DVR4-5500™ Operating Instructions 3.3.2 Motion Recording This is a little more complex than TIMER RECORDING, but has some distinct advantages. Basically, MOTION RECORDING will allow you to configure the DVR to record only when something is happening in front of the camera. This means that the hard drive will not be filled up with hours and hours of nothing happening! This is a great mode to select if, for example, you use the DVR to record images of a location during times that it is unoccupied.
DVR4-5500™ Operating Instructions 3.4 Playback 3.4.1 Finding an Event So – something has happened, and you want to review your footage. No problems! The easiest way to go about this is to press the LIST button. This will bring up a menu of different options. 1. 2. 3. 4. 5. RECORD LIST: Choose this if you want to view footage that was captured when you manually enabled the recording function. MOTION LIST: This will bring up a list of motion triggered recordings.
DVR4-5500™ Operating Instructions Part 4: Advanced Operations 4.1 Quick Search If you’re hunting some specific footage and you know the date and time at which the DVR recorded it, the best option might be to do a QUICKSEARCH for the event you want. 1. 2. 3. 4. 5. 6. Open the MENU and move down to the second page. Select the third submenu, called EVENT INFO. In this submenu, select QUICKSEARCH. Using the arrow buttons, select the date and time you would like to see an event from.
DVR4-5500™ Operating Instructions 4.2.2 Advanced Settings To get to the ADVANCED CONFIGURATION settings for recording: 1. 2. Open the MENU and scroll down to the ADVANCED CONFIG. Select the RECORD option. There are a number of options that you can configure or engage here, such as: 1. 2. 3. 4. Engaging the manual record override. This will make the DVR record constantly, regardless of whether TIMER RECORD or MOTION RECORD modes are engaged.
DVR4-5500™ Operating Instructions 4.4 Advanced Motion Detection Settings To alter the MOTION DETECTION settings: 1. 2. 3. 4. 5. Open the menu, and scroll down to ADVANCED CONFIG. Select DETECTION from the submenu and press This will open the DETECTION WINDOW. You can access settings for all four channels from here. Select which channels you’d like motion detection enabled on. There are four options, OFF, LOW, MEDIUM and HIGH.
DVR4-5500™ Operating Instructions 4.6.2 …to your PC Once you’ve finished backing up an event or two to the USB flash drive, you might be wondering what to do with it. Well, whilst you’re backing up footage, the DVR automatically copies a small program onto the flash drive that will allow you to access and playback the footage on a PC. Insert the USB flash drive into a spare USB port on your PC, open it, and find the file named “PLAYER.EXE”.
DVR4-5500™ Operating Instructions Part 5: Networking Why would you put your DVR onto a network? Well, how about being able to monitor your security system from any Internet capable computer on Earth, or even in low orbit if you travel that far from home? It’s pretty cool, and really convenient. We’re not going to try and deceive you: this is a somewhat tricky process which does require some knowledge of computers and networking.
DVR4-5500™ Operating Instructions 5.2 Configuring the DVR Once your DVR is connected to your network using a standard Ethernet cable (a cat5 or higher cable) – it plugs into the port on the back of the DVR and runs to the router (or to a network switch, if the ports on the router are full).
DVR4-5500™ Operating Instructions 5.3 Configuring your Network for Remote Viewing There are two final steps you’ll need to take to be able to access your DVR via the Internet. The first is to configure your router for port forwarding. If you’re totally unfamiliar with what this entails, we suggest talking to an IT professional. The second important step is to determine your PUBLIC IP ADDRESS (sometimes called a “WAN [Wide Area Network] address” or “global IP address”).
DVR4-5500™ Operating Instructions Part 6: Remotely accessing your DVR There are a few methods available for you to access your DVR remotely or via your local network, ranging from using the dedicated software (supplied on the enclosed CD) to using an Internet Explorer browser window. NOTE: The first time you remotely access your DVR, you will be asked for a username and password. The default username is “admin” and the default password is also “admin” (both an abbreviation for “administrator”, being you).
DVR4-5500™ Operating Instructions 6.2.3 Using the Video Viewer Interface NO. 1 Icon Name N/A Image Display 2 Address Book 3 Miscellaneous Control 4 / Record / Record Stop 5 Snapshot 6 Information 7 DVR Control Description The place where your images are displayed. Where you can enter the IP address of your DVR, and save it for future reference. Gives you a list of options that you can set. For details, see The Miscellaneous Control Window, detailed on the next page.
DVR4-5500™ Operating Instructions 6.2.4 The Miscellaneous Control Window When you click Miscellaneous Control icon ( Button Function Colour Setting Backup ) you’ll be transported to the Miscellaneous Control window: Description Changes the appearance of selected video channels. Allows you to set the brightness, hue and saturation values in a similar manner to a television screen. Takes you to the Download Setting page to make a video backup remotely.
DVR4-5500™ Operating Instructions 6.2.6 Playing Back Footage Access this window by clicking the Status List / Playback icon ( selecting either the Record or Backup tab. ) in the Miscellaneous Settings window, and The PLAYBACK Window The STATUS LIST Window To playback a recording, simply select the one you want from the list, double-click or click Play. You’ll immediately be taken to the Playback Control window. 6.2.
DVR4-5500™ Operating Instructions 6.3 Accessing the DVR without Video Viewer If you are away from your DVR and want to access the footage on it or configure your recording options, you can gain access to the DVR via Internet Explorer (Windows) window or QuickTime Player (Mac). 6.3.1 Accessing your DVR via Internet Explorer To do this, open up an Internet Explorer browser window, or a Mozilla Firefox browser window. Be sure that your copy of your Internet browser is up to date.
DVR4-5500™ Operating Instructions 6.3.2 Accessing your DVR via QuickTime Access to the DVR via QuickTime will allow you to log into the DVR and monitor the live images only. 1. 2. 3. 4. 5. 6. 7. Ensure you are running the most up-to-date version of QuickTime. If you need to update, you can grab an update from the Internet, at www.apple.com/quicktime Open your QuickTime window. From the File menu, choose Open URL in New Player… Key in the address of your DVR (see 6.1) Click OK.
DVR4-5500™ Appendix 1.
DVR4-5500™ Operating Instructions Appendix 3. Compatible SATA HDD List MANUFACTURER MODEL Seagate ST3320613AS ST33500320AS ST3750330AS ST31000340AS WD WD4200AAKS WD5000AACS WD6400AAKS WD7500AAKS Maxtor STM3500350AS STM3750330AS HITACHI HDT25032VLA360 HDS721010KLA330 CAPACITY 320GB 500GB 750GB 1000GB (1TB) 320GB 500GB 640GB 750GB 500GB 750GB 320GB 1000GB (1TB) SPEED 7200 rpm 7200 rpm 7200 rpm 7200 rpm 7200 rpm 7200 rpm 7200 rpm 7200 rpm 7200 rpm 7200 rpm 7200 rpm 7200 rpm Appendix 4.
DVR4-5500™ Operating Instructions Warranty Terms and Conditions Swann Communications USA Inc. 12636 Clark Street Santa Fe Springs CA 90670 USA Swann Communications PTY. LTD. Building 4, 650 Church Street, Richmond, Victoria 3121 Australia Swann Communications warrants this product against defects in workmanship and material for a period of one (1) year from it’s original purchase date. You must present your receipt as proof of date of purchase for warranty validation.
Swann Technical Support All Countries E-mail: tech@swannsecurity.com Telephone Helpdesk USA toll free 1-800-627-2799 (Su, 2pm-10pm US PT) (M-Th, 6am-10pm US PT) (F 6am-2pm US PT) USA Exchange & Repairs 1-800-627-2799 (Option 1) (M-F, 9am-5pm US PT) AUSTRALIA toll free 1300 138 324 (M 9am-5pm AUS ET) (Tu-F 1am-5pm AUS ET) (Sa 1am-9am AUS ET) NEW ZEALAND toll free 0800 479 266 INTERNATIONAL +61 3 8412 4610 See http://www.worldtimeserver.