
Installation Guide

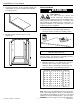
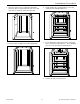


3. Cut the panel using a circular saw with a 60-80 tooth
carbide blade or a saber saw with a bi-metal blade
(14 teeth per inch).
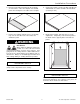
4. Dry fit the panel, and make any necessary
adjustments.
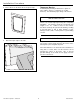
Panel Installation
Fumes Hazard
The fumes from the silicone and
solvents used by the installer can be
harmful if used in an unventilated room.
Always work in a well-ventilated area. To keep the area
well-ventilated, open windows and use exhaust fans. If
adequate ventilation is not achievable or practical, use
respiratory protective equipment.
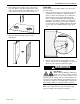
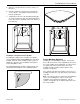
1. Clean the backs of each panel with denatured
alcohol or another non oil-based cleaning solvent.
Do not use oil-based cleaners, such as mineral spirits, to
clean the panels. The oil in the cleaner will prevent the
panel from adhering properly to the wall.
2. Apply the silicone in 1-1/4” diameter dots every 8 to
10 inches apart over the surface of the panel.
Follow the silicone manufacturer’s instructions and
note all ventilation and installation precautions.
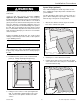
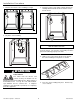
Note: When using an industrial grade hot melt glue gun
in place of bracing, apply the silicone as stated in Step 2.
Then apply the hot melt glue to the panel, as needed, and
quickly press the panel firmly into place. Also refer to the
WARNING on the next page for hot melt glue aplications.
IMPORTANT NOTICE
WARNING
The Swan Corporation – Swanstone 14 800-325-7008
Installation Procedure