English version LW320/LW321 Sweex Wireless 300N Router • Do not expose the Sweex Wireless 300N Router to extreme temperatures. Do not place the device in direct sunlight or in the direct vicinity of heating elements. • Do not use the Sweex Wireless 300N Router in extremely moist or dusty surroundings. • Protect the device against powerful shocks and falls – they may damage the internal electronics. • Never attempt to open the device yourself, there are no serviceable parts inside.
English version Product description Front 1 2 4 5 6 3 7 1. Power LED: 2. READY LED: 3. WPS LED: This light indicates that the router receives power. A constantly blinking SYS light indicates correct functioning of the router. When this light blinks, it is possible to connect to the router with a WPS enabled device. For more information, see the chapter: “Securing your wireless network”. 4. WIRELESS LED: This light indicates that the wireless network is active.
English version 1 2 3 4 Back 1. DC power input: 2. POWER ON/OFF button: 3. WAN port: 4. LAN port 1 - 4: Connect the supplied power adapter to this input. If the adapter is lost it can be replaced by a similar model with 9 V DC output and 0.6 A current rating. Press the button in to power on the router and press again to turn off the router. Connect the network cable coming from your ISP modem to this port. Upon a successful WAN connection, the WAN light at the front of the router will light up.
English version Simple setup Simple setup is done in 7 steps: 1. Disconnect the power to your modem. If one or more computers were connected to your modem using a network cable, disconnect them. 2. Use the included network cable to connect your modem to the blue WAN port of the router. Do not connect any computers yet! 3. Connect the power to your modem and wait until its lights indicate normal operation 4.
English version Connecting to a wireless network • Windows XP: Right click on your wireless adapter’s icon at the bottom right of your screen and click “View Available Wireless Networks”: A window titled “Choose a wireless network” will appear.
English version Note: If you see a red cross near the network and the text: “The settings saved on this computer for the network do not match the requirements of the network”, please refer to the troubleshooting section of this manual. If you have Windows Vista with Service Pack 2 or Feature Pack for Wireless installed and you are connecting the router for the first time, Vista will allow you to easily setup and secure your wireless network through the WPS method.
English version Windows 7: Windows 7 will indicate when wireless networks are available. You can recognise this by the following icon in the bottom-right of your screen: Note: If you see a small red cross through the icon, no networks are in range of your computer. Please consult the troubleshooting section of this manual if this is the case.
English version The following screen will appear, enter the desired name for your wireless network and click “Next” to begin configuring the router: Note: The default security method with this setup procedure is WPA2. If a device in your network does not support WPA2, you can change the security method by clicking the “Advanced” button.
English version Advanced setup Advanced setup can be done when you know exactly which settings your ISP requires or when the simple setup fails. There are 4 possible configurations. We have listed them with instructions on how to configure them. To know which setting matches the settings required by your ISP, look at the list of providers further on in this manual. The list is made out of ISP’s and their corresponding services. Behind each service is listed the required setting.
English version You should see the Internet Configuration Wizard screen: You can now proceed with the advanced setup using one of the configurations described further on. Checking if the router is successfully connected to the internet For all configurations, it is possible to check in the router if you have a working internet connection. After applying the configuration, the router will process the changes and take you to the “System Status” page.
English version Configuration 2: PPPoE If your ISP requires the PPPoE connection type, click the “PPPoE” button. You will see the following screen: Enter your account name (user name) that has been provided to you by your ISP in the “User Name” field and the corresponding password in the “Password” field. When finished, click the “Next” button and then “Finish”.
English version Fill out all fields as required by your ISP and then choose “Finish”. During all selections you will have an option to configure the “Basic” wireless settings of the router. The following screen is presented during each choice: Fill all fields in as desired. Please view the “Wireless network configuration” section for more information about the options presented.
English version Wireless network configuration It is recommended to only adjust wireless settings from a computer connected to the router by network cable, especially when changing wireless security settings. This will prevent the connection from being lost if you accidentally apply incorrect settings. To adjust the wireless network configuration, first login to the router as described in the “Advanced Setup” chapter, then click “Wireless” in the menu on the left side.
English version Channel Width In this section it is possible to manually select the channel width (20/40MHz), it is recommended to keep the default setting. Max Tx Rate The Tx speed can be selected in this section, it is recommended to make use of the default setting. After changing any of the settings, click the “Save” button to apply the changes. Securing your wireless network Wireless security protects your wireless network so that only authorised devices can gain access.
English version Method 1: WEP Securing your network with WEP is done in 3 steps: 1. Select the following settings: Type: “Automatic” (it is recommended to use the default setting) WEP Key Format: “Hexadecimal” or “ASCII” Key Selected: Insert the chosen “WEP key” and define the “Key type” 2. When finished, click the “Save” button. If you were connected wirelessly, you will now observe that your connection is lost.
English version After a WPS secured connection has been set up for the first time, all previously connected devices will lose their connection. You will have to connect them using the same WPS method or by manually entering the WPA key as described below. To connect a non-WPS device to a WPS secured router, click “WPS” in the menu on the left side, the “WPS Key (ASCII)” is the WPA key you can use for connecting non-WPS enabled devices.
English version To configure a device for a static DHCP address, fill out the device’s corresponding MAC address in the “MAC Address” section and fill in the “desired IP in the “Reserved IP Address”, then click the “Save” button. Look at the “DHCP Clients List” to see the IP and MAC addresses of all automatically configured devices currently active on your network. Note: Do not assign static DHCP addresses in the range 192.168.32.100 to 192.168.32.
English version For a DMZ, click “DMZ” in the menu on the left, enter the IP address of the device, check the “Enable” checkbox and click the “Save” button. Bandwidth Control Bandwidth control is also known as “bandwidth management”. It allows you to artificially restrict bandwidth for one or more devices on your network. This can be useful when, for example, you need to reserve bandwidth for a VOIP phone or you want to restrict the bandwidth available to peer-to-peer applications.
English version Troubleshooting This chapter of the manual will explain a number of common issues that you may run into and possible solutions. • I cannot log into my router at http://192.168.32.1/. Windows indicates that I have a working network connection. • This issue may arise from incorrect IP settings on your computer. You can check and adjust your settings as follows: Windows XP 1. Click the start button at the bottom left of your screen and click “Control Panel” 2.
English version 3. Right click the first connected LAN or High-Speed Internet Connection, in this example the “Local Area Connection”, and click “Properties” from the context menu. If you have multiple connected connections, repeat steps 3 to 6 for each connection. 4. The connection’s property window appears.
English version 5. The Internet Protocol’s property window appears. In this window, ensure that both settings are set to “Obtain automatically”: 6. Confirm the settings by clicking “OK”. The network settings for XP are now properly configured for your router. Windows Vista 1.
English version 2. In the Control Panel, click “View network status and tasks”. If your Control Panel is in classic view, open the “Network and Sharing Center” icon: 3. The Network and Sharing Center window should now open.
English version 4. Right click the first connected LAN or High-Speed Internet Connection, in this example the “Local Area Connection”, and click “Properties” from the context menu. If you have multiple connected connections, repeat steps 4 to 7 for each connection: 5. The connection’s property window appears.
English version 6. The Internet Protocol Version 4’s property window appears. In this window, ensure that both settings are set to “Obtain automatically”: 7. Confirm the settings by clicking “OK”. The network settings for Vista are now properly configured for your router. Windows 7 1.
English version 2. In the Control Panel, click “View network status and tasks”. If your Control Panel is in icon view, open the “Network and Sharing Center” icon: 3. The Network and Sharing Center window should now open.
English version 4. Right click the first connected connection, in this example the “Local Area Connection”, and click “Properties” from the context menu. If you have multiple connected connections, repeat steps 4 to 7 for each connection: 5. The connection’s property window appears.
English version 6. The Internet Protocol Version 4’s property window appears. In this window, ensure that both settings are set to “Obtain automatically”: 7. Confirm the settings by clicking “OK”. The network settings for Windows 7 are now properly configured for your router. • I appear to be connected but Internet Explorer still displays an error message “Internet Explorer cannot display the webpage” or similar. • This problem may arise from incorrect proxy server settings.
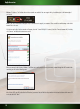
English version 3. In this window, click the “Connections” tab and in this tab, the “LAN Settings” button. 4. The “LAN Settings” window will now open.
English version • My computer indicates that it is not connected to a network. • This problem is usually resolved by carefully checking all connections and indicator lights. For a wired computer, follow the network cable to the router’s backside. It must be plugged in to one of the yellow LAN ports. The yellow ports are also numbered and corresponding to each LAN port there is an indicator light at the front of the router. This light must be lit to indicate a working connection.
English version 3. The Manage Wireless Networks window now opens. In this window, select the conflicting network and click “Remove”. After the network has been deleted, you can close the window and follow the steps described in the “Connecting to a wireless network” section of the manual. • I have Windows 7 and I cannot connect to my wireless network. A red cross is displayed next to the network • This problem can be solved as follows: 1.
English version 3. In the Network and Sharing Center, click “Manage wireless networks”: 4. The following window will appear, right click the network that was indicated with a red cross in step 2 and click “Remove network”: 5. After the network has been removed, you can close the window and follow the steps described in the “Connecting to a wireless network” section of the manual.
English version • I have lost the WPA or WEP key required to access my wireless network. • There are two possible solutions for this issue: 1. Access the router from a computer that is connected by network cable as described in the “Advanced setup” section of this manual. Click “Wireless Network” – “Security Settings”, you can view the key there. 2. Reset the router to its factory default settings, which is an unsecured network. The reset procedure is described further on.
English version Warranty 2-year standard warranty within the EU • In a standard manner a warranty period of 2 years as from the purchase date is available for this Sweex product within the EU. • Should you wish to invoke this warranty within the first 2 years after the purchase then you can directly apply to the point of sale where you purchased the product for the conditions and procedures.