
Use and Care Guide


21
When drilling holes in concrete a Carbide Bit
MUST BE used, DO NOT use a Diamond Bit.
See Step 5 below for further information.
In this instance, you would
assemble the Lower and Upper
Wall Panel Assembly (see pg 12)
on the left side. See Emergency
Exit Instructions (PN 20056).
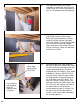
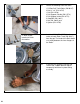
3. After all the holes have been drilled,
remove the template and store it in a
safe location for future use. Using a
vacuum cleaner remove all concrete
dust from each hole and from the
surrounding area. The template
should NOT be left under the
Safety Shelter.
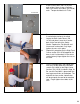
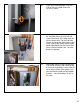
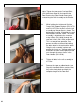
2. Do not allow the template to move
during this next step. Using the
template as a guide, drill all holes in
the concrete floor to a minimum
depth of 2 ¾” and a maximum depth
of 3”. Do not drill completely
through the concrete slab. If a hole
is drilled through slab an adjacent
hole may be drilled not closer than
3” from the abandoned hole or
contact supplier or a licensed
engineer to evaluate alternatives.
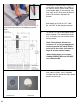
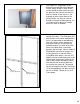
1. Locate all pieces of the Anchor Bolt
Alignment Template (see pg 11).
Lay the template out on the floor in
the approximate location the Safety
Shelter will sit. See note at left
regarding the proper placement of
the Emergency Exit Wall Assembly
It should not be against a solid
object or wall. Be sure the door side
template labeled “Door Opening This
Side Up” is in the front left and all
pieces are solidly locked together.
Check to ensure there is a minimum
of 7’ of vertical clearance above the
footprint of the template and a
minimum of 2” clearance around all
sides. See the appropriate table on
Page 19 to determine the minimum
concrete requirements for your
Model. Once the final location is set,
draw a line on the floor along the
inside edge of the template. Use this
line to ensure the template does not
move while drilling the anchor holes.
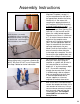
Assembly Instructions