
Use and Care Guide
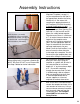
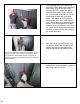
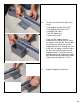

28. While holding the Inside and Outside
Center Rail Support Brackets (PN 19774
and PN 19773) on the Rail, raise the rail
assembly up into position as shown. The
bolt pattern on page 12 identifies the roof
hole locations for Bolt 19829. This entire
assembly is attached to the structure
using 3 Bolts (PN 19829) through the
roof and 3 Nuts (PN 19799) underneath.
This is a two person operation. One
person must be on the outside holding
the bolts down in the roof and the other
lifting the rail assembly in place and
putting the 3 nuts on. A deep socket and
extension must be used to place the two
nuts through the access holes in the
Door Header (PN 19749).
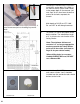
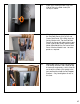
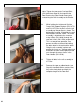
29. Tighten all bolts in the rail assembly to
31 Ft-lbs.
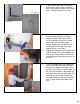
30. Remove the tape or rubber bands (see
Step 24) from both Rollers and test that
they move freely back and forth the
complete length of the Door Rail.
30
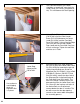
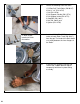
Note: Tighten the two center Carriage Bolts
(PN 19828 from Step 22) that connect the
Roof Panel to the Door Header Brace prior
to attaching the Rail Assembly to the Shelter.