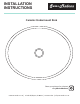
INSTALLATION INSTRUCTIONS Swiss Madison Ceramic Undermount Sink Share your pictures for a feature! using #SwissMadison www.swissmadison.com | 19 Stults Rd, Dayton, NJ 08810 | 1-434-623-4766 | info@swissmadison.
Prior to Installation: Inspect sink to ensure no damages have occurred while in shipping If provided, use the Swiss Madison cut out template Observe all plumbing and building codes in accordance with your state and local requirements Additional floor and wall preparations may be necessary to avoid damage to the product Installation with laminate countertop not recommended We recommend professional countertop installers. Customer is responsible for damage to countertop and/or sink during installation.
Thank you for your purchase Thank you for purchasing a Swiss Madison Ceramic Sink. We appreciate your business and know you will enjoy your sink for many years to come. If you have any questions or require assistance we would be happy to help, please contact us at 1-434-6234766 or info@swissmadison.com. To learn more about our products, please visit: www.swissmadison.
UNDERMOUNT SINK MODELS 18.5” 19.3” 15.25” 16.14” 15” 8” 8.25” 8” SM-UM621 18.5” x 15.25” x 8” *Matching Drain: SM-PD23R 21” SM-UM622 19.3” x 16.14” x 8.25” *Matching Drain: SM-PD23R SM-UM623 21” x 15” x 8” *Matching Drain: SM-PD23R 18.5” 21.3” 16.75” 14” 13.2” 13” SM-UM625 21.3” x 13.2” x 7.7” *Matching Drain: SM-PD23R 7.75” 7.7” 8” SM-UM624 18.5” x 14” x 8” *Matching Drain: SM-PD23R SM-UM629 16.75 “x 13” x 7.
UNDERMOUNT SINK INSTALLATION INSTRUCTIONS L SKU NAME SM-UM621 Plasir 18” Oval SM-UM622 Plasir 19” Oval SM-UM623 Plasir 21” Rectangular SM-UM624 Plasir 18” Rectangular SM-UM625 Voltaire 21” Rectangular SM-UM629 Plasir 16.
UNDERMOUNT SINK INSTALLATION INSTRUCTIONS The step-by-step guidelines in the installation instructions are a general reference for installing a Swiss Madison Sink. Should there be any discrepancies, Swiss Madison cannot be held liable. It is recommended to install all Swiss Madison products by hiring a licensed professional 1. 2. 3. 4. 5. Read the complete instruction manual before beginning installation.
2. Clean Countertop Make sure to thoroughly clean the underside of the countertop and let it dry completely. Note: The undersides of counters tend to be rough and unfinished which makes it easy to hold debris. You want to make sure it’s clean so nothing interferes with the bond between adhesive and the countertop. 3. Position and Trace Sink Flip sink upside down on top countertop in the desired location you want the sink to be. Trace the outline of the sink onto the countertop.
5. Secure Sink to Countertop Once again clean underside of the countertop and around cut-out area making sure area is free of defects. Apply a liquid nail or adhesive of choice to the rim of the sink near the inside edge. Be careful not to miss or skip any area. Carefully lift sink squarely under countertop cut-out. Press firmly on sink to form seal and seal sink. Immediately wipe excess sealant with damp cloth. Be careful not to smear or spread sealant onto countertop or sink.
Swiss Madison ONE YEAR LIMITED WARRANTY 1-434-MADISON (623-4766) 19 Stults Rd., Dayton, NJ 08810 www.swissmadison.com Swiss Madison® products are made with quality materials and excellent craftsmanship to provide the customers a long lasting product.