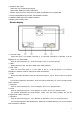
SWIT Electronics Co., Ltd. Model:S-1053F 5.5’’ Full HD Broadcast LCD Monitor User Manual Ver:A.3 Please read this User Manual throughout before using.
Preface 1. All internal technologies of this product are protected, including device, software and trademark. Reproduction in whole or in part without written permission is prohibited. 2. All brands and trademarks of SWIT Electronics Co., Ltd. are protected and other relative trademarks in this user manual are the property of their respective owners. 3.
Maintenance Warning 1.In order to reduce the risk of fire and electrical shock, do not lay this product in rain or damp places. 2.Please keep away from the strong magnetic field; it may cause the noise of the video and audio signals. The power 1.Please use the power adapter provided or recommended by the manufacturer in order to avoid damage. 2.For a third party power adapter, please make sure the voltage range, supplied power, and polarity of power lead are fit. 3.
Packing List This product offers the standard package and luxury package for option, respectively including: Standard package: Luxury package: 1.D-tap to Pole-tap DC cable with lock 2. Warranty card 3. User manual 1. D-tap to Pole-tap DC cable with lock 2. Warranty card 3. User manual 4. S-7003U/F/D/B/I/V/C/E 5. Sun hood 6. Articulating arm trestle 7. HDMI cable with lock 8. Power adaptor 9. LCD protective film 10. Flannelette bag 11.
Accssaroies introduction 1. Sun hood ⑴ Take out the sun hood from the flannel bag, see pic1; ⑵ Push out the sun hood as pic2, unfold as pic3; ⑶ Fold the two bottom parts inward as pic3, with the internal magnets attached and fixed as pic4; ⑷ Install the sun hood on the monitor, see as pic5. Pic.1 Pic. 3 Pic. 2 Pic. 4 Pic.
2. Battery plate Install the battery plate on the back panel of the monitor as shown above, fix with four screws, then insert the power connector with lock to the rear housing power port, and twist the latch portion clockwise to the end. Mounting the battery to the plate can power the monitor. 3. Arm Trestle As shown in the picture above which marked with 1, 2, 3 of the arm trestle can be 360°rotated. User can rotate to any position according to their needs.
Operation Instructions User definable function keys(F1~F3) User can set F1~F3 keys to corresponding function for quick operation according to their needs. For example:User can set F1 to “Focus Assistant”, and press F1 to directly switch the focus assistant parameter, the sequence is “Red→Blue→Off”. Quick function keys support multi definition, for details please refer to “4.Function key settings” in the “MENU” section.
⑻ SDI-OUT: SDI output Under SDI, loop out SDI-IN input signal; Under HDMI, HDMI converted to SDI output. Remark: when the current input source is HDMI, the SDI-OUT will not support SD. ⑼ SDI-IN: 3G/HD/SD SDI signal input, standard BNC interface. ⑽ HDMI-IN: HDMI signal input, HDMI-A interface. ⑾ Battery plate mounting area ·Screen display ⑴. Timecode(SDI) Under SDI input, it can display Timecode. If no Timecode information is detected, it will be displayed as “TC: UNLOCKED”.
Introduction of audio and video functions 16-ch embedded audio meters Under 3G/HD/SD SDI, it displays 16 channels embedded audio meters. Under HDMI, it displays 2 channels embedded audio meters. The audio meter is green, and will turn yellow when audio exceeds -20dB, and turn red when audio exceeds -9dB. Audio alarm If the embedded audio value is too low or no embedded audio, it will display “MUTE” or “UNLOCKED” in the audio bar.
AFD(SDI) It is the abbreviation of active format description. AFD is to display the SDI embedded AFD information graphically on the screen. H/V Delay (SDI) Under SDI input, H/V Delay can be used to display line/field blanking signal, and to observe the horizontal and vertical synchronous signal. Image flip Horizontal, vertical, horizontal and vertical two-way image flip function. Main menu S-1053F has OSD to adjust the parameters and settings, for example: Picture, color temp.
4. Revolve “MENU” to change the selected item’s parameter, press “MENU” to apply and save the settings. 5. Revolve “MENU” to select “Exit”, press “MENU” to quit submenu. Select “Exit & Status” under the Main Menu and press to quit Main Menu. Notice: * The items in gray can not be set up. * If there is no operation under the setted time, the menu will automatically save settings and quit. * If the key inhabit function is turned on, except key inhibit function, all other items are in grey.
4. Function key To define the F1~F3 function keys *1 Function keys F1-F3 can be setted as the down below functions: source, Waveform, Display, Color Temp, Time Code, Zebra, Vector, Audio Bar, Histogram, False Color, AFD, H/V Delay, R/G/B/Mono, Marker, Color Bar, UMD, Audio Alarm, Max backlight, Focus Assist, Aspect Ratio, Scan Mode, Zoom Mode, Mute, Freeze Frame, Flip Mode. For example: Set F3 to “R/G/B/Mono” under “Function key” submenu.
*1 When “Fit Marker” is “Off”, the size of safety area is benchmarked against the actual display screen, accounting for 80% ~ 95% of actual display screen. When “Fit Marker” is “On”, the size of safety area is benchmarked against the area inside the scales marker, accounting for 80% ~ 95% of the area inside the scales marker. Example: Aspect ratio: 4:3 Safety Area: 85% Center Marker: On Fit Marker: Off Aspect ratio: 4:3 Safety Area: 85% Center Marker: Off Fit Marker: On 7.
output can be selected from Channel1 to channel 16. In audio bar, the left channel information will be in green, and the right channel information will be in red. Channel1~2 Channel1~8 Channel1~16 8. Vector 9. Waveform *1: Only the “WFM Single Line” is set to “ON”, the “WFM Line Count” can be adjusted.
10. Display 11. System *1 Color space The default color space parameter is automatic. It will automatically dispay based on the input signal recognized color sapce. If the signal can not recognize the correct color space, user should manually adjust the color space to correctly display. *2 Source Scan When set to “Yes”, after turn on the monitor, the signal will be inspected and follow the sequence of “SDI→HDMI→SDI” For example: if channel is selected to SDI, SDI-IN has no input, and HDMI has input.
the side of the monitor; ⑵ Press “MENU” rotary knob, open the main menu, enter the “system” submenu, select “Driver/Kernel”; ⑶ Set the parameter to “Yes”, and press “MENU” rotary knob to begin upgrading; ⑷ While upgrading, there will be a prograss bar dispaying on the screen (Note: Do not power off when upgrading); ⑸ After upgraded, the monitor will automatically reboot. 12. OSD 13.
Specification LCD Performance Size Display area Resolution Color Aspect ratio Brightness Contrast Viewing angle 5.5 inch 120.96×68.04 mm 1920×RGB×1080 8 bit 16:9∕4:3 400 cd∕㎡ 1000:1 Horizontal∕Vertical: 160°∕160° Input∕Output Input Output HDMI×1 BNC×1 USB×1 BNC×1 3.5mm×1 HDMI input 3G/HD/SD-SDI input 3G/HD/SD-SDI loop through output SDI/HDMI audio output Video format 480i/576i/480p/576p 1080i(60/59.94/50) 720p(60/59.94/50) 1080p(60/59.94/50/30/29.97/25/24/23.98) 1080psf(30/29.97/25/24/23.
Trouble-shooting symptom No display Image or color abnormal Possible causes Solution The power is not turned on Please check if the power is connected, and then press ”POWER” button to turn on the monitor Unstable power voltage Reconnect to power supply BNC or HDMI cable loose contact or not correctly connected Check and correctly connect the BNC or HDMI cable The attached battery is no power Change battery Using DIY power supply but the polarity is reversed Refer to the provided power supply,