Telefon Uhrenradio Téléphone radio-réveil Telefono radiosveglia Telephone Clock Radio CRT 7 Bedienungsanleitung Mode d’emploi Istruzioni per l'uso Operating Instructions
CRT 7 Bedienungsanleitung ______________ 1 Mode d’emploi _________________ 13 Istruzioni per l'uso _______________ 23 Operating instructions ____________ 33 Declaration of conformity _________ 43 2
- Inhaltsverzeichnis 1 Allgemeine Informationen ........................................................... 4 2 Bedienelemente............................................................................ 5 3 Installation .................................................................................... 6 3.1 3.2 3.3 3.4 3.5 3.6 3.7 3.8 3.9 4 Bedienung..................................................................................... 8 4.1 4.2 4.3 4.4 4.5 5 Weckzeit einstellen ...................
- Allgemeine Informationen - 1 Allgemeine Informationen Batterien Keine anderen aufladbaren Akkus verwenden. Diese können möglicherweise einen Kurzschluss verursachen. Verwenden Sie beim Austauschen immer nur eine neue Batterie des Typs AAA 1,5V. Batterien nicht ins Feuer werfen oder ins Wasser tauchen. Alte oder defekte Batterien nicht mit dem normalen Hausmüll entsorgen. Aufstellort Stellen Sie das Telefon nicht in die unmittelbare Umgebung von anderen elektronischen Geräten wie z. B.
- Bedienelemente - 2 Bedienelemente 1 2 1 2 13 12 11 10 3 4 5 9 6 8 7 7 3 4 5 6 Telefonhörer 1 Schalter für Tonruflautstärke 2 Tasten zur Einstellung der Hörerlautstärke 3 Speichertaste 4 Kurzwahltaste 5 Rückruftaste 6 Buchse für Spiralkabel des Hörers 7 Wahlwiederholungstaste Rückseite des Grundgeräts Netzanschlussbuchse FM-Antenne Schalter Radio-/Summeralarm Buchse für Spiralkabel des Hörers Buchse für Telefonkabel Unterseite des Grundgeräts Batteriefach Grundgerät 1 Gabelumschalter 2 Radi
- Installation - 3 3.1 Installation Sicherheitshinweise HINWEIS! Es ist wichtig, dass Sie vor der Installation die allgemeinen Informationen am Anfang dieser Bedienungsanleitung lesen. 3.2 Verpackungsinhalt prüfen Zum Lieferumfang gehören: Ein Grundgerät Ein Telefonkabel Ein Netzteil Diese Bedienungsleitung 3.
- Installation 3.5 Ans Stromversorgungsnetz anschließen Stecken Sie das Netzteil in eine Netzsteckdose und schließen Sie das Kabel des Netzteils an die mit DC 12V gekennzeichnete Buchse an der Rückseite des Telefons an. Die Netz-LED leuchtet auf an zeigt damit an, dass die Stromversorgung korrekt funktioniert. Die Batterie sollte auch bei Verwendung der Netzstromversorgung stets eingesetzt sein, um vor einem Ausfall der Stromversorgung zu schützen. 3.
- Bedienung - 4 4.1 Bedienung Weckzeit einstellen Bei der Weckfunktion können Sie zwischen zwei Arten des Alarms wählen, RADIO- oder SUMMERALARM. Wählen Sie mit dem Schalter an der Rückseite des Telefons RADIO (Radioalarm) oder BUZZ (Summeralarm). Zum Einstellen der Weckzeit gehen Sie wie folgt vor: 1. 2. 3. 4. 4.2 Drücken Sie die Alarm-Einstelltaste ALARM SET. Das Symbol und die Ziffern der Zeitanzeige blinken. Drücken Sie nun die Taste UP/HOUR (Nach oben/Stunden), um die Stundenanzeige einzustellen.
- Bedienung 4.4 Bedienung des Radios Mit der Taste RADIO ON/OFF (Radio Ein/Aus) können Sie das Radio einschalten. Das Aufleuchten der LED RADIO zeigt an, dass das Radio eingeschaltet ist. Um das Radio auszuschalten, drücken Sie erneut die Taste RADIO ON/OFF. Das Erlöschen der LED RADIO zeigt an, dass das Radio ausgeschaltet ist. Mit dem an der rechten Seite des Geräts befindlichen Radiolautstärkeregler können Sie die Lautstärke des Radios einstellen.
- Telefonnummern speichern - 5 Telefonnummern speichern Sie können in Ihrem Telefon 10 Telefonnummern speichern. Diese 10 Nummern können auf die Kurzwahltasten gespeichert werden. Als Kurzwahltasten werden die Zifferntasten 0 bis 9 der Tastatur verwendet. 5.1 Nummern auf die Kurzwahltasten speichern 1. Heben Sie den Hörer ab. 2. Drücken Sie die Speichertaste STORE. 3. Drücken Sie die Kurzwahltaste MEM. 4.
- Telefonnummern speichern 5.3 Einstellbare Tonruflautstärke Mit Hilfe des Schiebeschalters RINGER (Tonruf) am Telefonhörer können Sie zwischen den Einstellungen HI (laut) und LO (leise) wählen, um die Lautstärke des Tonrufes Ihren Bedürfnissen anzupassen. Möchten Sie einmal nicht gestört werden, wählen Sie die Stellung OFF (Aus). Das CRT7 ist auch mit einer optischen Rufanzeige ausgestattet; die Lampe unter dem Display leuchtet auf, wenn das Telefon läutet. 5.
- Nebenstellenanlagen - 6 6.1 Nur für den Betrieb an einer Nebenstellenanlage (PBX) Pausenfunktion beim Betrieb des Telefons an einer Nebenstellenanlage Hinweis! Das in diesem Kapitel beschriebene Einfügen einer Pause zwischen der Kennziffer für die Amtsholung (meist 0 oder 9) und der zu wählenden Nummer ist nur bei älteren Nebenstellenanlagen erforderlich. Bei einigen Nebenstellenanlagen ist eine kurze Pause zwischen der Kennziffer für die Amtsholung (meist 0 oder 9) und dem Amtston vorhanden.
- Sommaire - 1 Informations générales...............................................................14 2 Fonctions d’utilisation .................................................................15 3 Installation ..................................................................................16 3.1 3.2 3.3 3.4 3.5 3.6 3.7 3.8 3.9 4 Fonctionnement..........................................................................18 4.1 4.2 4.3 4.4 4.5 5 Régler l’alarme du réveil ............................
- Informations générales 1 Informations générales Piles Ne pas utiliser d’autres batteries rechargeables qui risqueraient éventuellement de provoquer un courtcircuit. Pour le remplacement, utilisez toujours uniquement une nouvelle pile de type AAA 1,5 V. Ne pas jeter les piles au feu, ni les plonger dans l’eau. Ne pas jeter les piles usées ou défectueuses en même temps que les ordures ménagères.
- Fonctions d’utilisation 2 Fonctions d’utilisation 1 2 1 2 13 12 11 10 3 4 5 9 6 8 7 7 3 4 5 6 Combiné 1 Interrupteur de réglage de la sonnerie 2 Contrôle niveau de volume écouteur 3 Touche de mémoire 4 Touche d’enregistrement 5 Touche de rappel 6 Raccordement d’un câble spiralé 7 Touche de rappel du dernier numéro composé Arrière de la base Raccordement au secteur Antenne FM Interrupteur radio/sonnerie Raccordement d’un câble spiralé Raccordement câble téléphonique Surface inférieure du télé
- Installation 3 Installation 3.1 Informations sur la sécurité REMARQUE ! Avant l’installation, vous devez impérativement lire les informations générales au début du présent mode d’emploi. 3.2 Vérifier le contenu du paquet Ce paquet contient les articles ci-après : Une base Un cordon de ligne téléphonique Un adaptateur secteur Ce mode d’emploi 3.
- Installation 3.5 Raccorder l’adaptateur secteur Raccordez l’adaptateur CA à la prise secteur et insérez le câble dans la prise jack signalée par DC 12V au dos du téléphone. La DEL du secteur s’allume pour indiquer que l’alimentation en courant est correcte. Vous devez laisser toujours la pile en place, même lors de l’utilisation du courant électrique, en tant que protection contre les interruptions de courant. 3.
- Fonctionnement 4 4.1 Fonctionnement Régler l’alarme du réveil Pour vous réveiller, vous pouvez choisir entre deux types d’alarme, RADIO ou SONNERIE D’ALARME. Utilisez l’interrupteur au dos de votre téléphone pour sélectionner RADIO (alarme radio) ou BUZZ (alarme sonnerie). Pour régler l’alarme du réveil, procédez de la manière suivante : 1. 2. 3. 4. 4.2 Appuyez sur la touche ALARM SET. L’icône et les chiffres du réveil se mettent à clignoter.
- Fonctionnement 4.4 Utiliser la radio Utilisez la touche RADIO ON/OFF, la DEL radio s’allume pour indiquer que la radio est allumée. Pour éteindre la radio, appuyez à nouveau sur la touche RADIO ON/OFF. La DEL radio s’éteint pour indiquer que la radio est éteinte. Utilisez l’interrupteur du volume radio placé sur le côté droit de l’appareil pour régler le volume de la radio. Votre CRT7 capte à la fois les ondes FM et AM. Appuyez sur la touche RADIO FM/AM pour sélectionner les stations de radio FM ou AM.
- Enregistrer des numéros de téléphone 5 Enregistrer des numéros de téléphone Vous pouvez enregistrer 10 numéros dans votre téléphone. Ces 10 numéros additionnels peuvent être enregistrés sous les touches de composition rapide. Les numéros 0 à 9 sur le clavier sont utilisés pour les touches de composition rapide. 5.1 Enregistrer des numéros sous les touches de composition rapide 1. Soulevez le combiné. 2. Appuyez sur la touche STORE. 3. Appuyez sur la touche MEM. 4.
- Enregistrer des numéros de téléphone 5.3 Volume de sonnerie réglable Vous pouvez utiliser l’interrupteur coulissant RINGER sur le combiné pour sélectionner le réglage HI (fort) ou LO (faible) pour adapter le volume de sonnerie à vos besoins. Si vous ne souhaitez pas être dérangé, sélectionnez OFF (arrêt). Le CRT7 est également doté d’un indicateur visuel de sonnerie, le voyant lumineux sous l’affichage s’allume à chaque fois que le téléphone sonne. 5.
- Diagnostic des défauts 6 6.1 Utilisation avec un système téléphonique (autocommutateur) Fonction pause lors d’une utilisation avec un autocommutateur REMARQUE ! L’insertion d’une pause entre le code d’accès pour la ligne externe (habituellement 0 ou 9) et le numéro à composer décrit dans ce chapitre n’est nécessaire que sur les systèmes téléphoniques anciens. Certains systèmes téléphoniques requièrent une brève pause entre le code d’accès pour la ligne externe (habituellement 0 ou 9) et la tonalité.
- Indice 1 Informazioni generali ...............................................................24 2 Funzioni.....................................................................................25 3 Installazione..............................................................................26 3.1 3.2 3.3 3.4 3.5 3.6 3.7 3.8 3.9 4 Funzionamento.........................................................................28 4.1 4.2 4.3 4.4 4.5 5 Impostazione della sveglia...................................
- Informazioni generali - 1 Informazioni generali Batterie Non utilizzare mai degli altri accumulatori ricaricabili. Questi potrebbero causare eventualmente un corto circuito. Per il cambio delle batterie è necessario utilizzare esclusivamente uno batterie nuove del tipo AAA 1,5V. Non gettare mai le batterie nel fuoco o immergerle nell'acqua. Le batterie vecchie o difettose non devono mai essere smaltite nei normali rifiuti urbani.
- Funzioni - 2 Funzioni 1 2 1 2 13 12 11 10 3 4 5 9 6 8 7 7 3 4 5 6 Portatile 1 Interruttore regolazione suoneria 2 Regolazione volume ricevitore 3 Pulsante memorizzazione 4 Pulsante memoria 5 Pulsante Recall 6 Connessione per cavo spiraliforme del portatile 7 Pulsante richiamo Unità base del telefono 1 Interruttore riaggancio cornetta 2 Volume radio 3 Pulsante impostazione sveglia 4 LED radio 5 Pulsante impostazione ora 6 Pulsante radio on/off 7 Indicatore chiamata entrante 8 Display LCD 9 Pu
- Installazione - 3 Installazione 3.1 Informazioni sulla sicurezza NOTA: prima di eseguire l’installazione, leggere attentamente le informazioni generali riportate all’inizio del presente manuale. 3.2 Controllo del contenuto della confezione La confezione contiene i seguenti componenti: Una base del telefono Un portatile Un cavo telefonico Un cavo spiraliforme Un adattatore di corrente Due batterie AAA Il presente manuale per l’utente Un tagliando per la garanzia 3.
- Installazione 3.6 Connessione alla presa del telefono Connettere il cavo telefonico (in dotazione) alla presa del telefono e all’attacco posto sul retro dell’unità base del telefono e contrassegnato con il simbolo di “LINEA TELEFONICA”. 3.7 Pulsante Recall Il tasto Recall serve per l’utilizzo dei servizi forniti dal gestore della rete, come ad es. avviso di chiamata ecc. Il tempo di richiamo è impostato su 100 ms. 3.
- Funzionamento - 4 4.1 Funzionamento Impostazione della sveglia È possibile scegliere tra due tipi di sveglia, RADIOSVEGLIA o CICALINO. Selezionare RADIO (radiosveglia) o BUZZ (cicalino) servendosi dell’interruttore posto sul retro del telefono. Per impostare la sveglia procedere come descritto qui di seguito: 1. 2. 3. 4. 4.2 Premere il pulsante ALARM SET. L’icona e le cifre dell’orologio cominciano a lampeggiare. A questo punto premere il pulsante UP/HOUR per modificare la cifra delle ore.
- Funzionamento 4.4 Utilizzo della radio Premere il pulsante RADIO ON/OFF: il LED radio si illumina per indicare che la radio è accesa. Per spegnere la radio premere nuovamente il pulsante RADIO ON/OFF. Il LED radio si spegne, indicando che la radio è spenta. Per regolare il volume della radio, servirsi dell’apposito interruttore posto sul lato destro dell’unità. Il presente apparecchio CRT7 dispone della ricezione radio FM ed AM. Per selezionare le stazioni radio FM o AM, premere il pulsante RADIO FM/AM.
- Memorizzazione dei numeri di telefono - 5 Memorizzazione dei numeri di telefono Nel presente telefono è possibile memorizzare fino a 10 numeri. I suddetti numeri possono essere assegnati ad altrettanti tasti di chiamata rapida. I tasti numerici da 0 a 9 possono essere usati come tasti di chiamata rapida. 5.1 Assegnazione dei numeri ai tasti di chiamata rapida. 1. Sollevare il portatile. 2. Premere il pulsante STORE. 3. Premere il pulsante MEM. 4.
- Memorizzazione dei numeri di telefono Suggerimento Il presente telefono agevola l’effettuazione di chiamate attraverso diversi gestori di reti telefoniche. È sufficiente memorizzare il numero di accesso del gestore ed il numero di telefono in locazioni di memoria diverse.
- Solo per l’uso su centralini telefonici privati (PBX) - 6 6.1 Solo per l’uso su centralini telefonici privati (PBX) Funzione di pausa per l’uso del telefono con un centralino telefonico privato (PBX) NOTA: l’inserimento di una pausa tra il codice per la linea esterna (generalmente 0 o 9) e il numero che si desidera selezionare, come descritto in questo capitolo, è necessario solo per gli impianti telefonici vecchi.
- Table of contents 1 General Information ................................................................... 34 2 Operating Functions .................................................................. 35 3 Installation .................................................................................. 36 3.1 3.2 3.3 3.4 3.5 3.6 3.7 3.8 3.9 4 Safety information ...................................................................................36 Check contents of pack .................................
- General Information - 1 General Information Batteries Do not use any other kind of rechargeable batteries, as these could possibly lead to a short circuit. When changing the battery, always use a new battery, type AAA 1.5V. Do not throw batteries into the fire or immerse in water. Do not dispose of old or faulty batteries with the normal household waste. Position There must be a 230 Volt mains socket near to where the telephone is positioned.
- Operating functions - 2 Operating Functions 1 2 1 2 13 12 11 10 3 4 5 9 6 8 7 7 3 4 5 6 Handset 1 Ringer adjustment switch 2 Earpiece volume level control 3 Store button 4 Memory button 5 Recall button 6 Connection for curly handset cord 7 Redial button Telephone base unit 1 Hook switch 2 Radio volume 3 Alarm Set button 4 Radio LED 5 Time Set button 6 Radio On/Off button 7 Ring Indicator 8 LCD display 9 Down/Min button 10 Up/Hour button 11 Power LED 12 Radio FM/AM button 13 Snooze button Re
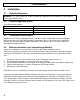
- Installation - 3 Installation 3.1 Safety information NOTE! Before installation, it is essential that you read the general information at the beginning of this user guide. 3.2 Check contents of pack The following items are supplied in this pack: One telephone base One telephone handset One telephone line cord One curly cord One power adaptor Two AAA batteries This user guide One warranty card 3.
- Installation 3.6 Connecting to the telephone socket Connect the telephone cable supplied to the telephone wall socket and to the socket marked with a “PHONE LINE” symbol on the rear of the base unit. 3.7 Recall button You will use the Recall button when using your network operator’s services such as call waiting etc. The time of recall is set at 100ms. 3.8 Setting the Time After the unit is connected to power, the LCD turns on and the display starts the clock at “12:00”.
- Operation - 4 4.1 Operation Setting the clock alarm You can choose to wake from two types of alarm, RADIO or BUZZER ALARM. Use the switch on the back of the phone to Select RADIO (radio alarm) or BUZZ (buzzer alarm). To set the clock alarm, proceed as follows: 1. 2. 3. 4. 4.2 Press the ALARM SET button. The icon and clock digits will be flashing. Now press UP/HOUR button to increment the clock digit. Press DOWN/MIN button to increment the minute digit.
- Operation 4.5 Using the telephone The TCR10 telephone is used like any conventional telephone and works with all modern telephone exchanges using the tone dialling system. 1. Lift the handset and wait until you hear dial tone. The keypad will illuminate. 2. Dial the required telephone number. 3. If the handset volume is too quiet or too loud, you can adjust this to suit your requirements. The volume can be adjusted with the + and - volume buttons on the handset. 4.
- Storing telephone numbers - 5 Storing telephone numbers You can store 10 numbers in your telephone. These 10 additional numbers can be stored under the speed dial buttons. The numbers 0 to 9 on the keypad are used as speed dial buttons. 5.1 Saving numbers under the speed dial buttons 1. Lift the handset. 2. Press the STORE button. 3. Press the MEM button. 4. Now select a speed dial storage location by pressing a number between 0 and 9 on the number pad. 5.
- Storing telephone numbers 5.3 Adjustable ringer volume You can use the RINGER slide switch on handset to select the settings HI (loud) or LO (soft) to adapt the ringer volume to your requirements. Should you not want to be disturbed, select OFF (off). The TCR10 also has a visual ring indicator, the light under the display will come on whenever the phone rings. 5.4 Last Number redial If a number that you have dialled is engaged or did not answer, simply replace the handset.
- For use on a Phone System only (PBX) - 6 6.1 For use on a Phone System only (PBX) Pause function when using phone on a PBX Note! Inserting a pause between the code for the outside line (usually 0 or 9) and the number to be dialled described in this chapter is only necessary on older telephone systems. With some telephone systems, there is a short pause between the code for the outside line (usually 0 or 9) and the dialling tone.
- Declaration of conformity DECLARATION OF CONFORMITY WE Adress: TELGO AG Route d'Englisberg 11 CH-1763 Granges Paccot Declare under our own responsability that the product MODEL: DESCRIPTION: SWITEL CRT7 Telephone Clock Radio Is in conformity with directives: R&TTE DIRECTIVE 1999/5/EC, 73/23/EEC, 93/68/EEC Compliance is achieved by conformity to the following: EN 60950 :2001, EN 55022 :1998, EN 55024 :1998, EN 301-437 :1999, TBR38 :1998, EN 55013 :2001, EN55020 :2002 Authorised by: Signed Name (printed
www.switel.