
User manual


9
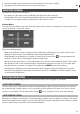
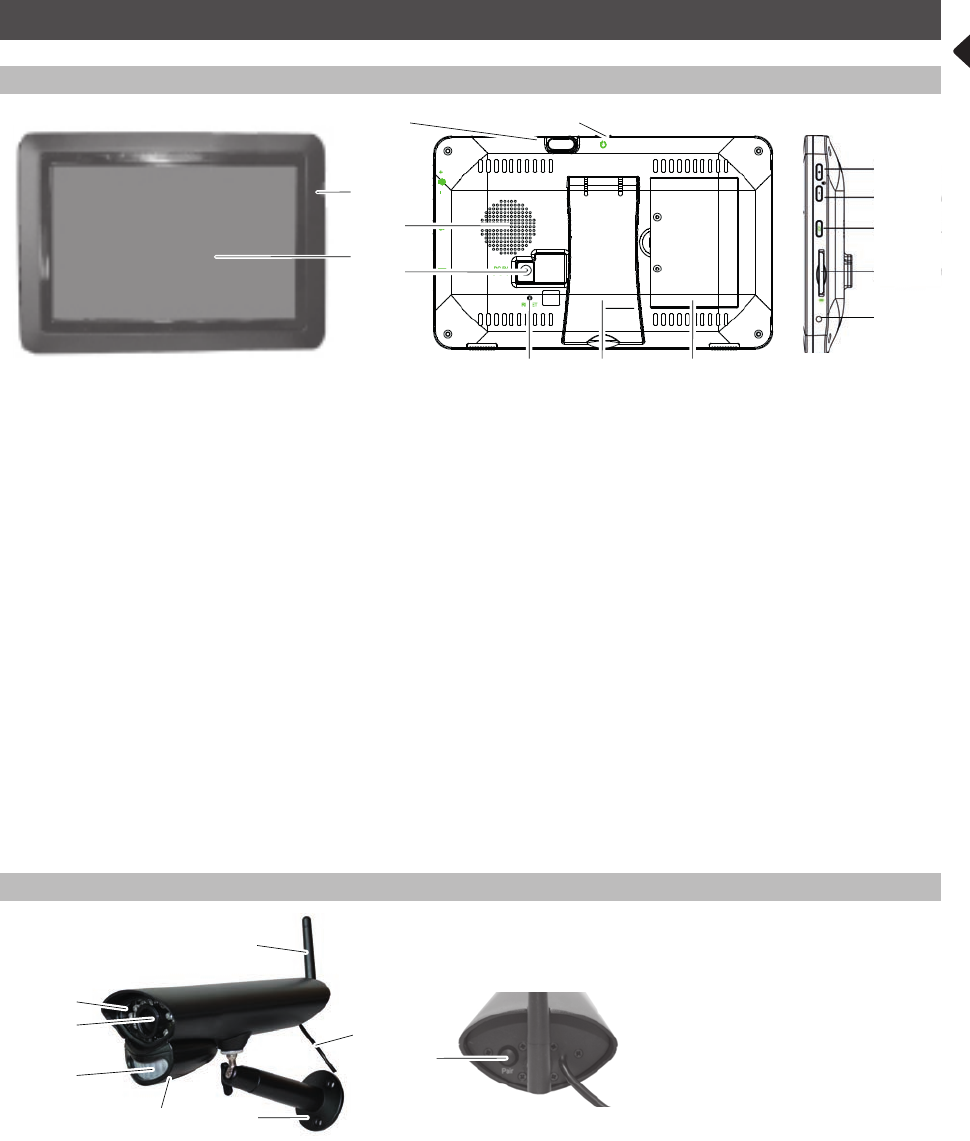
AT A GLANCE
Monitor (Receiver)
1 LCD Screen: Displays video from the camera(s) or system operation interface
2 Microphone
3 Wireless Antenna
4 Power Button/ Scan Button: Press and hold to turn the receiver on/off. Press and release while the
unit is powered on to turn Scan mode on/ off
5 Speaker
6 Power Port: Connect to a local power outlet using the included power adapter
7 Reset: Using a paper clip or other thin object, push the reset button to restore the system to its
default settings
8 Receiver Stand
9 Battery Cover
10 Volume Up
11 Volume Down
12 Talk. Press and hold to talk through the camera. Release to listen for a response
13 SD Card Slot. Insert SD card for recording videos
14 Blue LED: On - Monitor is in Scan mode. Flashing - Battery power is low
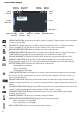
Camera (Transmitter)
1 IR LED – Infrared LEDs provide viewing in no/low light conditions
2 Lens – Catches the video in front of the lens and transmits video from camera to receiver
3 PIR sensor – Detects motion in front of the lens and emits detection signal to transmitter
4 Microphone – Captures the sound on camera side and transmits the sound from camera to monitor
5 Speaker – Produces the sound transmitted from the monitor
6 Camera Antenna – Receives & Sends signals to or from the Receiver
7 Bracket – Use the bracket to mount the camera on a wall or other flat surfaces
10
3
5
6
78 9
4
11
12
13
14
1
2
1
6
7
2
3
4/5
8
9
GB