SWORD HEALTH USER MANUAL NOV 2018
SPONSOR SWORD Health, SA The content of the User Manual, including all figures and drawings, is copyright-protected information belonging to SWORD Health S.A. and/or third parties, and is provided solely for the purpose of operating and maintaining the device. Using the content for other purposes or copying is prohibited. This manual applies to SWORD Phoenix® Manufacturer SWORD Health, S.A. Rua Sá da Bandeira, nº 651 1º Direito 4000-437 Porto Portugal (+351) 223 248 286 hello@swordhealth.
TABLE OF CONTENTS Getting to know SWORD Phoenix 9 1 - Introduction 10 2 - Indications, Contraindications and Adverse Events 11 3 - Candidate Selection 12 4 - Components 13 5 - Digital Therapist Kits 14 6 - Setup 19 7 - Motion Trackers 21 8 - Patient’s Card 22 9 - Straps 27 Phoenix Portal 28 10 - Create a User Account 29 11 - Accessing the Portal 31 12 - Getting to Know the Portal 32 13 - Patient List 34 14 - Add a New Patient 35 15 - Patient Screen 38 16 - Prescription 39
26 - First Configuration 59 27 - Performing the Sessions 72 28 - Updates 93 29 - Calibrate Motion Trackers 96 30 - Place Motion Trackers on Body 98 31 - Settings 103 Glossary 105 32 - Exercise Categories 106 33 - Metrics and Definitions 107 Support 109 Technical specifications 111 34. Service and inspections 112 35.
ABOUT THIS MANUAL 7
This User Manual provides detailed technical and operational information on the medical device SWORD Phoenix. Warning: No modification of this equipment is allowed. Caution: Do not use SWORD Phoenix before reading this manual.
GETTING TO KNOW SWORD PHOENIX 9
1 - INTRODUCTION Caution: The medical device is not to be used by people with visual difficulties. SWORD Phoenix is a medical device with a measuring function. At SWORD Health, we focus on finding technological solutions for some of the most important problems in healthcare systems. By identifying common needs across different problems, we are maximizing our impact on people’s lives. This is why we have focused on physical rehabilitation.
2 - INDICATIONS, CONTRAINDICATIONS AND ADVERSE EVENTS Indications SWORD Phoenix is indicated in the recovery process of musculoskeletal diseases to improve range of motion, muscle strength, motor control and/or movement pattern.
3 - CANDIDATE SELECTION SWORD Phoenix can be used both in patients capable of active collaboration (patient paced tasks) and in patients unable to collaborate (professional paced or passive tasks). In order for patient paced tasks to be performed, the following criteria must be met: 1. The patient must be able to understand both simple and complex motor commands.
4 - COMPONENTS SWORD Phoenix is composed of the following interconnected parts: Motion Trackers Lightweight, high precision sensors that acquire and digitize patient motion and communicate wirelessly with the Digital Therapist. Straps The straps are suitable for the majority of the adult population and must be placed on top of the clothing. It is advisable to wear relatively tight-fitting clothes. Caution: Do not use straps directly on skin. Always use the straps over clothes.
5 - DIGITAL THERAPIST KITS SWORD Phoenix contains four different kits: Every kit is different and contains a different number of components. Make sure you have the correct kit, that it contains every component, and that every component is in perfect condition. How can I make sure this is my kit? On the front of the box, there is a sticker identifying your kit.
LOWER LIMB UPPER LIMB 15
LOW BACK NECK 16
Samsung Galaxy Tab 10.1” (SM T585 Model) 1. Speaker 1 7. Front camera 13. Recent apps button 2. Headset jack 8. Speaker 2 14. Back camera 3. Power button 9. Memory card slot 15. SIM Card slot 4. Volume button (-) 10. Back button 16. Flash camera 5. Volume button (+) 11. Charger/Accessory port 6. Light tracker 12.
Motion Tracker The motion tracker is composed by: 1. Micro USB port 2. RGB Led 3.
6 - SETUP After unpacking and before the first use, ensure that all devices are fully charged. Step 1 - Charging the Tablet To charge the tablet you must: 1. Plug micro USB cable connector into Tablet USB port. 2. Plug the USB cable into Samsung Charger/Accessory port. 3.
Step 2 - Charging the Motion Trackers To charge the Motion Trackers you must: 1. Plug the micro USB cable end-point into the micro USB port of each Motion Tracker. 2. Plug the USB cable into the charger. 3. Plug the charger into the power supply.
7 - MOTION TRACKERS The motion trackers provide 3D angular velocity (by using gyroscopes), 3D acceleration (by using accelerometers) and 3D earth magnetic field (by using magnetometers). These are integrated using sensor fusion algorithms to provide 3D special orientation of limb segments. These motion trackers were specifically designed to be used in a clinical or ambulatory setting with a minimum need of calibration procedures.
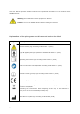
liquids. ● Do not open the charger or power supply case; there are no user serviceable parts inside. ● Do not cover the fan exhaust or obstruct the airflow, this will cause overheating. ● Use only the manufacturer’s power supply and observe terminal polarity. ● Place the charger in a cool spot, away from external heat sources. ● Caution - during charging the charger may become warm.
8 - PATIENT’S CARD Sealed Card The card is sealed inside SWORD Phoenix’s box. In that seal, you can see the Card Number and CVV.
Open package To use the card, open the package and in the center you will find the Card’s Security PIN code. This code is used to start your sessions with the Digital Therapist after you present your card. Never share your personal PIN code with anyone; if you do that, you might put your clinical and personal data at stake.
Card The card’s size and format are the same as those of a credit card. This card belongs to the patient and must never be shared or reused by another person. Once you finish your treatment, you must keep the card. 1. QR Code - A QR code is used to identify the patient. 2. Card Number - This is a unique, six-digit number to identify the card. 3. CVV - Card Verification Value, a three-digit number used as a safety procedure to ensure the card is authentic.
How to use the card Patients use their cards to start their sessions with the Digital Therapist. ● To make sure the card is promptly read, ensure you have good lighting in the room. ● During the reading of the card, keep it at least 8 inches (20 cm) away from the tablet’s front camera. ● During the reading, keep your fingers away from the QR code, otherwise, the Digital Therapist won’t be able to read the card.
9 - STRAPS Caution: Do not use straps directly on skin. Always use the straps over clothing. The straps are suitable for the majority of the adult population. They must be placed over clothing for comfort purposes. It is advisable to wear relatively tight-fitting clothes. Strap cleaning and care Do not put the straps on the washing machine or dryer, since that might damage the material. Wash the straps by hand with tepid water. Use a neutral detergent if they are dirty. Rinse well.
PHOENIX PORTAL 28
10 - CREATE A USER ACCOUNT To access the Portal, you need a user account. User accounts can only be created with an invitation from SWORD Health. Here is how you can create an account, step by step. Step 1 - Invitation Email After the initial contact with SWORD Health’s team, you will get an email inviting you to crea te a user account. If you don’t get the email, please make sure it is not in your Spam box. If it’s not in the Spam box, please contact help@swordhealth.com to help you solve the problem.
Step 3 - Create a User Account In this step, you must fill out every required field. Step 4 - Verification Email After you have finished creating your account, you will receive a verification email. As soon as you get it, you’re ready to access the Portal.
11 - ACCESSING THE PORTAL Use your credentials (Username and Password) to access the portal.
12 - GETTING TO KNOW THE PORTAL The portal has two navigation bars, one on the left side and one on top. In these bars, you can find different features. Top Navigation Bar 1. Institutions - If your user account has access to several institutions with different patients, you can change your view by institution. 2. Messages - By clicking this button, you can send messages to the patients. 3. Setting - By clicking this button, you will open the Portal’s settings.
Lateral Navigation Bar 1. Daily Summary - By clicking this tab, you will access the patients’ current day and former sessions’ summary. 2. Patient List - By clicking this tab, you will access your list of patients. 3. Overview - By clicking this tab, you will get an overview of your patients by week or month.
13 - PATIENT LIST The patient list is the starting point for the entire portal; this is where you can access all your active and inactive patients and where you can add new patients. 1. Add - By clicking this button you can add a new patient. 2. Search - The search bar allows you to look for a patient by name. 3. Sort by - Here, you can sort the patients by Name or Last Session. 4. Show Inactive Patients - This will show you all your inactive patients. 5.
14 - ADD A NEW PATIENT To add a new patient, three consecutive steps must be followed. Step 1 - Fill out patient information In this step, you must fill out every field with the patient information. 1. Next - After you finish filling out the fields, click this button to go to the next step (Step 2).
Step 2 - Associate a card with a patient In this step, ensure all the fields you filled out about the patient are correct and associate a card with the patient. 1. Card number - Insert the 6-digit card number in this field. 2. CVV - Insert the three-digit card’s CVV in this field. 3. Ignore - In case you don’t have a card readily available, ignore this step and associate a card later on. 4. Next - After you finish filling out the fields, click this button to go to the next step (Step 3).
Step 3 - Patient successfully added For the next step, you will get a notification saying the patient was successfully added and you can now prescribe your first session. 1. Yes - If you choose this option, you will prescribe a session to a patient. 2. No - If you choose this option, you will be redirected to the patient’s page.
15 - PATIENT SCREEN In this page, you can access all the information about a patient, as well as other features. 1. Starting date - The date the treatment started, i. e., the date the patient had his first session. 2. Compliance - Compliance of the patient from the starting date to today. 3. Performance - Performance of the patient from the starting date to today. 4. Satisfaction - Satisfaction of the patient regarding the treatment. 5.
16 - PRESCRIPTION In this page, you can access the patient’s prescription. 1. Estimated therapy time - This is an approximate value calculated based on the prescribed sessions. 2. Number of therapy days during the week - The days that show up were set during the patient’s first session prescription. This is where you can edit that value. 3. Active Session - Active Session the patient must perform every day he adheres to the therapy.
Important: All the active sessions are used to calculate Performance, so it’s important that, from the moment a patient adheres to the therapy, he attends all his or her active sessions, in the number of times they are prescribed.
17 - PRESCRIBE A SESSION Step 1 - Set the number of therapy days per week In this step, you must set the number of days the patient should have therapy per week. This step will only show up the first time you prescribe a session to the patient. To change this value, go to the Prescription page. 1. Next - After you set the number of days a patient should adhere to therapy, click here to go to the next step (Step 2).
Step 2 - Choose the therapy In this step, you have to choose the kind of therapy you want to prescribe to the patient. 1. Next - After you set the therapy, click here to go to the next step (Step 3).
Step 3 - Choose the exercises In this step, you can choose the exercises that will compose the session. 1. Therapy - Here you can see the therapy you have chosen before (Step 2). 2. Sides - These filters indicate the different sides for which you can prescribe an exercise. The list of exercises will change according to the sides you choose. 3. List of exercises chosen - By clicking this, a list containing the exercises you selected to compose the session will show up.
Step 4 - Session summary In this step, you will see a summary of the session. 1. Number of times per day - This is where you must set how many times a day the patient must perform a session. 2. Estimated time - A time estimate is made based on the number of exercises selected and the number of repetitions for each exercise. 3. Number of exercises - Number of exercises selected to compose the session. 4. Next - Click here to finish the session prescription (Step 5).
Step 5 - Session prescribed successfully In this step, you will get a notification that the session was successfully prescribed and you have the chance to make another prescription, in case you need one. At this point, the session is now active for the patient to see. The next time he/she begins a daily therapy session, this session will be available for him/her to perform.
18 - SET EXERCISE DIFFICULTY LEVEL Difficulty levels can be set depending on the exercise category: Range of Motion (degrees of motion), Time (in seconds) or Difficulty (Very Easy, Easy, Medium, Hard, Very Hard). 1. Sides/Directions - If an exercise is to be performed on both sides, you will have to specify the difficulty for each side. 2. Difficulty Levels - Here you can see the exercise’s difficulty level and set the intended goal. 3.
19 - PATIENT RESULTS This feature allows the therapist to check on the results of every session the patient has performed, from the starting date to present day. There are many levels of information a therapist can access, from an overview of the sessions the patient performed to the specific results of a given exercise on a given session.
6. Performed Session - Here you can have an overview of how the patient’s session went. You can also access further information about the session: ● Session Duration ● Pain and Fatigue reported by the patient in this session ● Patient Performance in the session 7. See session results - By clicking here you can access detailed results regarding this session (12.9.2). 8.
Detailed session results In this screen, you can see the patient’s results for a specific session with maximum detail, as well as have a general overview of how the exercises went. 1. Date and Time - Date and Time the patient began the session. 2. Session Duration - Session duration from the beginning of the first exercise to the conclusion of the last one. 3. Performance - Patient Performance for this session. 4. Pain and Fatigue - Pain and Fatigue reported by the patient at the end of the session.
Detailed result of an exercise When you access the detailed results of an exercise you see a graphic containing detailed information regarding each repetition/movement the patient made. In this graphic, you can see every mistake made and goal achieved by the patient during the exercise in detail. 1. Side/Direction - Side or Direction of the movements 2. Difficulty Levels - You can find the difficulty levels on the left side of the graphic. 3.
20 - PATIENT PROFILE By accessing the patient profile you can: ● Activate or Deactivate Patient ● Associate or Remove access card ● Share patient ● See and Edit patient profile 1. ID Number (ID) - This number is automatically generated when the patient is created and must be used to identify the patient if you need to contact SWORD Health’s support team. 2. Patient Key - The key was discontinued and must not be used. 3.
21 - OVERVIEW This feature gives you an overview of all the patients that were active at a given week or month. You can choose the time frame you want to see on the top of the page, numbers 1 and 2. 3. Total therapy time - The total therapy time is the sum of the therapy for all the patients in the timeframe you defined. 4. Compliance - Compliance is the average compliance of all the patients in the timeframe you established. 5.
22 - DAILY SUMMARY Every day, you can see all your patients’ activity and have an overview of how sessions are going. As you enter this page, a summary of the present day appears by default, but you can also see the summary of previous days. 1. Daily compliance - Daily compliance tells you the percentage of patients that adhered to therapy out of all the patients that had prescriptions/active sessions and could have had sessions that day. 2.
○ Grey - The patient was unable to perform any movement of the exercise correctly or skipped the entire exercise. ● On mouse-over in the exercise bar, you can access the following information: ○ Name of the exercise ○ Correct vs. Prescribed Repetitions/Movements Important - Patient session results may not be readily available for consultation.
23 - SEND MESSAGES This feature allows you to send messages to your patients. The patient cannot answer via the same channel. 1. To - Here you must choose the patient you want to message 2. Subject - Fill out the message subject 3. Message Body - Write the message to the patient here.
24 - SETTINGS 1. My Account - By accessing this field you can change your password and your profile information. 2. Language - You can change the Portal’s language. 3. Support - This is where you can find our User Manual and support contacts. 4. Terms and Conditions - Here you can read SWORD Phoenix’s terms and conditions. 5. About Us - This will redirect you to our website, where you can find more information on SWORD Health. 6. End Session - By clicking here will end your session in the Portal.
DIGITAL THERAPIST 57
25 - TURN ON THE DIGITAL THERAPIST To turn on the Digital Therapist, press the “on” button continuously.
26 - FIRST CONFIGURATION Step 1 - Connect to the Internet If the device doesn’t have a SIM card with 4G mobile access, a Wi-Fi connection is required. 1st The system will automatically look for available networks to connect.
2nd A list of available networks will show up, choose the one you want to connect to. 3rd Insert the network’s password and click “Connect”. Important - You won’t be able to use SWORD Phoenix unless you have an internet connection.
Step 2 - Choose Language In this step, you must choose the Digital Therapist’s language.
Step 3 - Select User Mode In this step, you must choose the Digital Therapist’s user mode. There are two different modes available: ● Patient - The Digital Therapist will be configured and used by only one patient. This is the recommended mode for patients having therapy at home. ● Multi-Patient - The Digital Therapist will be configured and used by several patients. This is the recommended mode for clinics where several patients access the same digital therapist.
Step 4 - Choose a type of patient authentication If you chose the Patient user mode, you’re required to choose the way the patient will authenticate himself. If you chose the Multi-Patient user mode, you can automatically skip to Step 8. There are two ways to authenticate a patient: ● Card - The patient will use a card to log into the system. ● Patient Key - This type of authentication was discontinued, therefore it must not be used.
Step 5 - Present card In this step, you must present your card. Pay attention to all the instructions we give you to avoid card reading problems. How to use the card: ● To make the card reading easier, make sure there is good lighting in the room. ● During the card reading, please keep it at an 8 inches (20 centimeters) distance from the tablet’s front camera.
Step 6 - Insert PIN Code In this step, you are required to insert the card’s PIN code. This code can be found inside the card’s box.
Step 7 - Save PIN Code In this step, the system will ask you if you want to save the PIN Code. If you accept to save it, you won’t be required to insert the PIN code ever again when accessing your Digital Therapist.
Step 8 - Take a photo This is the step where you get to take your picture. It is important to have a patient’s picture so your therapist can easily identify you and access your data. You can ignore this step, if you don’t want to take a picture.
Step 9 - Screen Brightness In this step, you can choose the screen brightness to however you feel comfortable.
Step 10 - Volume In this step, you can set a comfortable sound volume.
Step 11 - Plug in the Motion Tracker When you get your SWORD Phoenix kit, the motion trackers are turned off and you must turn them on for the first time. To do that, just plug them into the socket and make sure they all show a blue light.
Step 12 - Adjust and clip the straps To finish the Digital Therapist’s setup, a small instructional video will show up telling you how to adjust and clip the straps to your body.
Step 13 - Setup Finished After you complete every step correctly, the Digital Therapist is set up and ready to be used.
27 - PERFORMING THE SESSIONS Step 1 - Waking up The first thing you have to do is wake up the Digital Therapist: to do that, just touch the screen.
Step 2 - Hello After waking up, the Digital Therapist will greet you with “Hello”. Step 3 - Wait The Digital Therapist is communicating with the server, please wait.
Step 4 - Present Card If the last time you showed your ID card to the Digital Therapist was more than 24 hours ago, you will have to do it again. If you showed the card less than 24 hours ago, this screen will be skipped.
Step 5 - Introduce PIN Code If you didn’t choose the save the PIN Code for the following sessions option during setup, you will have to introduce your PIN Code. Important - If you enter the wrong PIN Code more than 5 consecutive times, the card will be blocked and you will have to reach out to the physical therapist in charge of your therapy for him or her to unblock the Portal.
Step 6 - Save PIN Code If you didn’t choose to save your PIN Code during Setup, you will always be asked if you want to do that after step 5.
Step 7 - Waking up the motion trackers In this step, the Digital Therapist will ask you to shake the motion trackers to wake them up. Please shake them and make sure a blue light shows up in all of them. Upon checking if there is a blue light on in every tracker, click the “Connect” button. Important - To keep the motion trackers calibrated, please keep them at the dock with the plug turned upwards during this process.
Step 8 - Connecting to the Motion Trackers In this step, you must wait while the Digital Therapist connects to the motion trackers. If by any reason the Digital Therapist has difficulties connecting to the trackers, go back to step 7, shake them and click the “Connect” button. If the connection is successful, a green light will appear on the motion trackers.
Step 9 - Checking the Motion Trackers In this step, the Digital Therapist will check whether the motion trackers are aligned and correctly adjusted to the dock, as requested in step 7. If the Digital Therapists detects an anomaly, you will be notified to correct it.
Step 10 - Place the motion trackers on the body In this step, the Digital Therapist will ask you to put on the straps and the trackers on your body as shown in the image. Depending on the kind of therapy you’re doing, the number of trackers and the place to put them on may vary, so pay attention to the instructions you’re given, so as to avoid placing them wrong.
Step 11 - Calibrating the trackers on your body In this step, the Digital Therapist will give you different instructions to calibrate the motion trackers on your body. Please pay attention to every instruction so that the calibration is successful. Important - If the motion trackers are not calibrated properly, significant mistakes might occur during the exercises.
Step 12 - Session Presentation In this step, the Digital Therapist will show you the sessions you have prescribed for the day. Good treatment results depend on performing the sessions prescribed by your therapist as well as possible.
Step 13 - Starting a Session After the Digital Therapist shows you the sessions for the day, the first session will automatically start. Important - Sessions are automatically chosen using an algorithm that optimizes therapy results and reduces treatment time.
Step 14 - Exercise Instructions In this step, the Digital Therapist will give you audio and video indications of how to perform the exercise. Always pay attention to every instruction to avoid mistakes. 1. Exercise Number - This is where you can see the number of the current exercise and the total number of exercises for this session. 2. Name - Name of the exercise. 3. Repetitions - Number of repetitions prescribed for this exercise. 4.
Step 15 - Performing the exercise After being given every instruction to perform the exercise (step 14), you are ready to start. Throughout the exercise, the Digital Therapist will give you real-time instructions as to how to perform the movements. These are: ● Instructions to stand correctly before you start the exercise. ● Feedback when the movement was performed correctly. ● Feedback when the exercise was performed incorrectly and which was the mistake made so you can correct it next time.
Step 15.
Step 16 - End of Exercise Once you complete every prescribed repetition/movement, the exercise will automatically end. A summary of the exercise will show up on the screen where you can see: ● How many stars you earned during the exercise ● How many correct repetitions you made When an exercise finishes, if any exercises are left undone, you will go back to step 14, where instructions for the next exercise will be given, followed by the performance of those exercises (Step 15).
Step 17 - End of Session Once you finish the session, a summary containing the following information will show up: ● How many stars you earned during the session ● How many movements/repetitions you performed correctly during the session ● How long the session lasted 89
Step 18 - Pain In this step, you will have to indicate the amount of pain you felt during the session.
Step 19 - Fatigue In this step, you will have to indicate how fatigued you felt during the session.
Step 20 - System Performance In this step, you will have to evaluate the Digital Therapist’s performance during the session. Your evaluation is very important because it allows SWORD Health’s team to keep improving the Digital Therapist, correcting every problem that might have occurred during the exercises.
28 - UPDATES Throughout your therapy, your Digital Therapist might have to perform updates. These updates are meant to bring you new features and correct any problems the Digital Therapist might have. Whenever a new update is available, please install it as soon as possible. Step 1 - Download Update In this step, the update will be downloaded (you might have to wait a few minutes).
Step 2 - Choose “Install” After the download, the Digital Therapist will ask you if you want to update straight away.
Step 3 - Install Confirm that you want to install the update by clicking “Install” at the bottom right corner of the screen.
29 - CALIBRATE MOTION TRACKERS You will have to calibrate the Motion Trackers approximately every two weeks. Step 1 - Rotate the Motion Trackers for approximately 30 seconds After you turn the motions trackers on and before you start your session, the system will ask you to rotate the trackers at the bottom for 30 seconds. Rotate them continuously and make sure you stay away from metallic objects that might interfere with the calibration.
Step 2 - Put the trackers in your hand After you rotate the motion trackers continuously for 30 seconds, you must place them horizontally in hour hand and stand still for 3 seconds. After you finish this process, the motion trackers are calibrated and ready to be used for the next few weeks.
30 - PLACE MOTION TRACKERS ON BODY Depending on the type of therapy you are performing, the motion trackers must be placed in strategic locations on your body. Placing the motion trackers correctly prevents problem during the exercises, so it is very important that you pay attention to the instructions during this phase.
Left Arm Tracker Where to place it? C Chest L External part of the arm, above the elbow L Slightly above the wrist Important - In this image, the straps are placed directly on the skin to exemplify the perfect placement and orientation of the trackers on the body. As told in section 9, the straps must always be worn over clothing, not directly on the skin.
Right Arm Tracker Where to place it? C Chest R External part of the arm, above the elbow R Slightly above the wrist Important - In this image, the straps are placed directly on the skin to exemplify the perfect placement and orientation of the trackers on the body. As told in section 9, the straps must always be worn over clothing, not directly on the skin.
Legs Tracker Where to place it? C Chest R Right Thigh, center R Right Shin, center, just below the knee L Left Thigh, center L Left Shin, center, just below the knee 101
Back Tracker Where to place it? C Back R Low back 102
31 - SETTINGS Step 1 - Access Settings While you’re using the Digital Therapist, you can access the Settings by continuously pressing the Back button on your tablet.
Step 2 - Settings 1. Brightness - Go here to adjust the screen brightness. 2. Volume - Go here to adjust volume. 3. Battery - Go here to: ● Check the motion trackers’ battery ● Check the tablet’s battery. 4. System - Go here to: ● Restart the Digital Therapist. ● Reset the Digital Therapist to configure a new user (patient). 5. User - Go here to: ● Take a profile picture ● End the session on your tablet. 6.
GLOSSARY 105
32 - EXERCISE CATEGORIES Category Description Range of Motion (RoM) These exercises evaluate the range of motion of a single joint and are divided into 5 difficulty levels. Its unit of measurement is degrees (º). Example of difficulty levels for these exercises: ● Level 1 - 10º ● Level 2 - 20º ● Level 3 - 30º ● Level 4 - 40º ● Level 5 - 50º Time These exercises evaluate the patient’s ability to hold a specific position for a given period of time.
33 - METRICS AND DEFINITIONS Metrics and Definitions Description Compliance Compliance is assessed with the number of days a patient adheres to therapy divided by the number of prescribed days. This metric is presented as a percentage. Ranking: ● Very low (0 - 20%) ● Low (21- 40%) ● Medium (41 - 60%) ● High (61 - 85%) ● Very High (=> 86%) Performance Performance is assessed with the number of correct repetitions of a given exercise divided by the total number of repetitions prescribed.
start Days of therapy The number of days from the date of therapy start until the current day or until the day the patient was deactivated. Time of therapy The total amount of time of every session a patient performed. Therapy The therapy is a set of exercises for a given pathology or anatomical location. Prescription The prescription is a set of exercises and its specifications which are determined by the therapist/clinician.
SUPPORT 109
1 - REPORTING ADVERSE EVENTS AND PROBLEMS WITH SWORD PHOENIX If you detect any adverse events or functioning problems while using Sword Phoenix, please contact SWORD Health’s Support teams via an email to help@swordhealth.
TECHNICAL SPECIFICATIONS 111
34. SERVICE AND INSPECTIONS Cleaning General rules when cleaning the outside of SWORD Phoenix and its components: Digital Therapist (Tablet): ● Make sure SWORD Phoenix is unplugged from the power supply before cleaning. ● Do not use alcohol (methyl, ethyl or isopropyl) or any strong dissolvent. Do not use thinner or benzene, abrasive cleaners or compressed air. ● To clean the tablet, use a cloth lightly dampened with a mild detergent. ● Avoid getting liquids inside the touchscreen.
Maintenance SWORD Phoenix has an expected service life of 3 years. In order to guarantee a perfect and effective functioning of the equipment, an annual inspection by a service technician authorized by the manufacturer is recommended. SWORD Health has designed and tested a protocol to perform at each annual inspection - Metrologic Validation Protocol. The aim of the Protocol is to serve as a setup for product calibration, i.e.
35. REGULATORY STATEMENTS 1 - OWNERSHIP SWORD Phoenix® including all the components and documents that are included in the kits, are the sole property of SWORD Health, S.A.. 2 - INTENDED USE SWORD Phoenix is a Medical Device intended to provide physical therapy. The information of the movement of body parts is gathered and used to give real time feedback on patient’s performance. The physical therapy may be performed at home but must be oriented by a physical therapist.
documentation, software, databases, feedbacks, documents and manuals, know-how, as well as all the studies and conclusions of any nature, including the ones connected with technics, business, process and commercialization, already existing and/or which are subsequently created and/or developed by SWORD Health, S.A. and/or by others. 7 - TERMINATION EFFECTS Upon termination of the agreement between SWORD Health, S.A.