
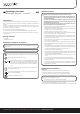
User manual


The home technology brand for the entire house. More information at www.sygonix.com
These operating instructions are a publication by Sygonix GmbH, Nordring 98a, 90409 Nürnberg (www.sygonix.com).
All rights including translation reserved. Reproduction by any method, e.g. photocopy, microfi lming, or the capture
in electronic data processing systems require the prior written approval by the editor. Reprinting, also in part, is
prohibited. These operating instructions represent the technical status at the time of printing. Changes in techno-
logy and equipment reserved. © Copyright 2010 by Sygonix GmbH.
Nr. 34483Y - Version 12/10Legal notice
Installation and Connection
Pay attention to the information in chapter "Preparations for
installation"!
• A correctly sized cut-out in the ceiling is necessary for installation. Refer to chapter
“Technical data”.
• Connect the respective terminal clamp on the top to the output of the halogen trans-
former using a suitable connection cable with the correct cross-section.
• Insert the metal frame into
the cut-out in the ceiling.
• To secure the light, four metal holders
must be folded outwards, these are then
screwed down with the screws to be
found on the inside.
• By turning the screws, the light is secured
in the suspended ceiling by the four metal
holders.
Inserting/replacing the bulb
Attention, risk of burns!
Before you replace a faulty bulb, switch off the light and wait until the faulty
bulb and the light have cooled down suffi ciently.
Do not touch the bulb with your bare hands, use a suitable cloth.
• The cable shoes on the connection cables are to be
screwed to the bulb (QRB111/G53).
• Insert the bulb into the light; the bulb is held in the
light by metal springs.
To remove the bulb, press it out of the holder from
the back.
• Switch on the light's power supply and check that
the new bulb is working.
Adjusting the bulb's light beam
Using the light's pivoting system, each refl ector can be aligned to illuminate the sur-
face desired.
Caution!
Never pivot the bulb system so far that the light beam is directed at the light
housing; there is a risk of overheating and fi re!
Maintain the minimum distance as specifi ed on the light between the light
outlet and illuminated surfaces; risk of fi re!
Depending on the illuminated surface/material, greater distances must be
kept, otherwise, discolouration or material deterioration may result!
Maintenance and Care
• The product does not need any other maintenance except replacement of the light
bulb.
• Switch off the light or disconnect it from the mains before cleaning. After that, allow
suffi cient time for the lamp to cool down.
• The exterior of the light should only be wiped with a clean, soft, dry cloth. Do not use
aggressive cleaning agents or chemical solutions that could damage the housing
(discolouring) or impair operation.
Dust can easily be removed using a clean, soft brush and a vacuum cleaner.
Disposal
Please dispose of the product, when it is no longer of use, according to the
current statutory requirements.
Technical Data
Number of bulbs: 3 x 100 W (max.)
Type of light bulb: QRB111 (= AR-111)
Bulb socket: G53
Operating voltage: 12 V
Pivoting range: 25°
Dimensions: 527 x 188 x 130 mm (L x W x H)
Installation depth: 280 mm (min.)
Installation opening: 506 x 167 mm (L x W)
Depth of material for installation: Max. approx. 45 mm
Weight: approx. 3 kg
Protection class: III
Installation location: Only in dry, enclosed indoor spaces
For minimum distances between several lights, to walls or insulation material or to the
transformer, please take note of the following illustration: