.$ 9 Pr el im in ar y 6TFS (VJEF
el im in ar y .
6TJOH #MVFUPPUI Pr el im in ar y $POUFOUT
el im in ar y .
6TJOH #MVFUPPUI *OUSPEVDUJPO #MVFUPPUI FRVJQQFE EFWJDFT DBO DPNNVOJDBUF XJUIPVU XJSFT VTJOH GSFRVFODZ IPQQJOH TQSFBE TQFDUSVN ')44 3' UP USBOTNJU BOE SFDFJWF EBUB JO UIF ()[ *OEVTUSZ 4DJFOUJGJD BOE .FEJDBM *4. CBOE #MVFUPPUI XJSFMFTT UFDIOPMPHZ JT TQFDJGJDBMMZ EFTJHOFE GPS TIPSU SBOHF GFFU NFUFST DPNNVOJDBUJPOT BOE MPX QPXFS DPOTVNQUJPO .
.$ 9 *OUFHSBUPS (VJEF t t )PQ 4FRVFODF .PEJGJDBUJPO "WPJET UIF JOUFSGFSFODF CZ TFMFDUJWFMZ SFEVDJOH UIF OVNCFS PG IPQQJOH DIBOOFMT $IBOOFM .
6TJOH #MVFUPPUI %JTDPWFSJOH #MVFUPPUI %FWJDF T 'PMMPX UIF TUFQT CFMPX UP EJTDPWFS BOE DSFBUF B CPOE QBJS XJUI PUIFS #MVFUPPUI EFWJDFT 5IF NPCJMF DPNQVUFS DBO SFDFJWF JOGPSNBUJPO GSPN EJTDPWFSFE EFWJDFT XJUIPVU CPOEJOH )PXFWFS PODF CPOEFE BO FYDIBOHF PG JOGPSNBUJPO CFUXFFO UIF NPCJMF DPNQVUFS BOE B CPOEFE EFWJDF PDDVST BVUPNBUJDBMMZ XIFO UIF #MVFUPPUI SBEJP JO UVSOFE PO 5P GJOE #MVFUPPUI EFWJDF JO UIF BSFB im in ar y &OTVSF UIBU UIF #MVFUPPUI EFWJDF CFJOH MPPLFE GPS JT JO EJTDPWFSBCMF NP
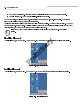
.$ 9 *OUFHSBUPS (VJEF /FYU 5BQ 5IF NPCJMF DPNQVUFS TFBSDIFT GPS PUIFS #MVFUPPUI EFWJDFT JO UIF BSFB 5IF 4FMFDU 3FNPUF %FWJDF XJOEPX BQQFBST y 'JHVSF 4FMFDU 3FNPUF %FWJDF 8JOEPX ar "MM EJTDPWFSFE #MVFUPPUI EFWJDFT BQQFBS JO UIF MJTU CPY 4FMFDU POF PG UIF #MVFUPPUI EFWJDFT JO UIF 3FNPUF %FWJDF /BNF DPMVNO 5BQ UP EJTDPWFS TFSWJDFT QSPWJEFE CZ UIF EJTDPWFSFE EFWJDF im #POEJOH XJUI %JTDPWFSFE %FWJDF T in /FYU Pr 5P CPOE XJUI B EJTDPWFSFE #MVFUPPUI EFWJ
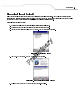
6TJOH #MVFUPPUI *G UIF EFWJDF UP XIJDI UIF NPCJMF DPNQVUFS JT CPOEJOH EPFT OPU BQQFBS JO UIF MJTU FOTVSF JU JT UVSOFE PO JO EJTDPWFSBCMF NPEF BOE XJUIJO SBOHF GFFU NFUFST PG UIF NPCJMF DPNQVUFS /FYU 5IF NPCJMF DPNQVUFS CFHJOT UP QBJS XJUI UIF SFNPUF EFWJDF 4FMFDU UIF SFNPUF EFWJDF UP QBJS XJUI UIFO UBQ Pr el im in ar 0O UIF SFNPUF EFWJDF FOUFS B 1*/ OVNCFS 0O UIF NPCJMF DPNQVUFS UIF 1*/ $PEF 3FRVFTU XJOEPX BQQFBST y 'JHVSF 1BJSJOH XJUI 3FNPUF %FWJDF 8JOEPX 'JHVS
.$ 9 *OUFHSBUPS (VJEF /FYU 5IF EFWJDFT BSF *O UIF 1*/ $PEF UFYU CPY FOUFS UIF 1*/ OVNCFS CFUXFFO BOE DIBSBDUFST BOE UIFO UBQ TVDDFTTGVMMZ QBJSFE y 'JHVSF 1BJSJOH 4UBUVT 8JOEPX 'JOJTI el im in ar 5BQ Pr
6TJOH #MVFUPPUI 3FOBNJOH B #POEFE %FWJDF *G JU JT OFDFTTBSZ UP SFOBNF B CPOEFE EFWJDF JU DBO CF EPOF GSPN UIF #5&YQMPSFS XJOEPX ar y -BVODI #5&YQMPSFS 5BQ BOE IPME UIF EFWJDF UP SFOBNF *O UIF QPQ VQ NFOV TFMFDU 3FOBNF Pr el im 5IF 3FOBNF CPOEFE EFWJDF XJOEPX BQQFBST in 'JHVSF 3FOBNF %FWJDF 4FMFDUJPO %JBMPH #PY 'JHVSF 3FOBNF B #POEFE %FWJDF 8JOEPX 0, &OUFS B OFX OBNF GPS UIF CPOEFE EFWJDF JO UIF UFYU CPY 5BQ %FMFUJOH B #POEFE %FWJDF *G JU JT OP MPOHFS OFDFT
.$ 9 *OUFHSBUPS (VJEF 5BQ BOE IPME UIF EFWJDF UP EFMFUF *O UIF QPQ VQ NFOV TFMFDU %FMFUF 'JHVSF %FMFUF B #POEFE %FWJDF y :FT el im in ar " DPOGJSNBUJPO EJBMPH BQQFBST 5BQ Pr 'JHVSF %FMFUF %FWJDF $POGJSNBUJPO %JBMPH #PY
6TJOH #MVFUPPUI "DDFQUJOH B #POE y &OTVSF UIBU UIF #MVFUPPUI EFWJDF JT UVSOFE PO BOE JO EJTDPWFSBCMF NPEF 8IFO QSPNQUFE UP CPOE XJUI UIF PUIFS EFWJDF UIF 1*/ $PEF 3FRVFTU XJOEPX BQQFBST ar 'JHVSF 1*/ $PEF 3FRVFTU 8JOEPX im el Pr 0, in *O UIF 1*/ $PEF UFYU CPY FOUFS UIF TBNF 1*/ UIBU XBT FOUFSFE PO UIF EFWJDF SFRVFTUJOH UIF CPOE 5IF 1*/ NVTU CF CFUXFFO BOE DIBSBDUFST *O UIF %FWJDF /BNF UFYU CPY FEJU UIF OBNF PG UIF EFWJDF SFRVFTUJOH UIF CPOE JG EFTJSFE 5B
.$ 9 *OUFHSBUPS (VJEF #MVFUPPUI 4FUUJOHT 6TF UIF #5&YQMPSFS 4FUUJOHT XJOEPX UP DPOGJHVSF UIF PQFSBUJPO PG UIF #5&YQMPSFS BQQMJDBUJPO 5BQ 5PPMT 4FUUJOHT 5IF #5&YQMPSFS 4FUUJOHT XJOEPX BQQFBST %FWJDF *OGP 5BC ar y 6TF UIF %FWJDF *OGP UBC UP DPOGJHVSF #5&YQMPSFS in 'JHVSF #5&YQMPSFS 4FUUJOHT %FWJDF *OGP 5BC %JTQMBZT UIF OBNF PG UIF NPCJMF DPNQVUFS %JTDPWFSBCMF .PEF 4FU UP NBLF UIF NPCJMF DPNQVUFS EJTDPWFSBCMF CZ PUIFS #MVFUPPUI EFWJDFT $POOFDUBCMF .
6TJOH #MVFUPPUI 5P BEE B TFSWJDF "EE 5IF "EE -PDBM 4FSWJDF XJOEPX EJTQMBZT 5BQ ar y 'JHVSF "EE -PDBM 4FSWJDF 8JOEPX *O UIF MJTU TFMFDU B TFSWJDF UP BEE 5BQ 5IF &EJU -PDBM 4FSWJDF XJOEPX EJTQMBZT GPS UIF TFMFDUFE TFSWJDF 4FMFDU UIF BQQSPQSJBUF JOGPSNBUJPO BOE UIFO UBQ 4FF UIF GPMMPXJOH QBSBHSBQIT GPS EFUBJMFE JOGPSNBUJPO PO UIF BWBJMBCMF TFSWJDFT 0, %JBM 6Q /FUXPSLJOH 4FSWJDF im in 0, Pr el %JBM VQ /FUXPSLJOH BMMPXT B EJBM VQ NPEFN UP CF BDDFTTFE CZ PUIFS
.$ 9 *OUFHSBUPS (VJEF 'JMF 5SBOTGFS 4FSWJDF 'JMF USBOTGFS BMMPXT GJMFT UP CF CSPXTFE CZ PUIFS #MVFUPPUI EFWJDFT ar y 'JHVSF 'JMF 5SBOTGFS *OGPSNBUJPO 8JOEPX %JTQMBZT UIF OBNF PG UIF TFSWJDF 4FSWJDF 4FDVSJUZ 4FMFDU UIF UZQF PG TFDVSJUZ GSPN UIF ESPQ EPXO MJTU /POF "VUIFOUJDBUF PS "VUIFOUJDBUF &ODSZQU 3PPU %JSFDUPSZ 4FMFDU UIF EJSFDUPSZ UIBU PUIFS #MVFUPPUI EFWJDFT DBO BDDFTT 'JMF 1FSNJTTJPOT 4FMFDU UIF GJMF QFSNJTTJPOT GPS UIF TFMFDUFE EJSFDUPSZ $IFDL UIF BQQSPQSJBUF CPY UP H
6TJOH #MVFUPPUI %P OPU BMMPX DMJFOUT UP QVTI PCKFDUT *OCPY %JSFDUPSZ 4FMFDU B EJSFDUPSZ XIFSF BOPUIFS #MVFUPPUI EFWJDF DBO TUPSF GJMFT 1FSTPOBM "SFB /FUXPSLJOH 4FSWJDF ar y 1FSTPOBM "SFB /FUXPSLJOH IPTUT B 1FSTPOBM "SFB /FUXPSL XIJDI BMMPXT DPNNVOJDBUJPO XJUI PUIFS #MVFUPPUI EFWJDFT in 'JHVSF 1FSTPOBM "SFB /FUXPSLJOH 8JOEPX %JTQMBZT UIF OBNF PG UIF TFSWJDF 4FSWJDF 4FDVSJUZ 4FMFDU UIF UZQF PG TFDVSJUZ GSPN UIF ESPQ EPXO MJTU /POF "VUIFOUJDBUF PS "VUIFOUJDBUF &ODSZQU 4VQQPSU (SPVQ "E
.$ 9 *OUFHSBUPS (VJEF 4FSWJDF /BNF %JTQMBZT UIF OBNF PG UIF TFSWJDF 4FSWJDF 4FDVSJUZ 4FMFDU UIF UZQF PG TFDVSJUZ GSPN UIF ESPQ EPXO MJTU /POF "VUIFOUJDBUF PS "VUIFOUJDBUF &ODSZQU -PDBM $0. 1PSU 4FMFDU UIF $0.
6TJOH #MVFUPPUI %JTDPWFSZ 5BC in ar y 'JHVSF #5&YQMPSFS 4FUUJOHT %JTDPWFSZ 5BC *ORVJSZ -FOHUI Pr 7JSUVBM $0. 1PSU 5BC el %JTDPWFSFE %FWJDFT im /BNF %JTDPWFSZ .PEF 'JHVSF #5&YQMPSFS 4FUUJOHT 7JSUVBM $0. 1PSU 5BC $0. #MVFUPPUI $0. #MVFUPPUI $0.
.$ 9 *OUFHSBUPS (VJEF .JTDFMMBOFPVT 5BC in ar y 'JHVSF #5&YQMPSFS 4FUUJOHT .
Wireless Applications Contents
4-2 MC909X Integrator Guide
Wireless Applications 4-3 Introduction Wireless LANs allow mobile computers to communicate wirelessly and to send captured data to a host device in real time. Before a mobile computer can be used on a Spectrum24 WLAN, the facility must be set up with the required hardware to run the wireless LAN and the mobile computer must be properly configured. Refer to the documentation that came with the Access Points (APs) for instructions on setting up the hardware.
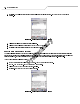
4-4 MC909X Integrator Guide Find WLANs Application Use the Find WLANs application to discover available networks in the vicinity of the user and mobile computer. To open the Find WLANs application, tap the Signal Strength icon - Find WLANs. The Find WLANs window displays. Figure 4-2. Find WLAN Window Find WLAN display is limited to 32 items (ESSIDs or MAC addresses). A combination of up to 32 ESSIDs/APs may be displayed.
Wireless Applications 4-5 Tap-and-hold on a WLAN network to launch a context sensitive menu. The menu provides two options: Connect and Refresh. Select Refresh to refresh the WLAN list. Wireless profiles may also be created from one of the listed networks by selecting a network from the list and then selecting Connect. Selecting Connect displays the Profile Editor Wizard. The wizard is initialized to set the values for the selected network.
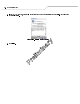
4-6 MC909X Integrator Guide Operating Mode Use the Operating Mode dialog box to select the operating mode (Infrastructure or Ad-Hoc) and the country location. Figure 4-4. Operating Mode Dialog Box Table 4-5. Operating Mode Fields Field Description Operating Mode Infrastructure: Select Infrastructure to enable the mobile computer to transmit and receive data with an AP. Infrastructure is the mobile computer default mode.
Wireless Applications 4-7 Ad-Hoc Use the Ad-Hoc dialog box to select the necessary information to control Ad-Hoc mode. This dialog box does not display if Infrastructure mode is selected. To Select Ad-Hoc mode: 1. Select a channel number from the Channel drop-down list. The default is Channel 1 (2412 MHz). Figure 4-5. Ad-Hoc Settings Dialog Box 2. Tap Next. The Authentication dialog box displays. Authentication Use the Authentication dialog box to configure authentication.
4-8 MC909X Integrator Guide Tunneled Authentication Use the Tunneled Authentication dialog box to select the tunneled authentication options. There are different selections available for PEAP or TTLS authentication. To select a tunneled authentication type Figure 4-7. Tunneled Auth Dialog Box 1. Tap a tunneled authentication type from the drop-down list. 2. Select the User Certificate check box if a certificate is required.
Wireless Applications Table 4-8 lists the TTLS tunneled authentication options. Table 4-8. TTLS Tunneled Authentication Options TTLS Tunneled Authentication Description CHAP Challenge Handshake Authentication Protocol (CHAP) is one of the two main authentication protocols used to verify the user name and password for PPP Internet connections. CHAP is more secure than PAP because it performs a three way handshake during the initial link establishment between the home and remote machines.
4-10 MC909X Integrator Guide User Certificate Selection If the User Certificate check box on the Tunneled Authentication dialog box is checked or if TLS is the selected authentication type, then the Installed User Certificates dialog box displays. The user is required to select a certificate before proceeding. Select a certificate from the drop-down list of currently installed certificates. When a certificate is selected its name appears in the drop-down list.
Wireless Applications 4-11 Server Certificate Selection If the Validate Server Cert check box is checked, a server certificate is required. The wizard displays the Installed Server Certs dialog box and a certificate must be selected before proceeding. An hour glass may be displayed as the wizard populates the existing certificate list. If the required certificate is not listed, then it must be installed. To select a certificate: 1.
4-12 MC909X Integrator Guide The default path or extension can be changed (and a new path searched) when the ENT key is pressed. A certificate must be selected before tapping the Install button. Figure 4-12. Confirmation Dialog Box A confirmation dialog displays verifying the installation. If the information in this dialog is correct, tap the Yes button, If the information in this dialog is not correct tap the No button. The wizard returns to the Installed Server Certs dialog box.
Wireless Applications 4-13 Table 4-9. Cache Options (Continued) Description On Resume If the On Resume option is selected, an authenticated user is reauthenticated when a suspend/resume occurs. Once the user is reauthenticated, the user is prompted for credentials. If the user does not enter the same credentials that were entered prior to the suspend/resume, the user is disconnected from the network. The user may try up to three times to enter the correct credentials.
4-14 MC909X Integrator Guide Figure 4-15. At Time Dialog Box 6. Enter the time using the 24 hour clock format in the (hh:mm) box. 7. Tap > to move the time to the right. Repeat for additional time periods. 8. Tap Next. The User Name dialog box displays. The user name and password can be entered (but is not required) when the profile is created. When a profile authenticates with credentials that were entered in the profile, caching rules do not apply.
Wireless Applications 4-15 When authenticating with a Microsoft IAS server, do not use advanced identity. Figure 4-18. Advanced Identity Dialog Box Tap Next, the Encryption dialog box displays. Encryption Use the Encryption dialog box to select an encryption type. The Encryption dialog box only allows encryption types that can be used with the currently selected authentication type. See Table 4-11 for the encryption types available with each authentication type. Figure 4-19.
4-16 MC909X Integrator Guide Table 4-10. Encryption Options (Continued) Encryption Description 128-Bit WEP Select 128-Bit WEP for the adapter to use the 128-bit key length WEP encryption. WEP keys are manually entered in the edit boxes. Only the required number of edit boxes for a key length is displayed (26 Hex digit value for 128-bit keys). Use the Key Index drop-down list to configure the four WEP keys. The adapter uses the selected key.
Wireless Applications 4-17 Key Entry Page If either 40-Bit WEP or 128-Bit WEP is selected the wizard proceeds to the key entry dialog box unless the Use Passkey check box was selected in the Encryption Dialog Box (see Figure 4-19 on page 4-15). To enter the key information: 1. Enter the 40-bit or 128-bit keys into the fields. 2. Tap Next. Figure 4-20. 40-Bit WEP Keys Dialog Box Figure 4-21.
4-18 MC909X Integrator Guide IP Mode Use the IP Mode dialog box to configure network address parameters: IP address, subnet, gateway, DNS and WINS. Figure 4-23. IP Config Tab (DHCP) Table 4-12. IP Mode Options Encryption Description DHCP Select Dynamic Host Configuration Protocol (DHCP) from the IP Mode drop-down list to obtain a leased IP address and network configuration information from a remote server. DHCP is the default setting for the mobile computer profile.
Wireless Applications 4-19 Select the Advanced check box to enter additional address information. If the Advanced check box is selected then tapping NEXT displays the Advanced Address Entry dialog box to enter the Gateway, DNS, and WINS address. If the Advanced check box is not selected then tapping NEXT displays the Transmit Power dialog box. Figure 4-25.
4-20 MC909X Integrator Guide Table 4-15. Transmit Power Dialog Box (Infrastructure Mode) Field Description Automatic Select Automatic to use the AP power level. Automatic is the default mode for mobile computers operating in Infrastructure mode. Power Plus Select Power Plus to set the mobile computer transmission power one level higher than the level set for the AP. Figure 4-27. Transmit Power Dialog Box (Ad-Hoc Mode) Table 4-16.
Wireless Applications Power consumption is also related to the transmit power settings. Table 4-17. Battery Usage Options Field Description CAM Continuous Aware Mode (CAM) provides the best network performance, but yields the shortest battery life. Fast Power Save Fast Power Save performs in the middle of CAM and MAX Power Save with respect to network performance and battery life. Default. MAX Power Save Max Power Save yields the longest battery life while potentially reducing network performance.
4-22 MC909X Integrator Guide Manage Profiles Application The Manage Profiles window provides a list of user configured wireless profiles. Up to 32 profiles can be defined at any one time. To open the Manage Profiles window, tap the Signal Strength icon - Manage Profiles. The Manage Profiles window displays. Figure 4-29. Manage Profiles Window Icons next to each profile identify the profiles current state. Table 4-18. Profile Icons Icon No Icon Description Profile is not selected, but enabled.
Wireless Applications 4-23 The profiles are listed in priority order for use by the automatic roaming feature. Change the order by moving profiles up or down. Edit existing profiles by selecting one in the list and then tap-and-hold to display the menu. The menu allows the selected profile to be connected, edited, disabled (enabled) or deleted. (Note: the Disable menu item changes to Enable if the profile is already disabled.) Figure 4-30.
4-24 MC909X Integrator Guide Creating a New Profile Create new profiles from the Manage Profiles window by performing a tap-and-hold anywhere in this window. A menu with only the Add highlighted displays. Figure 4-32. Manage Profiles - Add Select Add to display the Profile Wizard wherein the profile name and ESSID can be set. Use the Profile Wizard to set security, network address information and power consumption level for the new profile.
Wireless Applications Export a Profile To export a profile to a registry file, select a profile from the list and select Export from the pop-up menu. The save As dialog box displays with the Application folder and a default name of WCS_PROFILE{profile GUID}.reg (Globally Unique Identifier). Figure 4-33. Save As Dialog Box If required, change the Name field and tap OK. A confirmation dialog box appears after the export is complete.
4-26 MC909X Integrator Guide Wireless Status Application The Wireless Status application window displays the current wireless connection status and information about the wireless connection. To open the Wireless Status window, tap the Signal Strength icon - Wireless Status. The Wireless Status window displays. Figure 4-34. Wireless Status Window The Wireless Status window contains the following options. Tap the option to display the option window.
Wireless Applications 4-27 Signal Strength Window The Signal Strength window provides information about the connection status of the current wireless profile that includes signal quality, missed beacons and transmit retry statistics. The BSSID address (shown as “AP MAC Address) displays the AP currently associated with the connection. If Ad-Hoc mode is in use, the AP MAC Address shows the BSSID of the Ad-Hoc network. All information in this window updates every 2 seconds.
4-28 MC909X Integrator Guide Table 4-19. Signal Strength Status Field Description Missed Beacons Displays a percentage of the amount of beacons missed by the mobile computer. The fewer transmit retries, the more efficient the wireless network is. Beacons are uniform system packets broadcast by the AP to keep the network synchronized. Signal Level The AP signal level in decibels per milliwatt (dBm). Noise Level The background interference (noise) level in decibels per milliwatt (dBm).
Wireless Applications 4-29 Current Profile Window The Current Profile window displays basic information about the current profile and connection settings. This window updates every two seconds. To open the Current Profile window, tap Current Profile in the Wireless Status window. The Current Profile window displays. Figure 4-36. Current Profile Window Table 4-20.
4-30 MC909X Integrator Guide IPv4 Status Window The IPv4 Status window displays the current IP address, subnet and other IP related information assigned to the mobile computer. It also allows the address to be renewed if it the profile is currently using DHCP to obtain the IP information. When the user tap Renew a full DHCP discover initiates. The IPv4 Status window should update automatically when the IP address changes. To open the IPv4 Status window, tap IPv4 Status in the Wireless Status window.
Wireless Applications 4-31 Wireless Log Window The Wireless Log window displays a log of important recent activity, such as authentication, association, DHCP renewal completion, in time order. Users can choose to save the log to a file or to clear the log (within this instance of the application only). There is also an auto scroll feature to automatically scroll down when new items are added to the log. To open the Wireless Log window, tap Wireless Log in the Wireless Status window.
4-32 MC909X Integrator Guide Versions Window The Versions window displays software, firmware and hardware version numbers. This window only updates each time it is displayed. There is no need to update constantly. The content of the window is determined at runtime, along with the actual hardware and software to display in the list. Executable paths of the software components on the list are defined in registry, so that the application can retrieve version information from the executable.
Wireless Applications 4-33 Wireless Diagnostics Application The Wireless Diagnostics application window provides links to perform ICMP Ping, Trace Routing and Known APs. To open the Wireless Diagnostics window, tap the Signal Strength icon - Wireless Diagnostics. The Wireless Diagnostics window displays. Figure 4-40. Wireless Diagnostics Window The Wireless Diagnostics window contains the following options. Tap the option to display the option window.
4-34 MC909X Integrator Guide ICMP Ping Window The ICMP Ping window allows a user to test a connection at the network layer (part of the IP protocol), between the mobile computer and an AP. Ping tests only stop when the user taps the Stop Test button, closes the Wireless Diagnostics application, or if the mobile computer switches between infrastructure and ad-hoc modes. To open the ICMP Ping window, tap the ICMP Ping in the Wireless Diagnostics window. The ICMP Ping window displays. Figure 4-41.
Wireless Applications 4-35 Trace Route Window Trace Route traces a packet from a computer to a host, showing how many hops the packet requires to reach the host and how long each hop takes. The Trace Route utility identifies where the longest delays are occurring. The Trace Route window allows a user to test a connection at the network layer (part of the IP protocol), between the mobile computer and any place on the network.
4-36 MC909X Integrator Guide Known APs Window The Known APs window displays the APs in range using the same ESSID as the mobile computer. This window only available when in the Infrastructure mode. To open the Known APs window, tap Known APs in the Wireless Diagnostics window. The Known APs window displays. Figure 4-43. Known APs Window The icon next to the AP indicates: The AP is the currently associated access point, and it is set to mandatory.
Wireless Applications 4-37 Options Use the wireless Option dialog box to select various operation settings. The options are saved when Save is tapped. If the user taps X before saving and an option was changed, a dialog box displays asking the user to close without saving the changes. The options are: • • • • • • Operating Mode Filtering Regulatory Band Selection System Options Change Password Export.
4-38 MC909X Integrator Guide Regulatory Options Use the Regulatory settings to configure the country the mobile computer is in. Due to regulatory requirements (within a country) a mobile computer is only allowed to use certain channels. Figure 4-45. Regulatory Options Dialog Box Table 4-23. Regulatory Options Field Description Settings Select the country of use from the drop-down list.
Wireless Applications System Options Use the system options to set miscellaneous system setting. Figure 4-47. System Options Dialog Box Table 4-25. Band Selection Options Field Description Profile Roaming Select the Profile Roaming check box to configure the mobile computer to roam to the next available WLAN profile when it moves out of range of the current WLAN profile. Enable IP Mgmt Select Enable IP Mgmt check box to enable the Wireless Companion Services to handle IP Address management.
4-40 MC909X Integrator Guide Change Password Dialog Box Use the Change Password dialog box to require a password before any profile can be edited. This allows system administrators to pre-configure profiles and not allow a user to change the network settings. The user could also use this feature to protect their settings from a guest user. By default, the password is not set. Figure 4-48. Change Password Window 1.
Wireless Applications Figure 4-50. Export Options Save As Dialog Box 2. The default folder is \Application\FusionApps\Certs\. 3. In the Name field, enter a file name. 4. Tap OK.
4-42 MC909X Integrator Guide To export all profiles: 1. Tap Export All Profiles. The Save As dialog box displays. Figure 4-51. Export All Profiles Save AS Dialog Box 2. Navigate to the desired folder. 3. In the Name field, enter a file name. 4. Tap OK. When Export All Profiles is selected the current profile is also saved. This information is used to determine which profile to connect with after a warm boot or cold boot.
Wireless Applications 4-43 Registry Settings Some of the parameters can be modified through a registry key. The registry path is: HKLM\SOFTWARE\Symbol Technologies, Inc.\Configuration Editor Table 4-26. Registry Parameter Settings Key Type Default Description CertificateDirectory REG_SZ \\Windows The default directory to find certificates. EncryptionMask REG_DWORD 0x0000001F Defines the encryption types that are currently supported.
4-44 MC909X Integrator Guide Log On/Off Application When the user launches the Log On/Off application, the mobile computer may be in two states; the user may be logged onto the mobile computer by already entering credentials through the login box, or there are no user logged on. Each of these states have a separate set of use cases and a different look to the dialog box.
Wireless Applications 4-45 Tapping OK sends the credentials though WCS API. If there are no credentials entered, a dialog box displays informing the user which field was not entered. The Log Off button only displays when a user is already logged on. When the Log Off button is tapped, the user is prompted with three options: Log Off, Switch Users, and Cancel. Switching users logs off the current user and re-initialize the login dialog box to be displayed for when there is no user logged on.
4-46 MC909X Integrator Guide