
Installation Guide
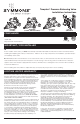

8ZV-3247 REV 0
8. SERVICE INSTRUCTIONS
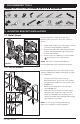
8.1 Removing Flow Control Spindle
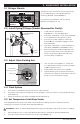
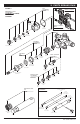
Reference parts breakdown (see FIGURE 9). See trim manual for trim removal instructions.
1. Shut o water supply to valve. Turn valve’s TA-10 flow control spindle to open position using
trim handle.
2. Remove trim handle and dome cover.
3. Remove escutcheon plate by first removing escutcheon screws.
4. Unscrew both T-12A cap assembly and flow control spindle together.
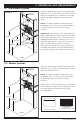
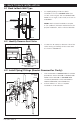
8.2 Hot/Cold Seat Repair Kit
Service requires TA-4 hot and cold seats and T-35C removal tools.
1. Remove flow control spindle (see STEP 8.1).
2. Remove both seats with removal tools, turning counter clockwise.
3. Replace both seats even if only one appears worn.
4. Install and tighten both seats to 15 foot pounds of torque, turning clockwise.
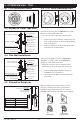
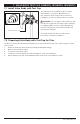
8.3 Flow Control Spindle Washer Repair Kit
Service requires TA-9 washer repair kit.
1. Remove flow control spindle (see STEP 8.1).
2. Remove cold washer by holding flow control spindle using trim handle and unscrew cold washer
retainer using channel lock pliers, turning counter clockwise.
3. Remove hot washer by removing hot washer screw.
8.4 Checking Water Pressure Balancing Piston
The perforated end of the flow control spindle houses the water pressure-balancing piston.
1. Remove flow control spindle (see STEP 8.1).
2. Shake flow control spindle and listen for clicking noise. Piston should be free to slide back and
forth the full length of its travel.
3. If piston appears restricted then do the following: a) tap the handle, or the stem end of flow
control spindle, against a solid object to free the piston, or b) try soaking in household vinegar
and repeat tapping handle or stem of flow control spindle.
4. If unable to free piston, replace flow control spindle.
8.5 Valve Reassembly
Reassemble valve, reversing the procedure in STEP 8.1. Be sure flow control spindle is drawn close to
the cap before screwing cap assembly back into valve.