
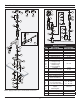
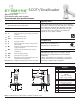
Installation Guide


4
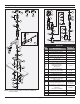
Installation (adjustments)
Maintenance
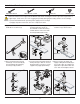
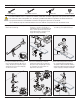
1) Loosen set screw (B), remove
handle (A) and remove cycle timing
washers (C).
2) Remove bushing (D) and upper
housing (E).
3) Remove cartridge (F) and inspect for
debris. Replace cartridge if neces-
sary. Reassemble faucet reversing
procedure outlined in Steps 1 & 2.
1
2
D
E
F
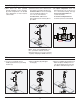
2
B
A
1
3
C
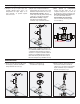
Note: When setting MAXIMUM cycle
time, you MUST maintain at least 3
timing washers (C) so as not to exceed
.25 gal/cyl at 60 psi (per ASME A112.18.1)
2) Faucet is factory set to shortest cycle
time with 6 cycle timing washers (C).
To increase time, loosen set screw (B),
remove handle (A) and remove
one or more of the washers.
To reduce time, add washers.
Reassemble faucet reversing above
procedure.
2
B
A
1
3
C
1) After faucet has been operated
through a number of cycles, and sup-
ply water temperature is at desired
level, adjustments to these features
can be made.
H C
HOT
COLD
U
3) To adjust temperature insert 1/4"
allen wrench into hex socket in cen-
ter of mechanical mixing valve (U).
To increase temperature turn
counter-clockwise.
To decrease temperature turn
clockwise (110°F recommended).