
Installation Guide


9
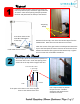
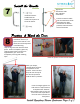
With the door temporarily
supported by the wedges and the
acrylic drip rail, adjust the door
and the panel to the clearances
shown. Adjust the fixed panel by
10
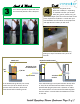
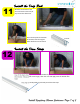
Remove the door, drill
the holes and install
wall plugs (if required) as
described in step 4.
Remember to partially
fill with silicone and trim
the wall plugs flush with
the wall.
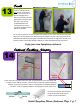
Carefully maintain
the position of the
door and double
check it for plumb.
Mark the six holes
with a Sharpie™.
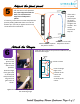
Replace the door and install with the six screws provided. Remove the spacers and
the clear drip rail and check the action of the door.
Tighten all Face Plates and Clamps securely.
You may adjust the alignment of the door and fixed panel by removing the plastic
caps and loosening the four set screws on the hinges – two on each hinge. Move the
door into alignment with the fixed panel and re-tighten the screws. Be careful not to
over-tighten and strip the screws. Replace the plastic caps.
loosening the set screws and sliding laterally. Use
the wooden wedges to move the panel away from
the wall and to establish the 1/8” space with the
door. Un-tape the temporary door supports and
use the wedges to adjust the door vertically until it
is lined up with the top of the fixed panel and there
is a consistent 1/8” space between the door and the
panel. With the door in position, loosen the face
plates on the hinges and press the body of the hinge
tight to the wall.