Fireplace Been discarding Unpractical lov parts on clean, padded Lee eee GE Tee es Lhe sen Lee cn GG el pee ee TT Quantity Quantity 3 Quantity Base Upper Front Anal Vertical Panel (4) Quantity | (6) Quantity | (8) Quantity Cross Panel Left Fran Panel Right Front Panel 7) © Quantity |B) Angularity | 19) Quantity Middle Front Paps Top Panel Left Rigs Panel {10 Quantity FOr Quantity | (12) Quantity Right Bide Patel Five! Shelf Middle Panel
CEs Luann le Skulduggery Wood Block Firebox {inseparable carton) & Quantity |B Quantity | & Quantity Wood Dowel Dia 6/16" x 121471 | Cam Bolt Can Look or Quantity JE Quantity: +F Quantity Brew Dial 8" x1" | Boru Dia x587L | Bracket G Quantity | H Quantity | Quantity Anchor RARER Screw Oia t/@ wp 12’L Plastic Strap 4 Quantity of 4 Small Wood Bows! Dia 5/18" 3/471 Care and Cleaning Instructions: Before using, wipe with a clean, radiotherapy. Periodically apply furniture wax to renew the finish.
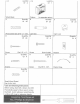
cee Col ve a when you feel tight” Figure 4 “Please do not-over tighten com bolts, Please stop oF Start tightening Cam Bolts with fingers to help align, Insert Can Locks (CY Info hole son Cross Banal (dad Upper Front Panel (2) Resew Cam Bolt (BY and inset Wood Dowels (A) sinkholes on Veronica Pang (3) Hf Tech Vertical Panels: (3) t Cross Pang (rand Upper Front Bane! (Zyl inserting Wood Dowels (8) snd Can Bolts (B) info corresponding holes until Vertical Panel {3} Crass Panel 8) and Upper Front Panel) gist.
replace eo ele eg ee Comfortableness dot on figure 1 lo assembled anti on: figure Z with Strews and Small Wend Dowels 1 Lighten Screws) with Philips: screwdriver Figure: 3 Straightening Tam Sopwith fingers fo help align insert Cap Locks (CC into holes:on Fixed Shelf 15 Severe Cam Bolts (B) into ho lesion Left Side Panel{8) and Right Bide Panel £18). Attach Left Bide Pane] (Bend Right: Side Panel CH) to Fixed Shalt (1) by inserting Cay Bolts {B) int uninteresting hole untied Siege Panels).
Figure 5 Frightening Cam Belts with fingers wheal align, Insert Cam Los ks {Chin holes ar Left Side Panamanian, Right Side Penal (10), and Fixed Shelf): # Boru Can and chert Waa Dowses (A) into holes on-assembled unit off figure 3. Attach Left Side Panel (9), Right Side Pane! (10), and Fixed Shelf (11) 1h asbembled.dnit oi figure shredding Wood Dowels (4) and Cam Bolts (Byintocorresporniding holes until Left Side Panel (9), Right Side Pane! (10), Fed Shelf (11, and assembled unity figure 3 irrigate.