
User`s guide
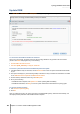
Table Of Contents
- Synology DiskStation User's Guide Based on DSM 4.0
- Chapter 1: Introduction
- Chapter 2: Get Started with Synology DiskStation Manager
- Chapter 3: Modify System Settings
- Chapter 4: Manage Storage Space
- What is Volume and Disk Group?
- Manage Volumes or Disk Groups with Storage Manager
- Manage iSCSI Target with Storage Manager
- Manage iSCSI LUNs with Storage Manager
- Manage Hard Disks with Storage Manager
- Manage External Disks
- Chapter 5: Access your DiskStation from the Internet
- Chapter 6: Enhance Internet Security
- Chapter 7: Set Up File Sharing
- Chapter 8: Access Files from Anywhere
- Access Files within the Intranet
- Access Files via FTP
- Access Files via WebDAV
- Sync Files via Cloud Station
- Access Files via File Station
- File Station Appearance
- Manage File Station Options
- Search for Files or Folders
- Set File Station in Action
- Download Files or Folders from Synology DiskStation
- Upload Files or Folders to Synology DiskStation
- Copy or Move Files or Folders on Synology DiskStation
- Rename a File or Folder on Synology DiskStation
- Create a Folder
- Delete Files or Folders
- Extract an Archive
- Compress Files or Folders
- Open a File in a New Window
- Create My Favorites or Desktop Shortcuts
- Edit the Properties of Files and Subfolders
- Share File Links
- Mount Remote Folders or Virtual Drives
- Edit Music Information
- View Documents, Photos, or Videos
- Edit Photos
- Chapter 9: Back Up Data
- Chapter 10: Host Websites, Email Server, and Print Server
- Install Featured Applications
- Chapter 11: Discover Various Applications with Package Center
- Chapter 12: Share Photos, Videos, and Blogs with Photo Station
- Chapter 13: Play Music with Audio Station
- Chapter 14: Download Files with Download Station
- Chapter 15: Safeguard Your Environment with Surveillance Station
- Chapter 16: Manage Media Server and iTunes Service
- Chapter 17: Perform Advanced Management Tasks
- Check System Information
- Monitor System Resources
- Update DSM
- Receive Event Notifications
- Access Applications with Independent Login
- Index Multimedia Files for Applications
- Reset admin's Password
- Restore Synology DiskStation to Factory Defaults
- Reinstall Synology DiskStation
- Enable SNMP Service
- Enable Terminal Services
- Chapter 18: Communicate with Mobile Devices
Synology DiskStation User's Guide
Based on DSM 4.0
154 Chapter 17: Perform Advanced Management Tasks
For more information about how to select notification event types and edit notification messages, click the Help
button (with a question mark) at the top-right corner, and then go to Control Panel > System > Notification >
Advanced.
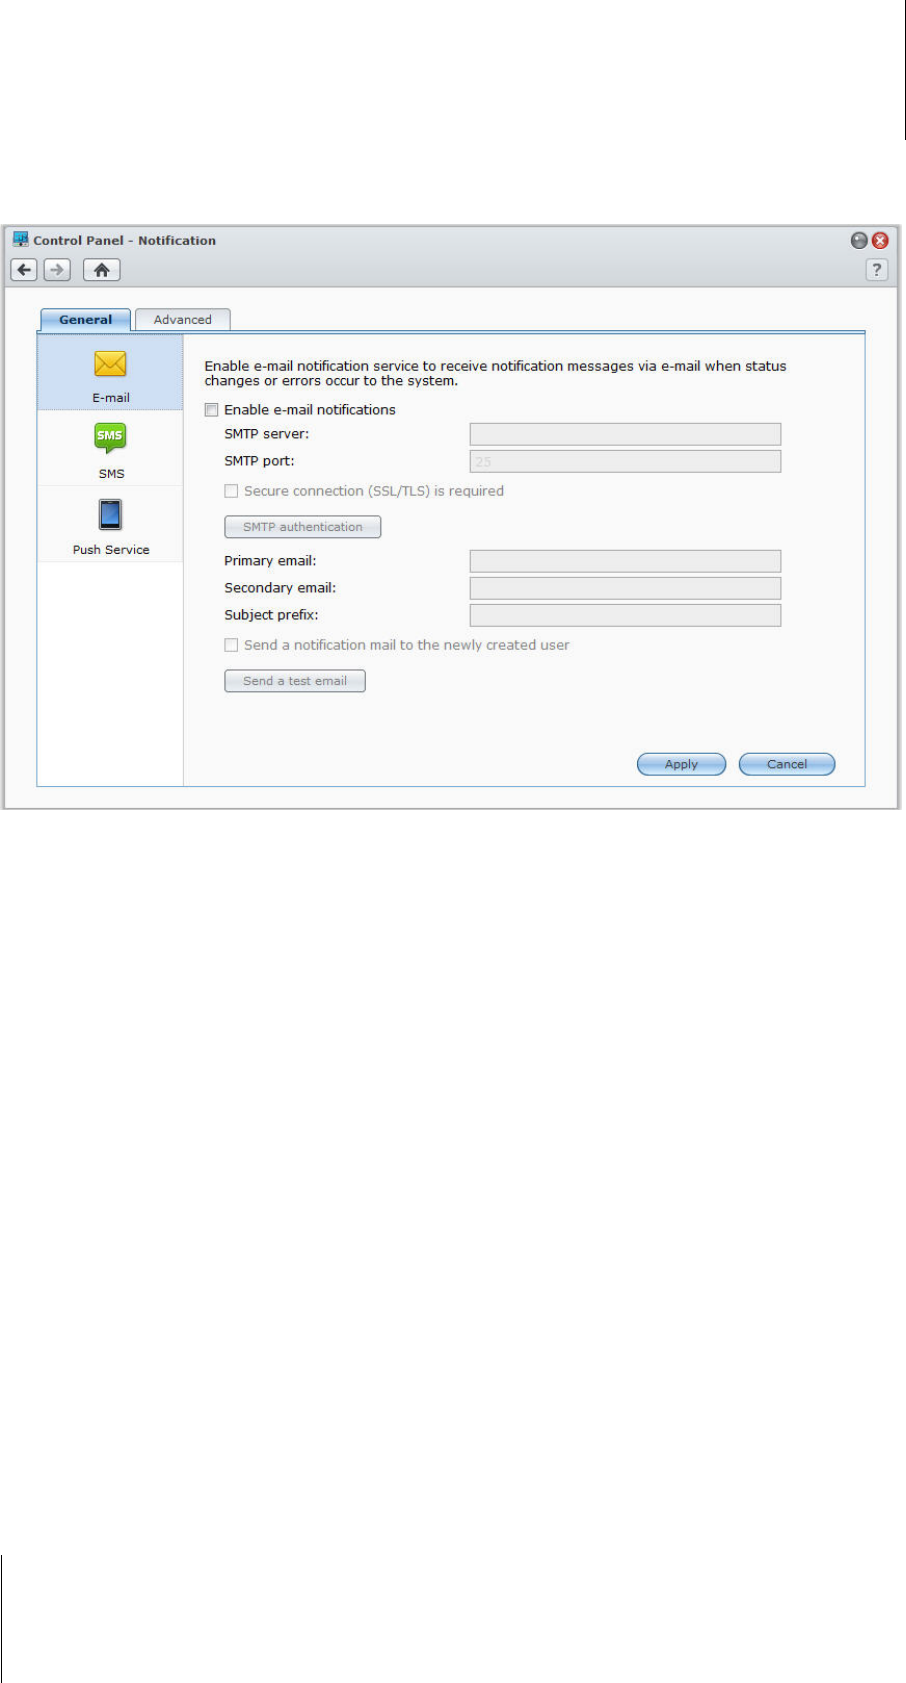
Manage E-mail Notification Service
Click the E-mail section to set up email notifications.
To enable E-mail notification:
Tick Enable e-mail notifications and complete the following settings:
1 Enter the SMTP server name or IP address.
2 By default, the SMTP port number is 25. Modify the number if you have specified a different SMTP port while
setting up port forwarding rules.
3 If your SMTP server requires SSL/TLS connection, tick Secure connection (SSL/TLS) is required.
4 If your SMTP server requires SMTP authentication, click SMTP authentication and tick Authentication
required, enter your username and password for the email server, and then click Save.
5 Enter the email address that will receive the notification mails in the Primary email or the Secondary
email field.
6 Click Send a test email to see if your email settings are set up properly.
7 If you want to add a subject prefix in front of the notification mail subject, enter it in the Subject prefix field.
The prefix helps you identify which DiskStation the notification mail was sent from.
8 If you want to send a notification mail to the newly created user, tick Send a notification mail to the newly
created user, and the user will receive a mail when his/her account is created.
9 Click Apply to save the configuration, or click Cancel to cancel the setup.