
User`s guide


Synology DiskStation User's Guide
Based on DSM 4.0
83 Chapter 9: Back Up Data
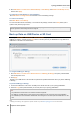
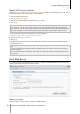
2 Go to Main Menu > Control Panel > Network Backup > Time Backup, tick Enable Time Backup service,
and then click Apply.
To install and run Time Backup on your DiskStation:
Go to Main Menu > Package Center to install and run the Time Backup package.
To launch Time Backup:
Go to Main Menu > Time Backup.
For more information about Time Backup, run and launch the package, and then click its Help button (with a
question mark) at the top-right corner.
Note: For more information about installing packages for Synology DiskStation Manager, see "Chapter 11: Discover
Various Applications with Package Center" on Page 92.
Back up Data on USB Device or SD Card
You can go to Main Menu > Control Panel > External Devices to specify a shared folder for used with
USBCopy or SDCopy, and then use the Copy button on the front panel of your DiskStation to copy data from a
USB device or SD card to the shared folder.
1
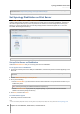
To configure USBCopy or SDCopy:
1 Go to Main Menu > Control Panel > External Devices > USBCopy or SDCopy and specify a shared folder
from the drop-down menu.
2 Click Apply.
All data on your USB device or SD card will be copied to the specified shared folder when you perform USBCopy
or SDCopy.
To perform USBCopy or SDCopy:
1 Connect the USB device or SD card to the USB port or the SD card slot of your Synology DiskStation.
2 Press the Copy button (with the letter C) on the front panel of your Synology DiskStation.
Note:
Only USB devices or SD cards in FAT or NTFS format are supported.
For USBCopy, the USB device must be plugged into the USB port on the front panel of Synology DiskStation.
The available space of the destination shared folder must be larger than the used space of the USB device or SD
card.
---------
1
USBCopy and SDCopy are supported on specific models only. Visit www.synology.com for more information.