Synology NAS User's Guide Based on DSM 6.
Table of Contents Chapter 1: Introduction Chapter 2: Get Started with Synology DiskStation Manager Install Synology NAS and DSM............................................................................................................................................. 7 Sign into DSM .......................................................................................................................................................................... 7 DiskStation Manager Desktop .........................
Hot Spare ............................................................................................................................................................................... 31 Manage External Disks ........................................................................................................................................................ 31 Chapter 6: Manage Storage Space with RAID Groups Manage RAID Groups ............................................................................
Back Up Data or iSCSI LUN on Synology NAS ................................................................................................................ 60 Back Up and Restore System Configurations................................................................................................................... 60 Sync Shared Folder Contents between Synology NAS................................................................................................... 60 Back Up Data on USB Device or SD Card .....
Chapter Chapter 1: Introduction Congratulations on your purchase of Synology NAS. Synology NAS is a multi-functional Network-Attached Storage server, serving as a file-sharing center within your Intranet.
Synology NAS User's Guide Based on DSM 6.0 Organize Videos with Video Station Video Station allows you to organize your collection of movies, TV shows, and home videos into a media platform on which you can watch and play video clips, live stream and record digital TV programs with a USB DTV dongle plugged into your Synology NAS, view and edit video metadata whose information is retrieved automatically from the Internet. You can also stream videos to your iPhone or iPad for playback.
Chapter Chapter 2: Get Started with Synology DiskStation Manager This chapter explains how to sign into Synology DiskStation Manager (DSM), customize your desktop, use the taskbar and widgets, and open applications and packages with the Main Menu. Install Synology NAS and DSM For more information about setting up Synology NAS and installing DSM, see the Quick Installation Guide for your Synology NAS model available at Synology’s Download Center.
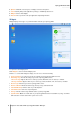
Synology NAS User's Guide Based on DSM 6.0 DiskStation Manager Desktop When you sign into DSM, you will see the desktop. From here, you can start getting things done, like manage settings, use packages, or view notifications. Desktop The desktop is where your application and package windows are displayed. You can also create desktop shortcuts to frequently used applications.
Synology NAS User's Guide Based on DSM 6.0 6 Options: Shutdown, restart, logout, or modify personal account options. 7 Search: Quickly find specific applications, packages, or DSM Help articles here. 8 Widgets: Show or hide widgets. 9 Pilot View: See a preview of all open application and package windows. Widgets Widgets display various types of system information related to your Synology NAS. To open/close the widget panel: Click Widgets to show or hide the widgets panel.
Synology NAS User's Guide Based on DSM 6.0 Open Applications and Packages with Main Menu The Main Menu (the button at the top-left of the desktop) is where you can find all the applications and packages you have installed from Package Center on your Synology NAS. To open applications or packages: Open Main Menu and click the icon of the application or package that you want to open. To reorder icons: Open Main Menu and drag an icon to any position you want.
Synology NAS User's Guide Based on DSM 6.0 Shutdown, Restart, Logout, or Manage Personal Options Click the Options menu (the person-shaped icon at the top right) to shutdown, restart, logout, or manage your user account settings. To manage personal options: Select Options from the drop-down menu to manage personal account options, like password, 2-step verification, desktop, etc.
Synology NAS User's Guide Based on DSM 6.0 Account Under Account, you can edit your account settings, enable 2-step verification, and view recent login activity of your DSM account. Limitations: The user description is case sensitive and can be 0 to 64 displayable Unicode characters. The password is case sensitive and should be 0 to 127 displayable characters, including letters, numbers, signs, and space. 2-Step Verification 2-step verification provides improved security for your DSM account.
Chapter Chapter 3: Modify System Settings After you have connected to Synology DiskStation Manager (DSM) and learned how to access its functions and customize its appearance, users belonging to the administrators group can begin to modify basic settings. This chapter explains the basics of modifying network settings, display languages, time, and energy saving features. For more detailed instructions, please see DSM Help.
Synology NAS User's Guide Based on DSM 6.0 Change Network Settings Go to Control Panel > Network to configure network settings and connect your Synology NAS device to the Internet. You can also manage traffic control rules to adjust the outgoing traffic allowed when clients access services on your Synology NAS. For more detailed instructions, please see DSM Help.
Synology NAS User's Guide Based on DSM 6.0 Join Wireless Network1 At Control Panel > Wireless, you can connect your Synology NAS device to a wireless network, or create a wireless hotspot to share its Internet connection with other devices wirelessly. Also, you can manage Bluetooth adapters and connect Bluetooth devices to your Synology NAS. For more detailed instructions, please see DSM Help. Modify Regional Options Go to Control Panel > Regional Options to configure the following regional options.
Synology NAS User's Guide Based on DSM 6.0 NTP Service Click the NTP Service tab to have your Synology NAS serve as a network time server to synchronize time between different network devices and the Synology NAS over network. Note: The NTP service is required for Surveillance Station and Synology High Availability. Therefore, if you have Surveillance Station installed and run on your Synology NAS, the service cannot be disabled while the package is running.
Synology NAS User's Guide Based on DSM 6.0 UPS Under the UPS tab, you can modify UPS-related settings. UPS (Uninterruptible Power Supply) is a backup power device that allows the Synology NAS to continue operating for a short time if power failure occurs. This function helps prevent data loss by giving the Synology NAS enough time to save data and unmount volumes before losing power and shutting off. Synology NAS supports connecting to local or SNMP UPS devices.
Chapter Chapter 4: Perform Advanced Management Tasks Synology DiskStation Manager comes with a variety of management functions, allowing you to check system information, monitor system resources, manage notification services, restore or upgrade DSM, access applications with independent login, index multimedia files for applications and more. This chapter explains how to comprehend advanced management functions to make sure your Synology NAS is providing the best performance.
Synology NAS User's Guide Based on DSM 6.0 General Under the General tab, you can see the basic information about your Synology NAS, including serial number, model name, amount of physical memory, DSM version, time information, thermal status, and external devices. Network Under the Network tab, you can view the status of network configuration and network interfaces. Storage Under the Storage tab, you can check the free or used space of your Synology NAS volumes and check the status of the hard disks.
Synology NAS User's Guide Based on DSM 6.0 Monitor System Resources Resource Monitor allows you to monitor the CPU usage, memory usage, disk utilization and network flow. You can choose to monitor in real time or view previous data. For more detailed instructions, please see DSM Help. Analyze System Usage Storage Analyzer allows you to quickly view overall usage trends of your Synology NAS, create tasks to analyze storage spaces, and generate detailed reports on volume usage.
Synology NAS User's Guide Based on DSM 6.0 Scan System Settings Security Advisor allows you to check and scan your DSM settings for any suspicious activities that may present security risks. For detailed instructions, please see DSM Help. Deploy High-Availability Solution High Availability Manager allows you to form two servers into a “high-availability cluster”, in which one assumes the role of the active server while the other acts as the stand-by server.
Synology NAS User's Guide Based on DSM 6.0 Automate Tasks Go to Control Panel > Task Scheduler to schedule and run services or scripts at pre-defined times. You can create and manage tasks to automatically run user-defined scripts, empty shared folder recycle bins, or start and stop certain services. For more detailed instructions, please see DSM Help.
Synology NAS User's Guide Based on DSM 6.0 Receive Event Notifications At Control Panel > Notification, you can set your Synology NAS to send notifications when specific events or errors occur, notifying you via email, SMS, web browsers (Safari/Chrome), or mobile devices. For more detailed instructions, please see DSM Help.
Synology NAS User's Guide Based on DSM 6.0 Reinstall Synology NAS If you want to reinstall your Synology NAS without losing its data, you can use the RESET button on the back panel. To reinstall Synology NAS: 1 Press and hold the RESET button for about 4 seconds until the Synology NAS emits a beep sound. 2 Within the next 10 seconds, press and hold RESET button for about 4 seconds until the Synology NAS emits a beep sound.
Chapter Chapter 5: Manage Storage Space Before taking advantage of the various features of your Synology NAS, you need to set up at least one storage space. This chapter explains how Storage Manager can help you manage storage spaces, such as volumes, Disk Groups, iSCSI Targets, or iSCSI LUNs, as well as view the status of hard drives. For more detailed instructions, please see DSM Help. Volumes and Disk Groups Volumes are the basic storage spaces on your Synology NAS.
Synology NAS User's Guide Based on DSM 6.0 Quick or Custom Volumes When creating a new volume, the following options are available: Method Features Creates an SHR (Synology Hybrid RAID) volume. Quick Automatically optimizes volume capacity and performance based on member hard disks. Recommended for saving time and simplifying storage management. Supports different RAID types. Supports creating single or multiple volumes on Disk Groups.
Synology NAS User's Guide Based on DSM 6.0 RAID Type HDD # Allowed Failed HDD # RAID 1 2-4 (HDD #) - 1 The system will write identical data to each hard drive at the same time, so data integrity is protected when at least one disk is normal. Smallest HDD size RAID 5 ≧3 1 This configuration includes a backup option. It uses parity mode to store redundant data on space equal to the size of one disk for later data recovery.
Synology NAS User's Guide Based on DSM 6.0 Hard Disk Requirements In order to change the RAID type of a volume or Disk Group, there must be a sufficient number of available hard disks installed in your Synology NAS. Please see below for the minimum number of hard disks required for each RAID type.
Synology NAS User's Guide Based on DSM 6.0 Expand a Volume or Disk Group by Adding Disks For SHR, JBOD, RAID 5, RAID 5+Spare, and RAID 6, the storage capacity of volumes and Disk Groups can be expanded by adding more hard disks if there are empty hard drive bays in your Synology NAS. For more detailed instructions, please see DSM Help. Please see the following table regarding the minimum size of new hard disks.
Synology NAS User's Guide Based on DSM 6.0 Manage iSCSI LUNs An iSCSI LUN (logical unit number) represents an individually addressable portion of an iSCSI Target. An iSCSI LUN can be mapped to multiple iSCSI Targets to perform storage operations such as read or write. Go to Storage Manager and click the iSCSI LUN tab to manage iSCSI LUNs on your Synology NAS. The maximum number of iSCSI LUNs varies depending on the model. Detailed product specifications can be found on our website: www.synology.com.
Synology NAS User's Guide Based on DSM 6.0 SSD Cache SSD cache1 drives can be installed and mounted in a RAID 0 (read-only) or RAID 1 (read-write) configuration to boost the read/write speed of a volume, including iSCSI LUN (Regular Files) on a volume, or iSCSI LUN (BlockLevel) on your Synology server. You can now create a read-only cache with one SSD, as well as mount, check SSD compatibility, and view related information by going to Storage Manager > SSD Cache.
Chapter Chapter 6: Manage Storage Space with RAID Groups1 Before using features or services on your Synology NAS, you need to create RAID Groups and manage storage spaces. This chapter explains how to create and manage RAID Groups, volumes, and iSCSI LUNs and iSCSI Targets, as well as access external disks and manage hard disks or cache. For more detailed information or instructions, please refer to DSM Help.
Synology NAS User's Guide Based on DSM 6.0 RAID Group Types Your Synology NAS supports the following RAID Groups types: RAID Group for Single Volume or iSCSI LUN (Block-Level) Allocates all available capacity to a single volume or iSCSI LUN (Block-Level). Provides better performance but less storage management flexibility. Allows creation of multiple iSCSI LUNs (Regular File) on volumes. Supports a maximum of one RAID Array. The maximum volume size that can be allocated is 200 TB.
Synology NAS User's Guide Based on DSM 6.0 Change RAID Types The RAID types of existing RAID Groups can be changed without losing existing data, allowing you to easily and economically manage storage capacity. To change the RAID type of a RAID Group, there must be available hard disks installed in the Synology NAS. The table below displays supported types of RAID change. For more detailed instructions regarding how to change RAID types, please refer to DSM Help.
Synology NAS User's Guide Based on DSM 6.0 Manage Volumes Volumes are basic storage spaces on which you can create shared folders, iSCSI LUNs (regular file), save data, or install packages. Before creating a volume on your Synology NAS, please create at least one RAID Group. Create Volumes To create a volume, please go to Storage Manager > Volume, and click Create. For more detailed instructions, please see DSM Help.
Synology NAS User's Guide Based on DSM 6.0 Manage iSCSI LUNs iSCSI is an Internet Protocol based storage networking standard for linking data storage facilities. iSCSI facilitates data transfer over local area networks (LANs), wide area networks (WANs), or the Internet. By mapping iSCSI Targets and iSCSI LUNs, client servers can access space on a storage server as if it were a local disk.
Synology NAS User's Guide Based on DSM 6.0 repair any RAID Group within your Synology NAS. Before assigning hot spare disks, please see the following requirements: The RAID type of the volume/Disk Group/iSCSI LUN must be one with data protection (i.e. RAID 1, RAID 5, RAID 6, RAID 10). The hot spare disk size must be equal to or larger than the size of the smallest disk in the volume/Disk Group/iSCSI LUN.
Chapter Chapter 7: Access your Synology NAS from the Internet You can connect to your Synology NAS over the Internet, allowing its services to be accessible from anywhere and anytime. This chapter explains the basics regarding using the Synology EZ-Internet wizard, advanced port forwarding functions, and DDNS hostname registration to connect your Synology NAS to the Internet. For more detailed instructions, please see DSM Help.
Synology NAS User's Guide Based on DSM 6.0 Set Up Port Forwarding Rules for Router If your Synology NAS is within the local network, you can set up port forwarding rules for the router to allow your Synology NAS to be accessible over the Internet. Note: Before you start, make sure you have manually assigned a static IP address for your Synology NAS. See "Network Interface" for more information. Go to Control Panel > External Access > Router Configuration to set up your router and port forwarding rules.
Synology NAS User's Guide Based on DSM 6.0 Access DSM Services via QuickConnect QuickConnect is a solution that helps client applications (such as DS file, Cloud Station utilities, DS audio, etc.) connect to your Synology NAS via the Internet without setting up port forwarding rules. Go to Control Panel > QuickConnect to manage the QuickConnect service. For more details regarding QuickConnect, please see DSM Help.
Synology NAS User's Guide Based on DSM 6.0 Set Up VPN Connection VPN Server is an add-on package that enables your Synology NAS to become a PPTP, OpenVPN, or L2TP/IPSec VPN (virtual private network) server, allowing DSM local users over the Internet to access resources shared within local area network of the Synology NAS. Set up your Synology NAS as a VPN Server To install VPN Server on your Synology NAS, go to Package Center.
Chapter Chapter 8: Enhance Internet Security After your Synology NAS is available on the Internet, you will need to safeguard it against any attacks from Internet hackers. This chapter explains how to set up firewall, enable DoS protection and enable auto block. For more detailed instructions, please see DSM Help. Prevent Unauthorized Connection with Firewall The built-in firewall can prevent unauthorized logins, and control which services can be accessed.
Synology NAS User's Guide Based on DSM 6.0 Automatically Block Suspicious Login Attempts Auto block allows you to prevent unauthorized login. After enabling the service, an IP address will be blocked if it has too many failed login attempts. Go to Control Panel > Security > Auto Block to create and manage your block list and allow list.
Chapter Chapter 9: Set Up File Sharing Synology NAS can become the file sharing center within the local network or over the Internet, allowing users to access its files anytime and anywhere. For more detailed instructions, please see DSM Help. This chapter explains how to enable the support for file sharing protocols for all platforms, create and manage users and groups, set up shared folders, and allow or deny access to the shared folders, applications or subfolders from specific users or groups.
Synology NAS User's Guide Based on DSM 6.0 Join Synology NAS to Domain/LDAP Go to Control Panel > Domain/LDAP to join your Synology NAS to a directory service as a Windows domain or LDAP client. When the Synology NAS is joined to a directory service, you can manage domain/LDAP users' access privileges to shared folders and DSM applications and enable their home service.
Synology NAS User's Guide Based on DSM 6.0 Host LDAP Service with Directory Server Directory Server is an add-on package based on LDAP version 3 (RFC2251) that allows your Synology NAS to become an account administration center to centralize the account management of all connecting clients, and provides authentication service for them. In addition, with Google Apps Single Sign-On support, Directory Server can become an identity provider for your Google Apps domain.
Synology NAS User's Guide Based on DSM 6.0 Manage Users and Groups Go to Control Panel > User or Group to create users or groups, and allow or deny their access to different shared folders. Create Users Click Create to create a user account. The user can log in to edit his/her account info after the user account has been established. You can also choose to set an account expiration date or disallow the user to change account password.
Synology NAS User's Guide Based on DSM 6.0 Create User's Home Folder Each DSM user (except for guest) can have his/her own folder called the home folder, which is accessible only by the user and the system administrator. Click User Home to enable user home service. For users belonging to the administrators group, DSM users’ home folders are here: homes/[Username] Note: When the user home service is disabled, the homes folder will be kept but accessible by users belonging to the administrators group only.
Synology NAS User's Guide Based on DSM 6.0 Set Up Shared Folders Go to Control Panel > Shared Folder to manage the shared folders, which are the root folders of Synology NAS. You can store data in the shared folders and share them with users or groups with access privileges.
Synology NAS User's Guide Based on DSM 6.0 Built-in Shared Folders Created by the System System built-in shared folders are created when the services or applications requiring the folders are enabled. Name public web Description The public folder will be created automatically after the first time you set up Synology NAS.1 The web folder contains contents of your website. It will be created automatically when Web Station is enabled.
Synology NAS User's Guide Based on DSM 6.0 Allow Users or Groups to Access Shared Folders Go to Control Panel > Shared Folder, click Edit and go to Permissions to allow or deny users' or groups' access to a shared folder. Allow Linux Clients to Access Shared Folders Go to Control Panel > Shared Folder, click Edit and go to NFS Permissions to assign NFS permissions to any shared folder, allowing Linux clients to access it.
Chapter Chapter 10: Access Files from Anywhere 10 When you have set up users or groups with proper access privileges to the shared folders, they can share their files with your Synology NAS from anywhere. This chapter explains the ways to access the Synology NAS shared folders within the local network or over the Internet. For more detailed instructions, please see DSM Help.
Synology NAS User's Guide Based on DSM 6.0 Access Shared Folders from Mac Choose Go > Connect to Server from the menu bar. Type the IP address or name (appended with .local) of the Synology NAS preceded by smb:// or afp:// in the Server Address field and click Connect. (e.g. smb://EricaWang.local or afp://192.168.0.2) Note: For better performance, it is recommended that you connect to the shared folders via SMB. Select the shared folder you want to access.
Synology NAS User's Guide Based on DSM 6.0 Access Files via FTP If your Synology NAS is accessible over the Internet, you can use a FTP application to access the shared folders. Note: For more information about making Synology NAS accessible over the Internet, see "Chapter 7: Access your Synology NAS from the Internet". Go to Control Panel > File Services > FTP to enable FTP service, allowing users to upload or download Synology NAS data via FTP.
Synology NAS User's Guide Based on DSM 6.0 Access Files via WebDAV By enabling WebDAV or CalDAV, you can remotely manage and edit files or calendars stored on the Synology NAS. Go to Package Center to install the WebDAV package and to enable its services. Sync Files via Cloud Station Server Cloud Station Server is a file sharing service that allows you to synchronize files between a centralized Synology NAS and multiple client computers, mobile and Synology NAS devices.
Synology NAS User's Guide Based on DSM 6.0 Access Files via File Station File Station is DSM's file management tool, allowing DSM users over the Internet to access the Synology NAS folders with their web browsers, or transfer files to another WebDAV/FTP server.1 By launching two or more File Stations, you can manage all your Synology NAS data by dragging and dropping them between different File Stations.
Synology NAS User's Guide Based on DSM 6.0 Search for Files or Folders You can type keywords in the Filter field at the top-right corner of File Station to filter through files or folders in the current folder. Additionally, you can also perform advanced search in the Advanced Search panel for more refined search results. Note: For quicker search result, it is recommended that you index shared folder contents. See "Index Shared Folder Contents" for more information.
Synology NAS User's Guide Based on DSM 6.0 Send Files as Email Attachments You can directly send and share files as email attachments. Simply right-click selected files and then select Send as email attachments. Mount Remote Folders or Virtual Drives File Station allows you to mount remote folders to access contents shared by network computers or other Synology NAS, or virtual drives to access contents within disc images.
Chapter Chapter 11: Back Up Data 11 Synology offers comprehensive backup solutions for your computer and Synology NAS, allowing you to back up data on your computer to Synology NAS. If you are a user belonging to the administrators group, you can also back up the Synology NAS data with local or network backup, or sync shared folder contents between Synology NAS. The creative Copy button simplifies external storage devices backup with One-touch design.
Synology NAS User's Guide Based on DSM 6.0 Back Up Data or iSCSI LUN on Synology NAS Other than backing up computer data to Synology NAS, users belonging to the administrators group can perform backup tasks, restore files, and sync shared folders from one Synology NAS device to another with Hyper Backup. For more detailed instructions, please see DSM Help.
Chapter Chapter 12: Host Websites and Print Server 12 Synology NAS is designed for small and medium businesses (SMB), providing the ability to set up web and print servers on a single Synology NAS without spending extra money. This chapter provides basic information regarding these features. For more detailed instructions, please see DSM Help.
Synology NAS User's Guide Based on DSM 6.0 Modify HTTP Service Options In addition to the default port number 80, you can add another port for the use of Photo Station and Web Station. For more detailed instructions, please see DSM Help. Manage PHP Settings After you have enabled Web Station, you can click the PHP Settings tab to configure PHP related settings. For more detailed instructions, please see DSM Help.
Chapter Chapter 13: Discover Various Applications with Package Center 13 Synology has integrated third party or Synology-designed applications into packages that can be installed on Synology NAS and managed with Package Center.
Synology NAS User's Guide Based on DSM 6.0 Cloud Station Server Cloud Station Server is a file sharing service that allows you to synchronize files between a centralized Synology NAS and multiple client computers, mobile and Synology NAS devices. Cloud Station ShareSync Cloud Station ShareSync is a file sharing service that allows you to synchronize files between a centralized Synology NAS device and multiple client Synology NAS devices, computer and mobiles.
Synology NAS User's Guide Based on DSM 6.0 Install or Buy Packages Click Install, Try or Buy, and follow the onscreen instructions to install packages. You can also click Manual Install and follow the wizard to install packages by uploading .spk files (available at Synology's Download Center or third party websites).
Chapter Chapter 14: Communicate with Mobile Devices 14 As Internet access grows popular on mobile devices, Synology provides you with several creative alternatives to communicate with your Synology NAS using iOS/Android, Windows Phone, or other mobile devices. Manage DSM Settings with DSM mobile DSM mobile allows DSM users belonging to the administrators group to manage DSM settings and check DSM information with the web browser of an iOS (iPhone, iPad or iPod touch), Android device, or Windows Phone.
Synology NAS User's Guide Based on DSM 6.0 DS finder DS finder allows you to monitor or email the status of your Synology NAS, and request it to perform wake on LAN (WOL), restart, shut down, or play beep sounds (to help you quickly find the its location) with an iOS/Android device or Windows Phone. DS note DS note is the mobile counterpart to Synology’s Note Station web application, which allows you to easily sync your notes between your iOS/Android device and Synology NAS.
Troubleshooting For any questions about managing your DSM, go to DSM Help or click the Help button (with a question mark) at the top-right corner of every window. For any questions other than that, please visit the Synology Knowledge Base website at help.synology.com for further assistance.
SYNOLOGY, INC. END USER LICENSE AGREEMENT IMPORTANT–READ CAREFULLY: THIS END USER LICENSE AGREEMENT ("EULA") IS A LEGAL AGREEMENT BETWEEN YOU (EITHER AN INDIVIDUAL OR A LEGAL ENTITY) AND SYNOLOGY, INC. ("SYNOLOGY") FOR THE SYNOLOGY SOFTWARE INSTALLED ONTO THE SYNOLOGY PRODUCT PUCHASED BY YOU (THE “PRODUCT”), OR LEGALLY DOWNLOADED FROM WWW.SYNOLOGY.COM, OR ANY OTHER CHANNEL PROVIDED BY SYNOLOGY ( "SOFTWARE").
Section 14. Export Restrictions. You acknowledge that the Software is subject to U.S. export restrictions. You agree to comply with all applicable laws and regulations that apply to the Software, including without limitation the U.S. Export Administration Regulations. Section 18. Dispute Resolution.
SYNOLOGY, INC. LIMITED PRODUCT WARRANTY THIS LIMITED WARRANTY ("WARRANTY") APPLIES TO THE PRODUCTS (AS DEFINED BELOW) OF SYNOLOGY, INC. AND ITS AFFILIATES, INCLUDING SYNOLOGY AMERICA CORP, (COLLECTIVELY, "SYNOLOGY"). YOU ACCEPT AND AGREE TO BE BOUND BY THE TERMS OF THIS WARRANTY BY OPENING THE PACKAGE CONTAINING AND/OR USING THE PRODUCT. IF YOU DO NOT AGREE TO THE TERMS OF THIS WARRANTY, DO NOT USE THE PRODUCT.
the expiration of the applicable Warranty Period, support for Products may be available from Synology upon written request. 2.6 Exclusions.
single arbitrator, and will be limited solely to the dispute between Customer and Synology. The arbitration, or any portion of it, will not be consolidated with any other arbitration and will not be conducted on a class-wide or class action basis. The arbitration shall be held in King County, Washington, U.S.A. by submission of documents, by telephone, online or in person as determined by the arbitrator at the request of the parties.